Create a Policy for iOS—Exchange ActiveSync Account
This policy governs all settings for iOS device. These settings apply for both ABM and non-ABM iOS devices.
•The ABM-only settings are denoted with a ABM icon ![]() . These settings will only apply to iOS devices enrolled in the Apple ABM portal. We recommend that you do not customize these ABM-only settings when creating a policy for non-ABM iOS devices.
. These settings will only apply to iOS devices enrolled in the Apple ABM portal. We recommend that you do not customize these ABM-only settings when creating a policy for non-ABM iOS devices.
•Some settings can only be applied to an iOS device with a certain version of iOS. These settings are marked by an icon representing the iOS version, for example iOS version 11.0 and later ![]() .
.
•If both of the icons (ABM icon and iOS version icon) are present next to a specific setting, the device must meet both requirements or management of the setting will fail.
See the sample scenario below which explains how to use the iOS MDM policy when you want to set up a Microsoft Exchange Mail account:
You can use this policy to configure a Microsoft Exchange Mail account, Contacts and Calendar on user's iOS mobile devices. The advantage of using such a policy is that you only need to create one policy which you can then apply to many iOS mobile devices without the need to configure each separately. This is possible using Active Directory user attributes. You need to specify a variable, for example ${exchange_login/exchange} and this will be replaced with a value from the AD for a specific user.
If you do not use Microsoft Exchange or Exchange ActiveSync, you can manually configure each service (Mail Accounts, Contacts Accounts, LDAP Accounts, Calendar Accounts and Subscribed Calendar Accounts).
The following is an example of how to create and apply a new policy to automatically set up Mail, Contacts and Calendar for each user on iOS mobile device using Exchange ActiveSync (EAS) protocol to synchronize these services.
Before you begin setting this policy up, ensure you have already performed the steps described under mobile device enrollment. |
Basic
Type a Name for this policy. The Description field is optional.
Settings
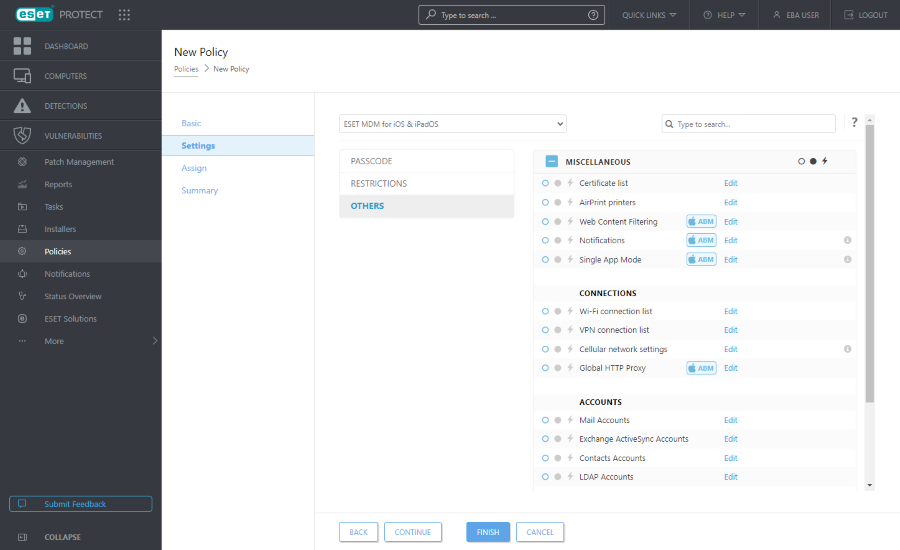
Select ESET MDM for iOS & iPadOS from the drop-down list, click Others to expand categories and then click Edit next to Exchange ActiveSync Accounts.
Click Add and specify the details of your Exchange ActiveSync account. You can use variables for certain fields (select from the drop-down list), such as User or Email Address. These will be replaced with actual values from Computer Users when a policy is applied.
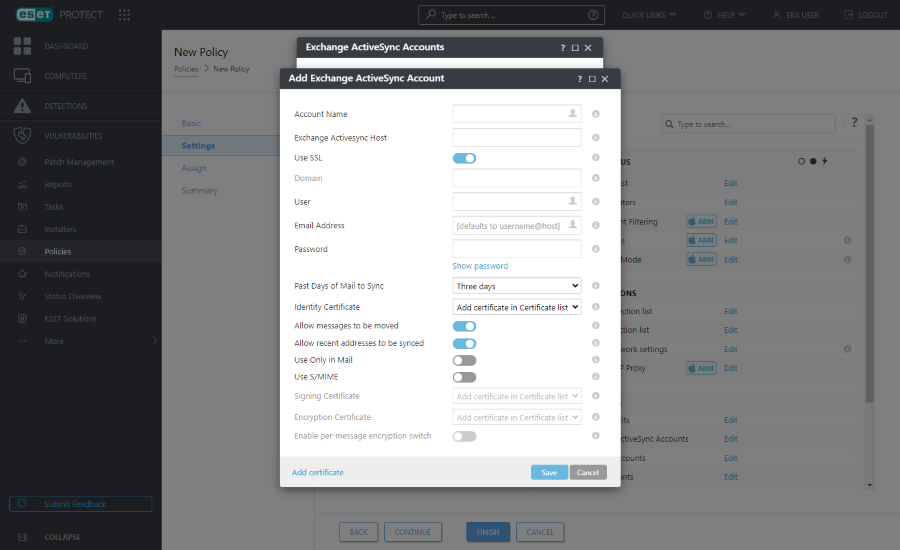
•Account name - Type the name of the Exchange account.
•Exchange ActiveSync Host - Specify the Exchange Server hostname or its IP address.
•Use SSL - This option is enabled by default. It specifies whether the Exchange Server uses Secure Sockets Layer (SSL) for authentication.
•Domain - This field is optional. You can type the domain this account belongs to.
•User - Exchange login name. Select the appropriate variable from the drop-down list to use attribute from your Active Directory for each user.
•Email Address - Select the appropriate variable from the drop-down list to use an attribute from your Active Directory for each user.
•Password - Optional. We recommend that you leave this field empty. If it is left empty users will be prompted to create their own passwords.
•Past Days of Mail to Sync - Select the number of past days of mail to sync from the drop-down list.
•Identity certificate - Credentials for connection to ActiveSync.
•Allow messages to be moved - If enabled, messages can be moved from one account to another.
•Allow recent addresses to be synced - If this option is enabled, the user is allowed to sync recently used addresses across devices.
•Use Only in Mail - Enable this option if you want to allow only the Mail app to send outgoing email messages from this account.
•Use S/MIME - Enable this option to use S/MIME encryption for outgoing email messages.
•Signing Certificate - Credentials for signing MIME data.
•Encryption Certificate - Credentials for encryption MIME data.
•Enable per-message encryption toggle - Allow the user to choose whether to encrypt each message.
If you do not specify a value and leave the field blank, mobile device users will be prompted to type this value. For example a Password. |
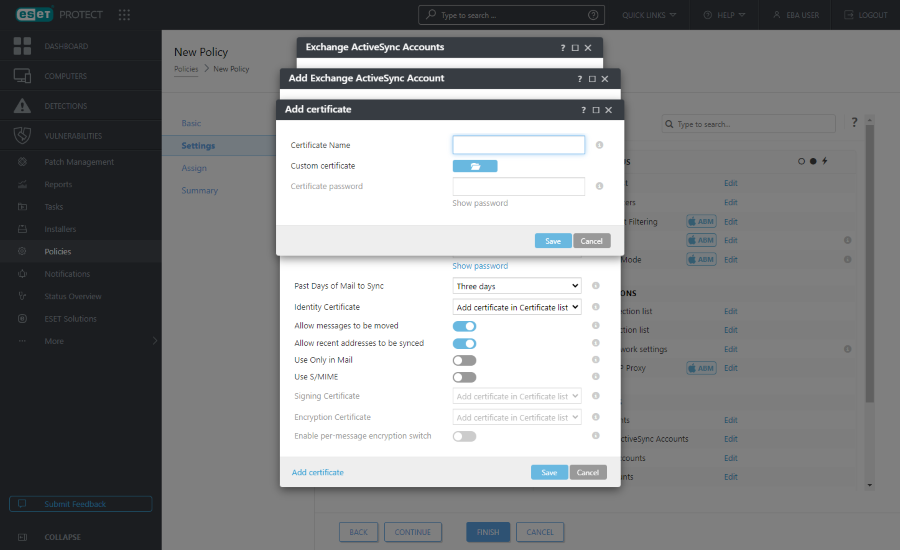
•Add certificate - You can add specific Exchange certificates (User Identity, Digital Signature or Encryption Certificate) if required.
Using the steps above, you can add multiple Exchange ActiveSync Accounts, if desired. This way, there will be more accounts configured on one mobile device. You can also edit existing accounts if necessary. |
Assign
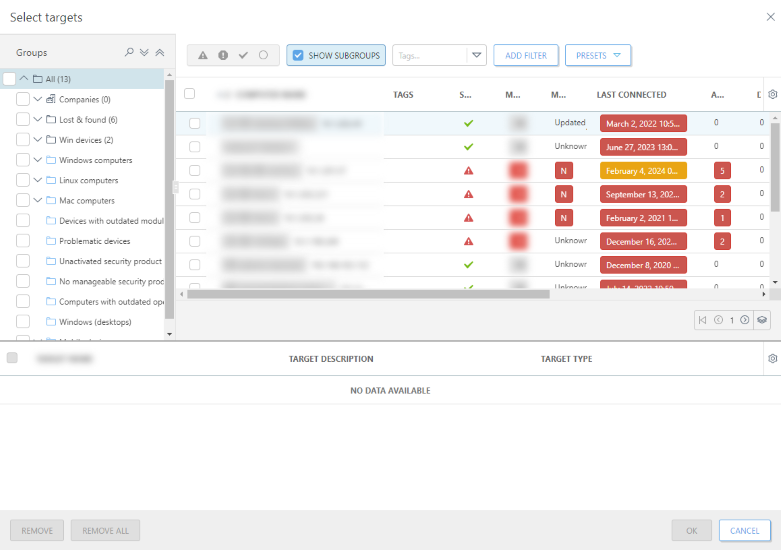
Specify the clients (individual devices or whole groups) that are the recipients of this policy.
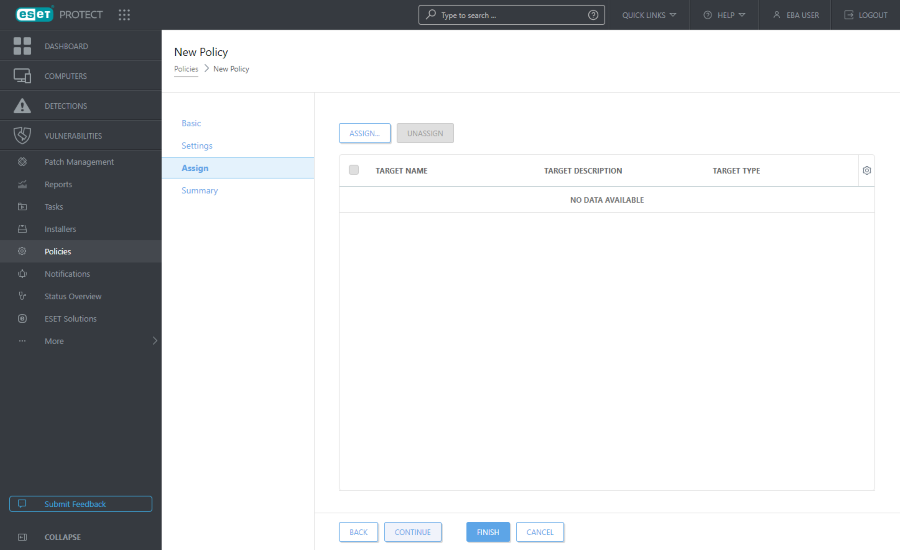
Click Assign to display all Static and Dynamic Groups and their members. Select your desired computers or groups and click OK.
We recommend that you test the policy by assigning it to one computer before assigning it to more targets. |
To assign all computers in a group, assign the group instead of individual computers to prevent a Web Console slowdown. The Web Console displays a warning if you select a high number of computers. |
Summary
Review the settings for this policy and click Finish. The policy gets applied on the targets after their next connection to ESET PROTECT.