User Management - Provisioning
All user management takes place in the Users section of the Web Console.
Provisioning is the process of providing users with the ability to authenticate with a second factor when accessing devices/services protected by ESET Secure Authentication On-Prem.
Since ESA version 3.0, phone number is not essential to use the ESA mobile application unless SMS provisioning is used. The phone number for each user is typed either manually when creating/editing the user in the Web Console, or imported automatically along with the user information if synchronizing with LDAP, or typed by the user if self-enrollment is enabled.
Each user belongs to a realm (domain, computer name, etc.). Realms and users are created automatically when a user logs on to a machine with an ESA component installed (except RADIUS), logs in to a service protected by ESA, or if ESA is synchronized with LDAP. You can also create custom realms manually.
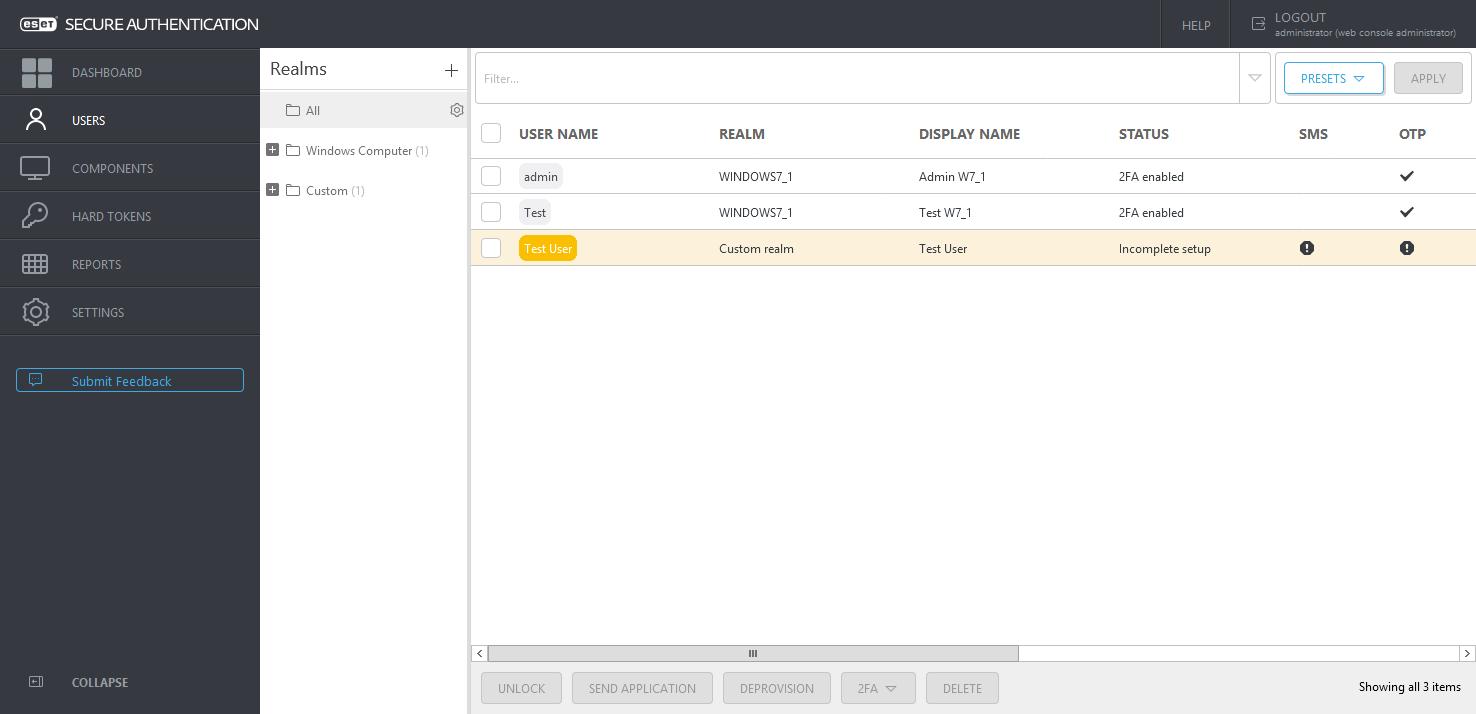
The image below shows a custom realm and an automatic realm. The custom realm was created manually (Custom Realm), and Test User user was added to it. The automatic realm and its two users were created automatically (admin, Test). The realm name was derived from the computer where the Windows Login protection is installed, and the two users logged on. The status column indicates if the user has 2FA enabled (and used 2FA at least once) or 2FA setup is pending. The Display Name column shows the value of the Display Name field. It can either be defined manually per user or automatically synchronized from Active Directory (or LDAP) based on the configuration at Settings > Default Fields > select Default display name field as the Field type.

Create a custom realm manually
1.Click the ![]() icon next to Realms and click Create custom Realm.
icon next to Realms and click Create custom Realm.
2.Type the desired string for both Realm ID and Realm Name, select Category,and click Save.
To create a realm corresponding to an Active Directory domain manually, you must find the GUID.
Obtain domain GUID from ADUC
1.Open Active Directory Users and Computers.
2.Right-click the domain name, select Properties.
3.Click the Attribute Editor tab, look up ObjectGUID.
4.Use the ObjectGUID value in the Realm ID field when creating the realm manually.
Obtain domain GUID via PowerShell
1.Open Windows PowerShell.
2.Run one of the following commands:
Get-ADDomain | select -Property ObjectGUID |
or
wmic ntdomain list full |
To manually create a realm that corresponds to a local computer (non-domain users), you need the SID.
2.Run PsGetsid.EXE or PsGetsid64.EXE (depending on your Windows bit version) from Windows Command Prompt or Windows PowerShell.
Add user to a realm manually
1.Select the realm where you want to add the user.
2.Click Add user.
3.Type the name, phone number, and optionally email address of the user.
4.Click Create user.
|
Phone number format Mobile numbers must be in the international format "+421987654321", where +421 is the country code. For example, a Slovak phone number 0987654321 would be typed as +421987654321, replacing the leading zero "0" with the country code "+421". A US phone number "201-321-4567" would be typed as "+12013214567", where "+1" is the country code. |
You can also import users to a custom realm from a file.
Send the mobile application to users
The default provisioning method is ESET servers, meaning SMS delivery, which requires a valid phone to send the installation link.
1.Select the check box next to users who will receive the mobile application.
2.Click Send application.
3.Close the confirmation window.
|
The validity of the provisioning link The time validity of the provisioning link is 24 hours or until first use. |
Enabling 2FA per user
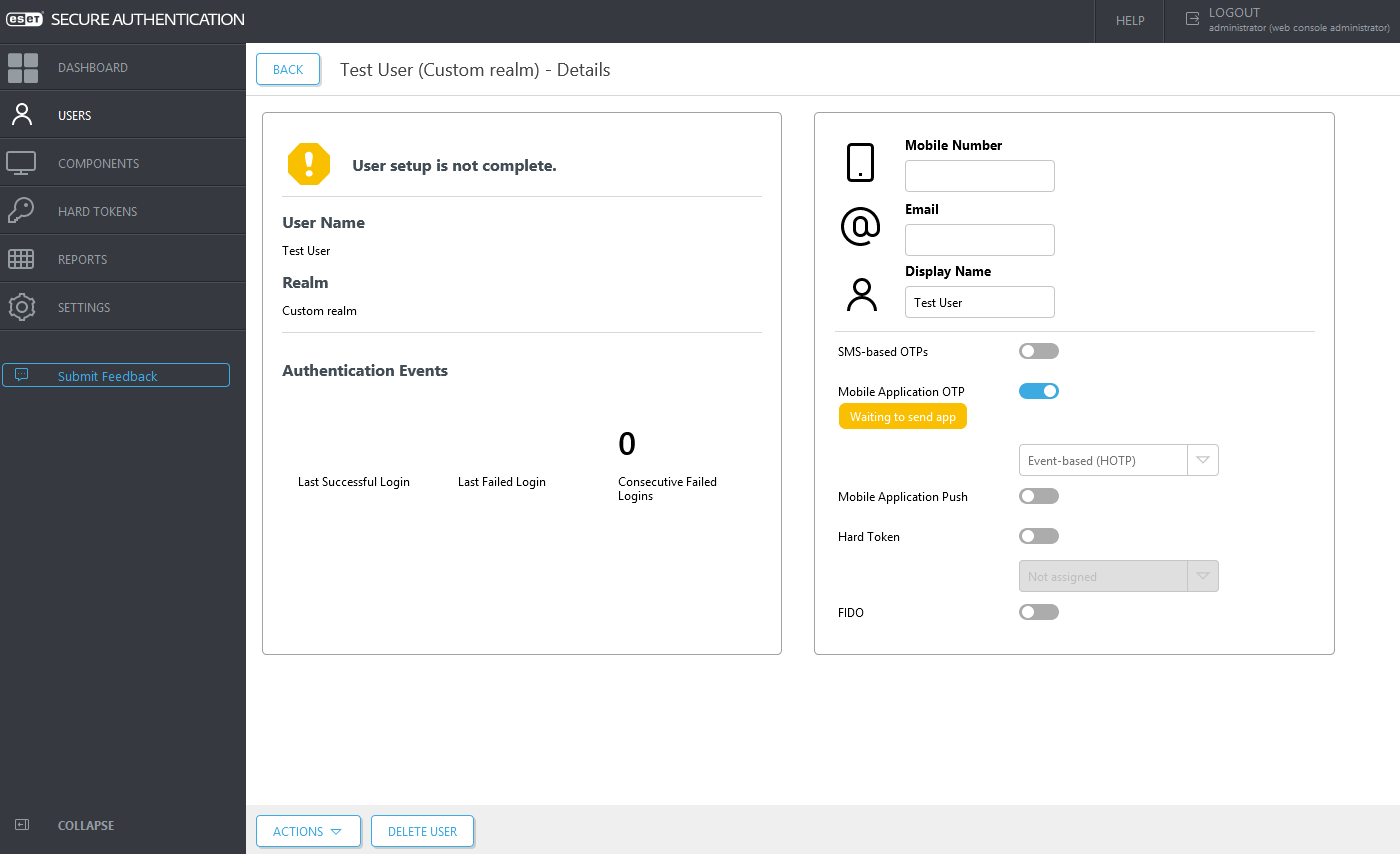
Click a user and select the desired authentication options. OTP and Push authentication are the most convenient ones. If Hard Token OTPs have been enabled and imported, then Hard Tokens will be available in the drop-down menu under the Hard Token toggle. Click Save to save the changes.

If an authentication method requires any information, a notification is displayed. You can still save the user's profile, and if self-enrollment is enabled, the user can fill in the missing information after they sign up for 2FA.
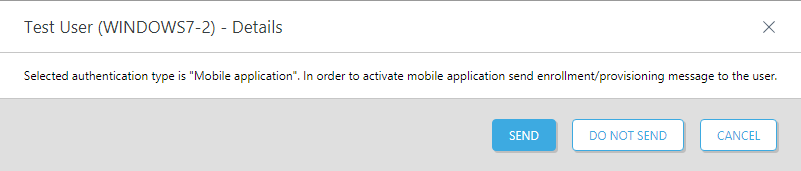
If Mobile Application OTP or Mobile Application Push has been turned on, a notification will display to remind you to send the enrollment/provisioning message to the user to activate the mobile application.

If you click Do not send or Cancel, you can use the Actions button to send the enrollment/provisioning message later. If you click Send, an information window will show you the unique application URL sent to the user.
Enabling 2FA for multiple users at one time
1.Select the check box next to the users you are enabling 2FA for.
2.Click 2FA, select Enable and select the desired authentication option.
3.Close the confirmation window.
For instructions on installing and using the mobile application, click the desired mobile OS to be redirected to the corresponding article:
•iOS