The ESET PROTECT All-in-one installer is available for Windows operating systems only. The All-in-one installer enables the installation of all ESET PROTECT components via the ESET PROTECT On-Prem installation Wizard.
Are you a Linux user?
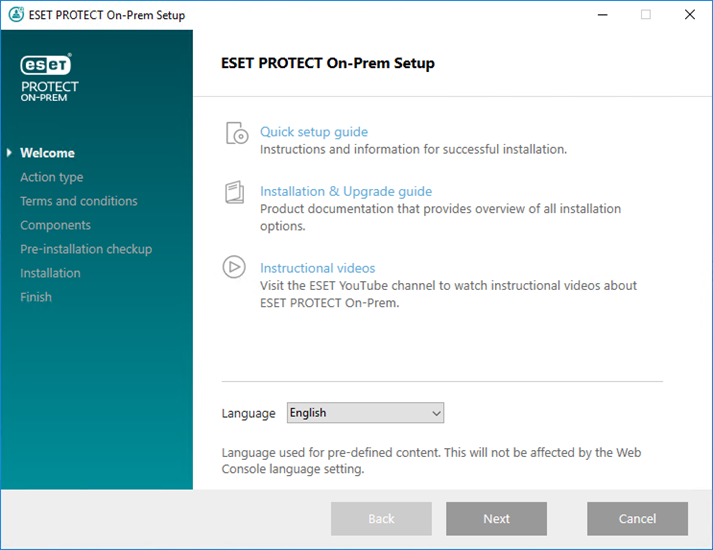
1.Open the installation package. On the Welcome screen, use the Language drop-down menu to set the language. Click Next.
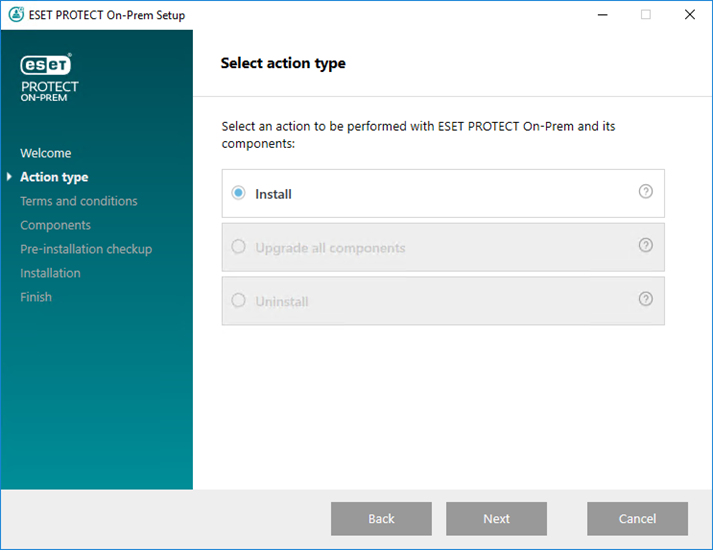
2.Select Install and click Next.
3.Select the Participate in product improvement program check box to send anonymous telemetry data and crash report to ESET (OS version and type, ESET product version and other product-specific information). After accepting the EULA, click Next.
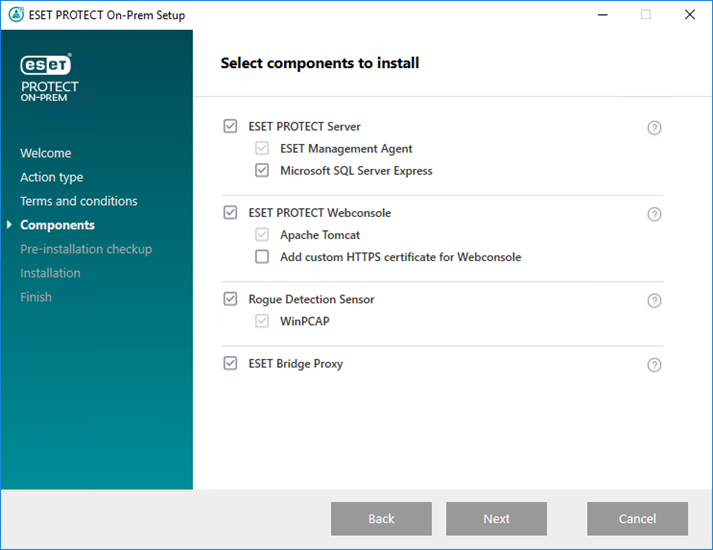
4.Select the components to install and click Next.
 Microsoft SQL Server Express
•The ESET PROTECT On-Prem 11.1 All-in-one installer installs Microsoft SQL Server Express 2019 by default.
oIf you use an earlier Windows edition (Server 2012 or SBS 2011), Microsoft SQL Server Express 2014 will be installed by default.
oThe installer generates a random password for database authentication and stores it in %PROGRAMDATA%\ESET\RemoteAdministrator\Server\EraServerApplicationData\Configuration\startupconfiguration.ini.
|

|
Microsoft SQL Server Express (the free edition) has a 10 GB size limit for each relational database. We recommend using other Microsoft SQL Server editions than Microsoft SQL Server Express:
•In enterprise environments or large networks.
•If you want to use ESET PROTECT On-Prem with ESET Inspect On-Prem. |
•If you already have a supported version of Microsoft SQL Server or MySQL installed, or you plan to connect to a different SQL Server, deselect the check box next to Microsoft SQL Server Express.
•Do not install SQL Server on a Domain Controller. Install ESET PROTECT On-Prem on a different server or deselect the SQL Server Express component during installation. Use your existing SQL or MySQL Server to run the ESET PROTECT database. |
Add custom HTTPS certificate for Webconsole
•Select this option if you want to use a custom HTTPS certificate for the ESET PROTECT Web Console.
•If you do not select this option, the installer automatically generates a new Tomcat keystore (a self-signed HTTPS certificate). |
ESET Bridge Proxy
|

|
The ESET Bridge Proxy option is intended only for smaller or centralized networks without roaming clients. If you select this option, the installer configures clients to tunnel communication with ESET via a proxy installed on the same machine as the ESET PROTECT Server. This connection will not work if there is no direct network visibility between clients and the ESET PROTECT Server.
|
•HTTP Proxy can considerably reduce bandwidth usage on data downloaded from the internet and improve download speeds for product updates. We recommend selecting the check box next to ESET Bridge Proxy if you manage more than 37 computers from ESET PROTECT On-Prem. You can also choose to install ESET Bridge later.
•For more information, see ESET Bridge (HTTP Proxy) and The differences between ESET Bridge (HTTP Proxy), Mirror Tool, and direct connectivity.
|

|
The All-in-one installer creates default HTTP Proxy Usage policies for ESET Management Agent and ESET security products applied to the All Static Group. The policies automatically configure ESET Management Agents and ESET security products on managed computers to use ESET Bridge as a Proxy for caching update packages. The HTTPS traffic caching is enabled by default:
•The ESET Bridge policy contains the HTTPS certificate and the Cache HTTPS Traffic toggle is enabled.
•The HTTP Proxy usage policy for ESET Endpoint for Windows contains the Certificate Authority for the HTTPS traffic caching. |
HTTP Proxy host is the ESET PROTECT Server's local IP address and port 3128. Authentication is disabled. You can copy these settings to another policy if you need to set up additional products.
|
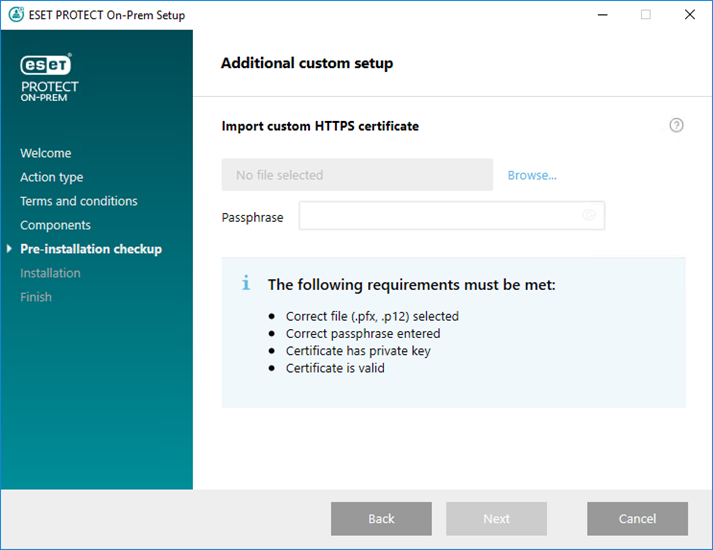
5.If you have selected Add custom HTTPS certificate for Webconsole, click Browse. Select a valid Certificate (.pfx or .p12 file) and type its Passphrase. Leave the field blank if there is no passphrase. The installer will install the certificate for Web Console access on your Tomcat server. Click Next to continue.
6.If errors appear during the prerequisites check, fix them. Ensure your system meets all prerequisites.
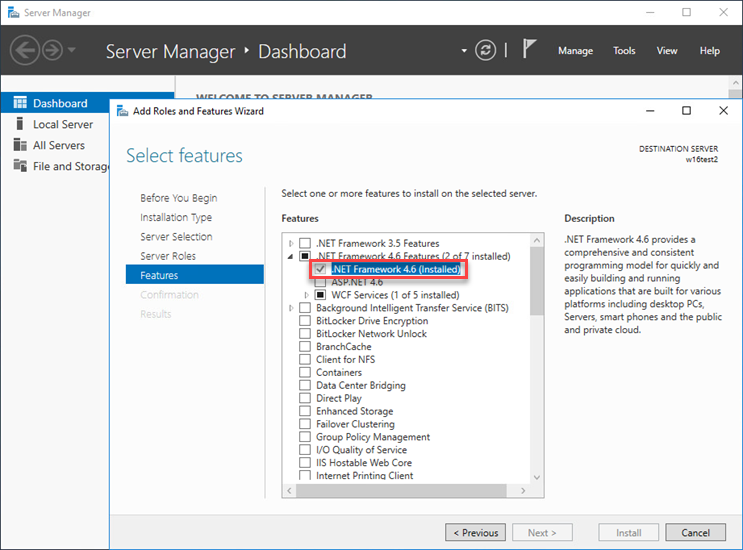
.NET v4 is not installed
Microsoft SQL Server Express installation requires Microsoft .NET Framework 4. You can install it using the Add Roles and Features Wizard:
|
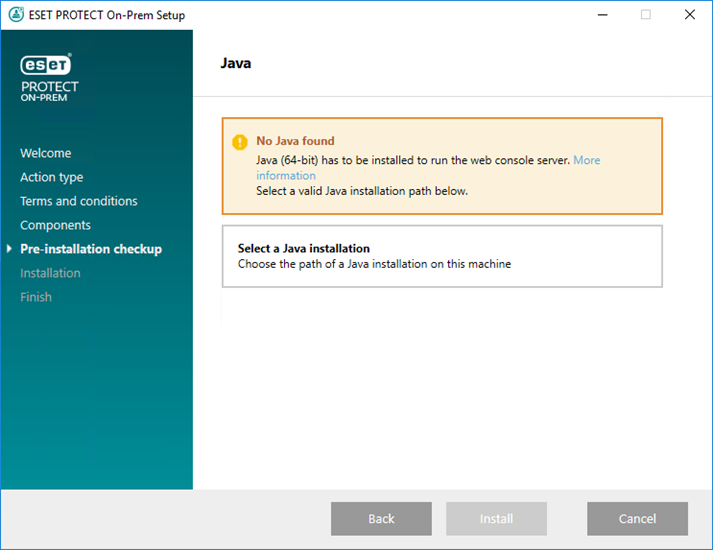
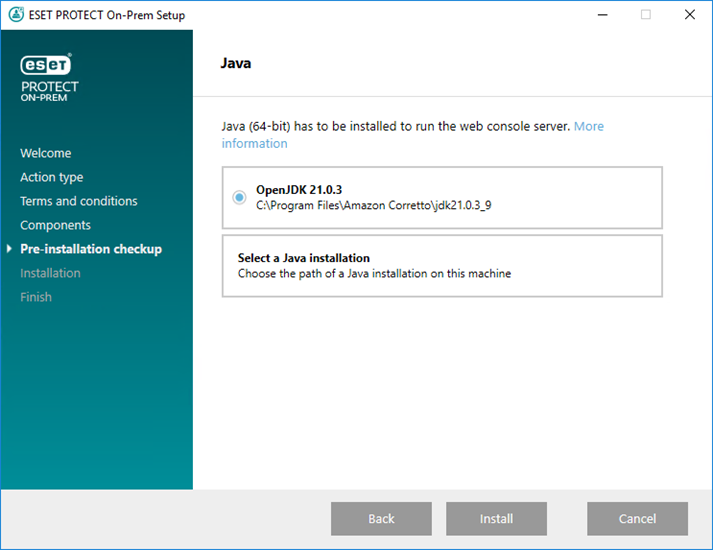
No Java found / Java (64-bit) detected
|
If your system has multiple Java versions installed, uninstall earlier Java versions and keep only the latest supported Java version.
|
|
Starting January 2019, Oracle JAVA SE 8 public updates for business, commercial or production use require a commercial license. If you do not purchase a JAVA SE subscription, you can transition to a no-cost alternative. See the supported versions of JDK.
|
a)To select the already installed Java, click Select a Java installation, select the folder where Java is installed (with a subfolder bin, for example, C:\Program Files\Amazon Corretto\jdk1.8.0_212) and click OK. The installer prompts you if you have selected an invalid path.
b)Click Install to continue or change to change the Java installation path. |
Setup is not in valid state/Microsoft SQL Server Express
The installer displays this message for several reasons:
•The installer is corrupted. For example, some installer files are missing. Download and run the All-in-one installer again.
•The path to the All-in-one installer contains special characters—for example, letters with diacritics. Run the ESET PROTECT All-in-one installer from a path with no special characters. |
There is only 32 MB free on a system disk
The installer displays this message if your system does not have enough disk space for ESET PROTECT On-Prem installation.
You need at least 4,400 MB of free disk space to install ESET PROTECT On-Prem.
|
ESET Remote Administrator 5.x or older is installed on the machine
You can upgrade to ESET PROTECT On-Prem 11.1 from ESET PROTECT On-Prem 9.0 and later. A direct upgrade from the End of Life versions 7.2–8.x has not been tested and is not supported.
If you have ERA 5.x/6.x or ESMC 7.0/7.1, the direct upgrade to ESET PROTECT On-Prem 11.1 is not supported—Perform a clean installation of ESET PROTECT On-Prem 11.1.
|
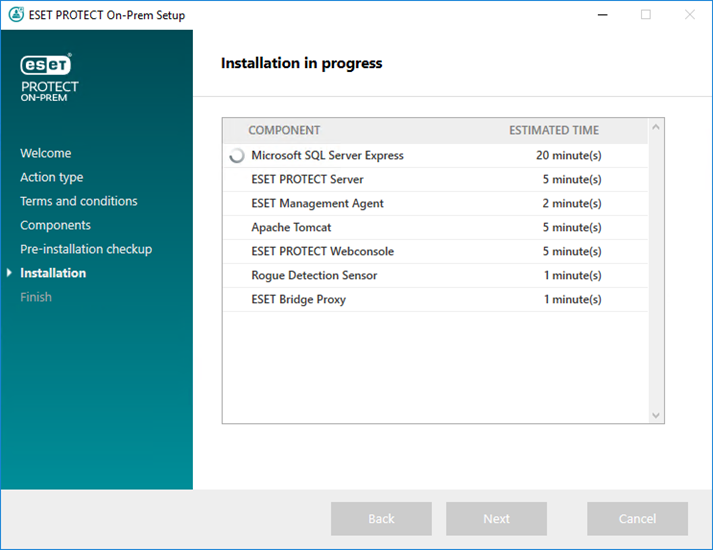
7.When the prerequisites check completes and your environment meets all requirements, the installation begins. Note that installation can take more than an hour, depending on your system and network configuration.
|
|
During installation, the ESET PROTECT On-Prem installation Wizard may not respond.
|
8.If you chose to install Microsoft SQL Server Express in step 4, the installer will perform a database connection check. If you have an existing database server, the installer will prompt you to type your database connection details:
Configure the connection to SQL/MySQL Server
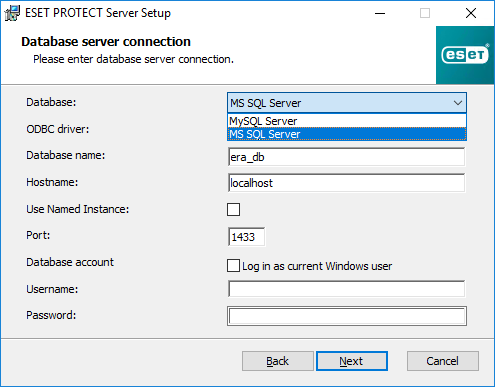
The database stores all data (ESET PROTECT Web Console password, client computer logs, etc.). Configure the Database server connection:
•Database—MySQL Server/MS SQL Server:
oMicrosoft SQL Server—You can find the Database name, Hostname and Port number in SQL Server Configuration Manager.
oMySQL Server—You must configure MySQL to accept large packets for ESET PROTECT On-Prem to run properly because ESET PROTECT Server stores large data blobs in the database.
•ODBC Driver—MySQL ODBC 5.1 Driver/MySQL ODBC 5.2 Unicode Driver/MySQL ODBC 5.3 Unicode Driver/MySQL ODBC 8.0 Unicode Driver/MySQL ODBC 8.1 Unicode Driver/SQL Server/SQL Server Native Client 10.0/ODBC Driver 11 for SQL Server/ODBC Driver 13 for SQL Server/ODBC Driver 17 for SQL Server/ODBC Driver 18 for SQL Server.
•Database name—We recommend using the pre-defined name or changing it if required.
•Hostname—Hostname or the IP address of your database server.
•Use Named Instance—If you use a Microsoft SQL database, you can select the Use Named Instance check box to use a custom database instance. You can set it in the Hostname field in the form HOSTNAME\DB_INSTANCE (for example, 192.168.0.10\ESMC7SQL). For a clustered database, use only the cluster name. If this option is selected, you cannot change the database connection port—the system will use default ports determined by Microsoft. To connect the ESET PROTECT Server to the Microsoft SQL database installed in a Failover Cluster, type the cluster name in the Hostname field.
•Port—The port used for connection to the database server.
•Database account—Username and Password. You can use:
oAn SA account (Microsoft SQL) or root account (MySQL).
oA dedicated database user account with access to the ESET PROTECT database only.
•When you select the Log in as current Windows user check box, the Microsoft SQL database user (administrator or a dedicated database user) can use Windows authentication. As a result, the username and password will not be visible in the StartupConfiguration.ini file.
|
|
If you select Log in as current Windows user and use a dedicated Microsoft SQL database user (not the database administrator), the ESET PROTECT Components Upgrade task will be unable to upgrade the ESET PROTECT Server in the future. The ESET PROTECT Server upgrade, repair and removal will require entering the password of the custom domain user.
|
Click Next. The installer will verify the database connection:
•If you have an existing database from a previous ESET PROTECT On-Prem installation on your database server, the installer will detect it. You can choose to Use the existing database and apply upgrade or Remove existing database and install a new version.
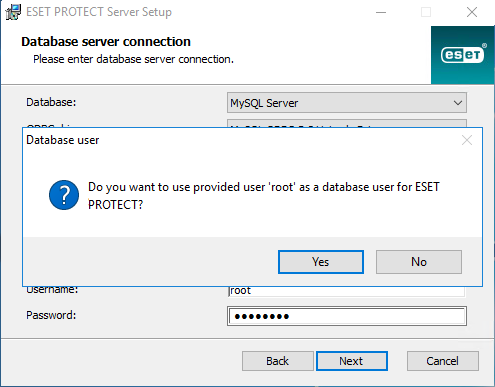
•If you typed the SA account or root account in the previous window, click Yes to continue using the SA/root account as the ESET PROTECT database user. If you click No, proceed to the next installer window.
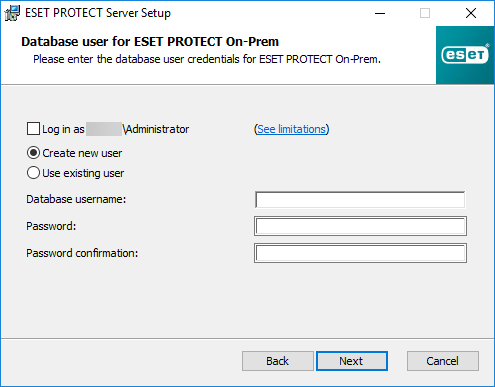
Select a database user for ESET PROTECT On-Prem—You have the following options:
•If you have selected Custom account, you can select the Log in as hostname\username check box.
•Create new user—The installer will create a new database user.
•Use existing user—Type your username and password.
|
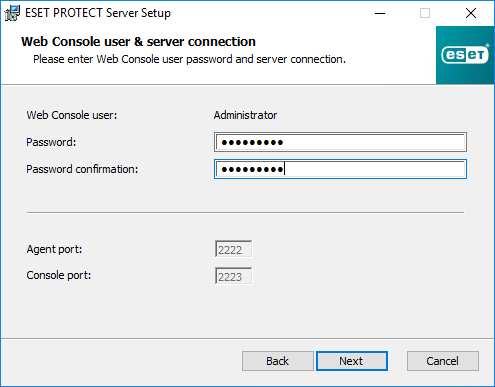
9.The installer prompts you to type a password for the Web Console Administrator account. This password is important—use the password to log into the ESET PROTECT Web Console. Click Next.
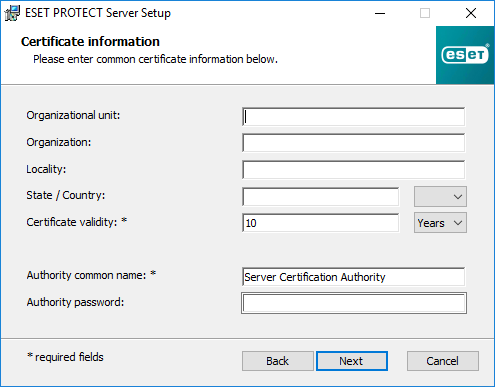
10. Leave the fields unchanged or type your corporate information that will appear in the details of the ESET Management Agent and the ESET PROTECT Server certificates. If you choose to type a password in the Authority password field, be sure to remember it. Click Next.
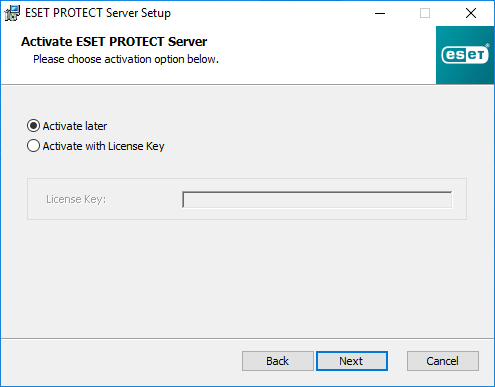
11. Type the valid License Key (included in the new purchase email you received from ESET) and click Next. Alternatively, choose to Activate later (see the Activation chapter for more instructions).
|
|
You can add a license key for these protection tiers:
•ESET PROTECT Entry On-Prem
•ESET PROTECT Essentials On-Prem
Adding a higher protection tier license key will result in an error. You can add the higher protection tier by synchronizing ESET PROTECT On-Prem with ESET PROTECT Hub, ESET Business Account or ESET MSP Administrator.
|
12. You will see the installation progress.

13. If you selected to install the Rogue Detection Sensor, you will see the installation windows for the WinPcap driver. Ensure to select the check box Automatically start the WinPcap driver at boot time.
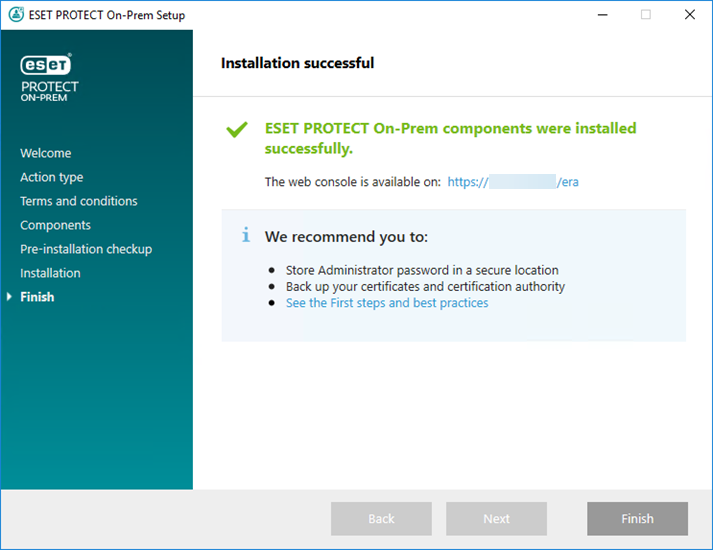
14. When the installation completes, the message "ESET PROTECT components were installed successfully" appears along with your ESET PROTECT Web Console URL address. Click the URL to open the Web Console, or click Finish.
If the installation is not successful:
•Review the installation log files in the All-in-one installation package. The logs directory is the same as the directory for the All-in-one installer, for example:
C:\Users\Administrator\Downloads\x64\logs\
•See Troubleshooting for additional steps to resolve your issue.