Server installation - Windows
Prerequisites
•You must have a valid license key.
•You must have a supported Windows operating system.
•The required ports must be open and available—see the complete list of ports.
•The supported database server and connector (Microsoft SQL Server or MySQL) are installed and running. We recommend that you review the database server configuration details (Microsoft SQL Server or MySQL) to have the database properly configured for use with ESET PROTECT On-Prem. Read our Knowledgebase article to set up your database and database user for Microsoft SQL or MySQL.
•ESET PROTECT Web Console installed to manage the ESET PROTECT Server.
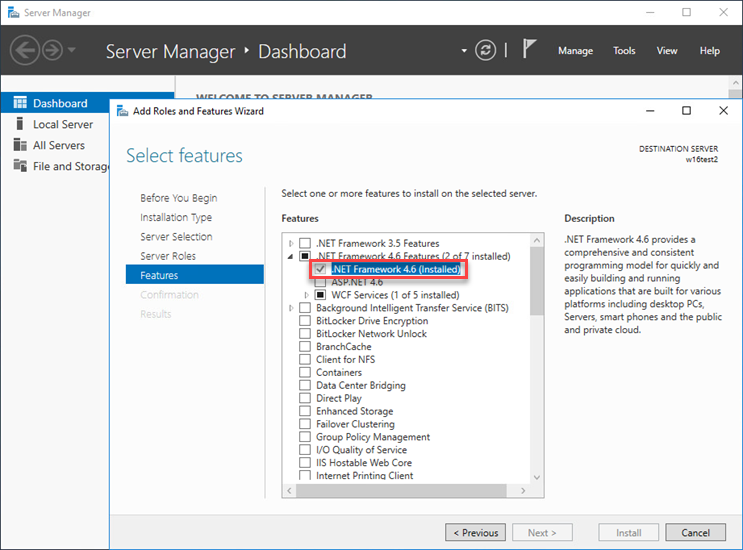
•Microsoft SQL Server Express installation requires Microsoft .NET Framework 4. You can install it using the Add Roles and Features Wizard:
Installation
Follow the steps below to install the ESET PROTECT Server component on Windows:
|
Ensure to meet all the installation prerequisites listed above. |
1.Visit the ESET PROTECT download section to download a standalone installer for this ESET PROTECT component (server_x64.msi).
2.Run the ESET PROTECT Server installer and accept the EULA if you agree.
3.Select the Participate in product improvement program check box to send anonymous telemetry data and crash report to ESET (OS version and type, ESET product version and other product-specific information).
4.Leave the check box next to This is cluster installation empty and click Next. ![]() Is this a cluster installation?
Is this a cluster installation?
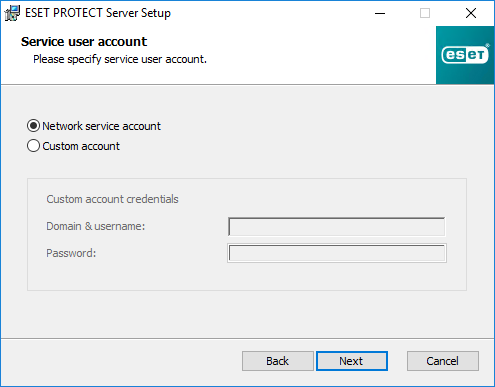
5.Select a Service user account. This account will be used to run the ESET PROTECT Server service. The following options are available:
•Network service account—Select this option if you do not use a domain.
•Custom account—Select this option if you use a domain—Provide domain user credentials: DOMAIN\USERNAME and password. You can create and use a dedicated Microsoft SQL database user.
6.Connect to a Database. All data is stored here (ESET PROTECT Web Console password, client computer logs, etc.).
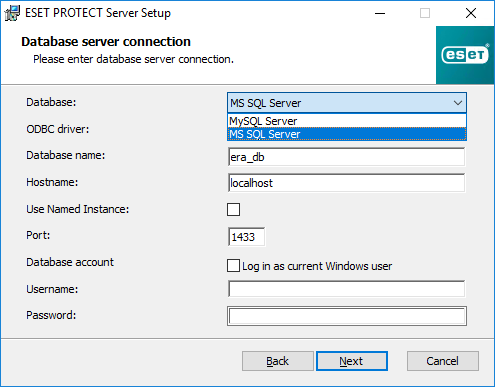
The database stores all data (ESET PROTECT Web Console password, client computer logs, etc.). Configure the Database server connection:
•Database—MySQL Server/MS SQL Server:
oMicrosoft SQL Server—You can find the Database name, Hostname and Port number in SQL Server Configuration Manager.
oMySQL Server—You must configure MySQL to accept large packets for ESET PROTECT On-Prem to run properly because ESET PROTECT Server stores large data blobs in the database.
•ODBC Driver—MySQL ODBC 5.1 Driver/MySQL ODBC 5.2 Unicode Driver/MySQL ODBC 5.3 Unicode Driver/MySQL ODBC 8.0 Unicode Driver/MySQL ODBC 8.1 Unicode Driver/SQL Server/SQL Server Native Client 10.0/ODBC Driver 11 for SQL Server/ODBC Driver 13 for SQL Server/ODBC Driver 17 for SQL Server/ODBC Driver 18 for SQL Server.
•Database name—We recommend using the pre-defined name or changing it if required.
•Hostname—Hostname or the IP address of your database server.
•Use Named Instance—If you use a Microsoft SQL database, you can select the Use Named Instance check box to use a custom database instance. You can set it in the Hostname field in the form HOSTNAME\DB_INSTANCE (for example, 192.168.0.10\ESMC7SQL). For a clustered database, use only the cluster name. If this option is selected, you cannot change the database connection port—the system will use default ports determined by Microsoft. To connect the ESET PROTECT Server to the Microsoft SQL database installed in a Failover Cluster, type the cluster name in the Hostname field.
•Port—The port used for connection to the database server.
•Database account—Username and Password. You can use:
oAn SA account (Microsoft SQL) or root account (MySQL).
oA dedicated database user account with access to the ESET PROTECT database only.
•When you select the Log in as current Windows user check box, the Microsoft SQL database user (administrator or a dedicated database user) can use Windows authentication. As a result, the username and password will not be visible in the StartupConfiguration.ini file.
|
If you select Log in as current Windows user and use a dedicated Microsoft SQL database user (not the database administrator), the ESET PROTECT Components Upgrade task will be unable to upgrade the ESET PROTECT Server in the future. The ESET PROTECT Server upgrade, repair and removal will require entering the password of the custom domain user. |
Click Next. The installer will verify the database connection:
•If you have an existing database from a previous ESET PROTECT On-Prem installation on your database server, the installer will detect it. You can choose to Use the existing database and apply upgrade or Remove existing database and install a new version.
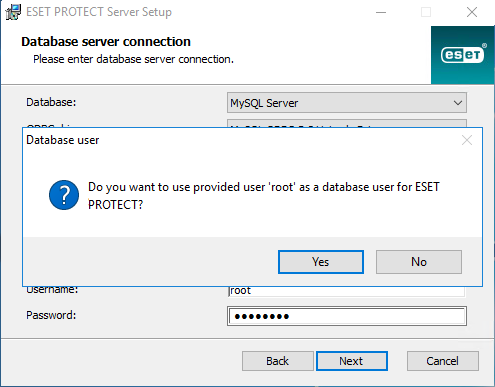
•If you typed the SA account or root account in the previous window, click Yes to continue using the SA/root account as the ESET PROTECT database user. If you click No, proceed to the next installer window.
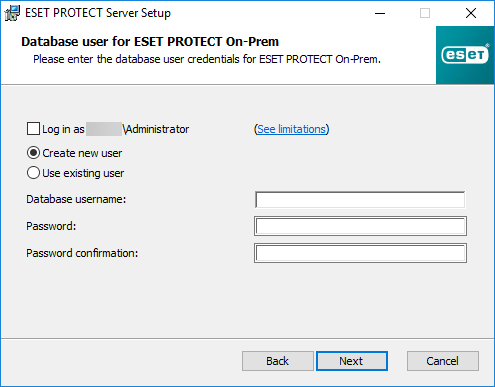
7.Select a database user for ESET PROTECT On-Prem—You have the following options:
•If you have selected Custom account, you can select the Log in as hostname\username check box.
•Create new user—The installer will create a new database user.
•Use existing user—Type your username and password.
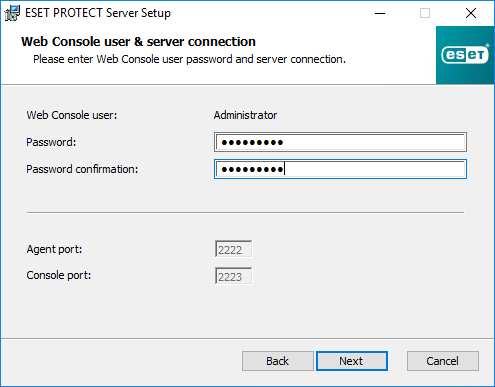
8.Type a password for Web Console access.
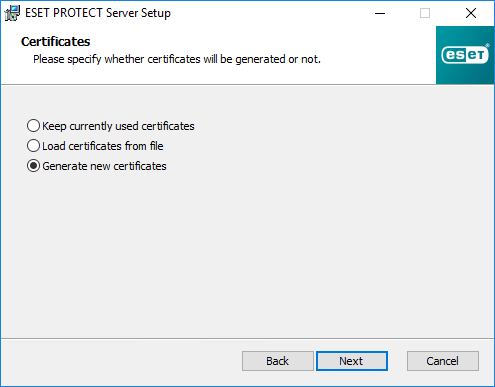
9.ESET PROTECT On-Prem uses certificates for client-server communication. Select one of the following options:
•Keep currently used certificates—This option is available only if the database was already used with another ESET PROTECT Server before.
•Load certificates from file—Select your existing Server certificate and Certification Authority.
•Generate new certificates—The installer generates new certificates.
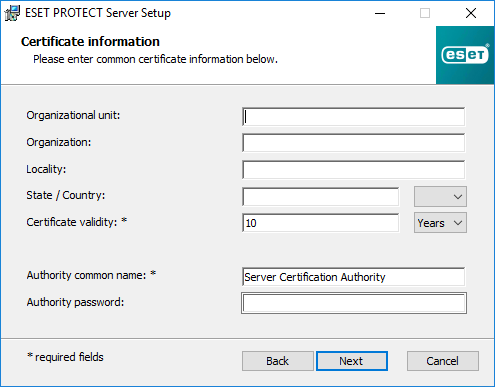
10. Follow this step if you have selected the Generate new certificates option in the previous step.
a)Specify additional information about the certificates (optional). If you type the Authority password, be sure to remember it.
b)In the Server Certificate field, type the Server hostname and a Certificate password (optional).
|
Server hostname in the Server certificate must not contain any of the following keywords: server, proxy, agent. |

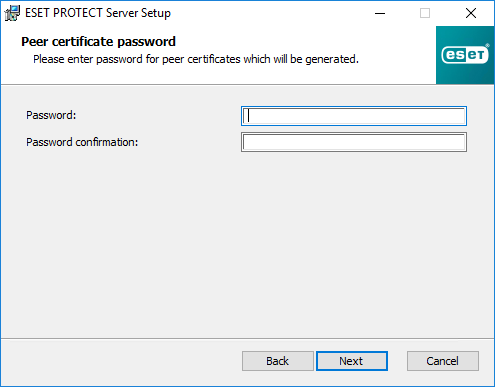
c)In the Peer certificate password field, type the password for Agent and Proxy Peer certificates.
11. Setup can perform an initial Static Group Synchronization task. Select the method (Do not synchronize, Sync with Windows Network, Sync with Active Directory) and click Next.
12. Type a valid License Key or choose Activate later.
|
You can add a license key for these protection tiers: •ESET PROTECT Entry On-Prem •ESET PROTECT Essentials On-Prem Adding a higher protection tier license key will result in an error. You can add the higher protection tier by synchronizing ESET PROTECT On-Prem with ESET PROTECT Hub, ESET Business Account or ESET MSP Administrator. |

13. Confirm or change the installation folder for the server and click Next.
14. Click Install to install the ESET PROTECT Server.
|
When you have completed the ESET PROTECT Server installation, you can install ESET Management Agent on the same machine (optional) to enable managing the Server the same way you manage a client computer. |