Users
The central entity that ESET Cloud Office Security protects is the user account. Double-click a user to find useful information such as the Overview, Settings defined by Policies, list of Policies assigned to the user, and Detections for Gmail, Google Drive, Exchange Online and OneDrive.
You can also choose which users will be Protected or Unprotected. Additionally, you can see whether users are protected per user or auto-protected using either group or tenant protection. Users are organized by tenant and group which are imported from Microsoft 365 or Google Workspace. You can use filtering with multiple criteria to make searching for a specific user within a group easier.
Users without a Microsoft 365 license will not be shown in the ESET Cloud Office Security console by default. This includes shared mailboxes without a Microsoft 365 license. To view and manage all Microsoft 365 users, go to Settings and disable the option for Microsoft 365 licensed users. |
Protection status:
Status |
Description |
|---|---|
|
A user is currently not being protected. |
|
Protected user with auto-protection. You can exclude certain user accounts from the auto-protection by clicking the |
|
Transitional state that occurs during the process of protecting a user. Once it finishes, the user's status changes to Protected. |
|
User's Mailbox and OneDrive are being protected by the Default or a Custom policy. |
|
The process of protecting a user was unsuccessful. The error might have occurred for one of the resources, Mailbox or OneDrive. Likely, both resources are not available for the user. Check if the user has a valid Microsoft 365 license assigned. |
Navigate within the tree to see users of a specific tenant or group. To see all users in every tenant and group, click All.

To access Table actions, click the gear icon ![]() in the upper-right corner of the table and choose from the context menu:
in the upper-right corner of the table and choose from the context menu:
•Export to CSV—Export the table grid to CSV format for use in other applications. The current column configuration of the table is applied to the exported file.
•Edit columns—Customize the table view by removing or adding columns and rearranging their order as you see fit. The column configuration is saved, so the table view is retained when you return. The column configuration is applied when exporting data to a CSV file.
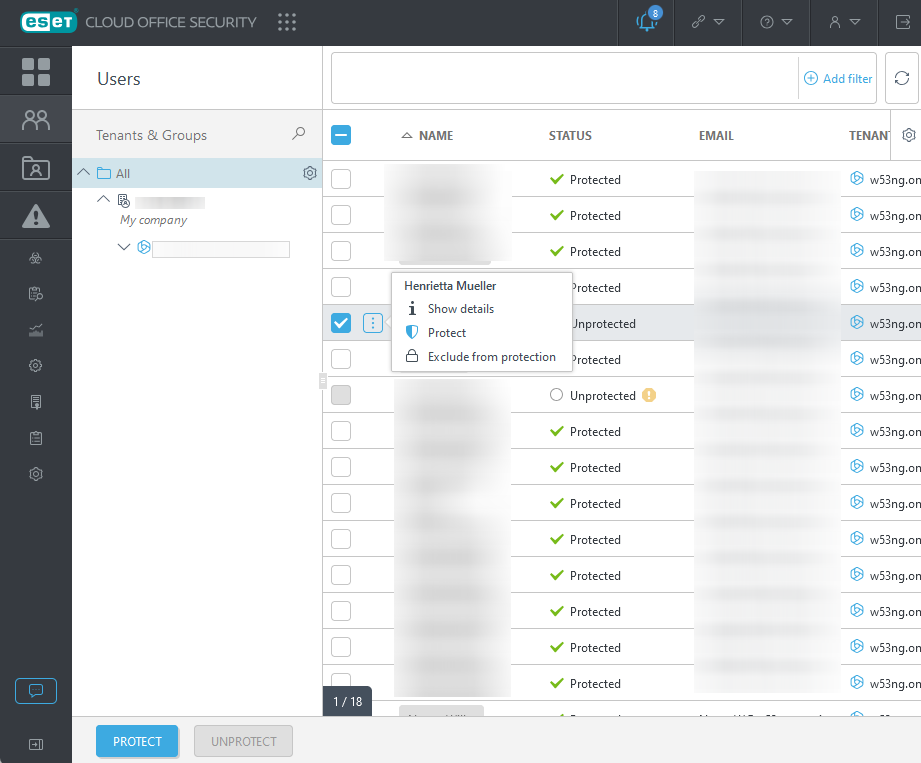
For more detailed information, double-click a user, click the ![]() icon, and select an action (Show details, Protect, Unprotect, Exclude from protection and Allow protection). Click a user to open the Show details window that consists of four parts:
icon, and select an action (Show details, Protect, Unprotect, Exclude from protection and Allow protection). Click a user to open the Show details window that consists of four parts:
Action |
Usage |
|---|---|
Overview |
Shows necessary information about the user loaded from Microsoft 365 (Email, Group membership, Job title, etc.). Auto-protected by if—automatically protected by belonging to either groups or tenants. License pool what license pool is a given user protected by. If clicked, the user is transferred to the respective license pool. Also, a current Protection status for Mailbox, OneDrive and Google Drive is shown. |
Contains a read-only list of Settings and assigned Policies for this user. Switch between the tabs to view the configuration or a list of assigned policies. You cannot modify Settings or assign Policies to users, go to the Policies section instead. |
|
Show all detections for this user account (Gmail, Google Drive, Exchange Online or OneDrive). |
|
Show all quarantine emails and files store from this user. You can also use an action: Release, Download, or Delete quarantine emails or files. |
You can filter users by several criteria. Click Add filter and select a filter type from the drop-down menu or type a string (repeat when combining multiple criteria):
Add filter |
Usage |
|---|---|
Protection Status |
Select Protected, Unprotected, Warning, or Pending status of a user. |
Auto-protected |
Show automatically protected users only. |
Excluded from protection |
Show only users excluded from manual and auto-protection. |
Name |
Type a valid username. |
Type a valid user email. |
|
Type |
Select the user type (Unknown, User, Linked, Shared mailbox, Room, Equipment, Others). |
Suspended |
Show only those users who are currently suspended. |
Not suspended |
Show only those users who are currently not suspended. |
Protect users
1.Select Users who will be protected, and click Protect.
2.Select the License pool loaded from ESET Business Account and click OK. The Default policy now protects selected users.
3.If required, specify a custom policy for users in the Policies section.
Unprotect users
1.Select Users who will be unprotected.
2.Click Unprotect.