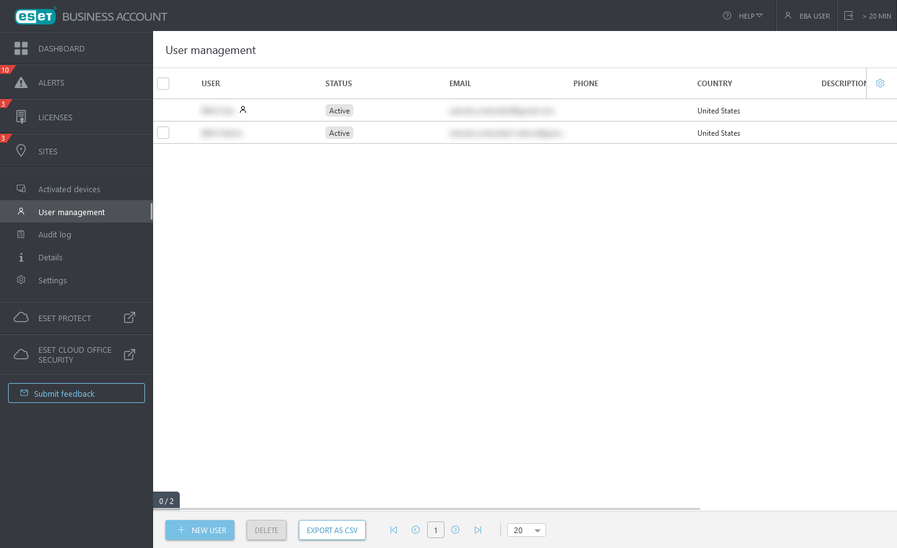
User management
Enroll people you trust to help you manage a share of your licenses.
ESET MSP Administrator 2 account If an email address is registered as an ESET MSP Administrator 2 (EMA) account, and you create a user in ESET Business Account (EBA) portal using that email address, after confirming the activation link received via email, no password configuration is requested. Password configured for the ESET MSP Administrator 2 account remains in use. If you change the user's password in one of the services (EMA or EBA), it updates both accounts. |
1.In the ESET Business Account (EBA) portal, click User management > New User.

2.Type in the required personal details. Use a valid email address so that the user receives the confirmation email (may take up to 15 minutes to deliver), which includes the activation link.
3.Assign desired permissions regarding the company and sites. Click Create.
Language of user interface The language selected under the registration form will be used as the display language in the ESET Business Account portal. The display language can be changed in the portal after clicking your name. |
Superuser
Superuser ![]() - Owner of a specific EBA account by default. The only user who can request the activation of the ESET PROTECT account.
- Owner of a specific EBA account by default. The only user who can request the activation of the ESET PROTECT account.
To assign the superuser role to a different user:
1.Click the user, select Edit.
2.Select Reassign superuser rights to this user, click Save.
3.Type the current superuser's password and click Reassign.
Access rights
To allow a user to manage other users, select Write for Company access. An additional user cannot delete the initial creator of a Business Account.
Company access
•Read — View Alerts, Licenses, Sites, Audit logs, and Activated device
•Write — View and manage Alerts, Licenses, Sites, Activated devices and Users
•No Access — Users cannot view any company information, only information related to the Sites they are associated with
If you select No Access for a user, you must associate them with at least one site and select the desired permission (Read, Write) regarding the specific site.
Site access
•Read — View site-related Alerts, Licenses, and Audit logs
•Write — View and manage site-related Alerts and Licenses
Specify permissions per site.
ESET PROTECT and ESET Inspect access
•Read — Users can access ESET PROTECT and ESET Inspect to view the collected data
•Write — Users has full access to ESET PROTECT and ESET Inspect
•Custom — User cannot access ESET PROTECT until you configure their permissions in ESET PROTECT.
•No Access — Users cannot access ESET PROTECT or ESET Inspect
ESET Cloud Office Security access
•Read — Users can access ESET Cloud Office Security (ECOS), see all collected data
•Write — Users have full access to ECOS
•No Access — Users cannot access ECOS
Integrations
This option enables the user to use available public API endpoints via ESET Connect.
Data security By enabling it, any data you transmit leaves ESET's secure infrastructure and goes into external systems or networks. |
Dedicated API user We recommend creating a dedicated API user in your ESET Business Account to separate your regular account from ESET Connect activities. Only ESET Business Account superuser can create a dedicated API user with Integrations enabled. You cannot enable Integrations for ESET Business Account superuser. |
To add to a new user:
1.Log in as the ESET Business Account superuser.
2.Click User management > New User.
3.Fill in the required fields and permissions.
4.Click toggle next to Integrations to enable or disable the option.
5.Click Create.
To modify the existing user:
1.Log in as the ESET Business Account superuser.
2.Click User management.
3.Click the username and Edit.
4.Click toggle next to Integrations to enable or disable the option.
5.Click Save.
Require a password change at the next login
To force a user to change their password at the next login:
1.Click the user, select Edit.
2.In the Security section, select Password change required.
3.Click Save.
Delete users
Cannot recover deleted accounts If a user is deleted from your EBA account, the deleted account cannot be recovered. |
To delete a single user:
1.Select the user > Delete.
2.Click Delete in the confirmation dialog.
To delete multiple users:
1.Select all applicable users.
2.Click Delete, then click Delete again in the confirmation dialog.