Create new case
In the Create new case window, select the available Service type from the drop-down menu.
New case via service tile The Service type field is pre-selected if you are opening a new case via a specific service tile. |
1.Select the ESET Premium Support from the Service drop-down menu.
2.Select the Activity from the drop-down menu. 3.Type a Subject for the new case. 4.Type the Product ID or click the Search text field, and select the product from the drop-down menu. 5.Select the Product version from the drop-down menu. 6.Select the Operating system from the drop-down menu. 7.Select the Case type from the drop-down menu. 8.Select the Issue type from the drop-down menu. 9.Select the Priority from the drop-down menu. 10. Type a detailed Description of your request.
11. Click Create to finish and submit the new case for resolution. A green confirmation message Case was created successfully will appear.
|
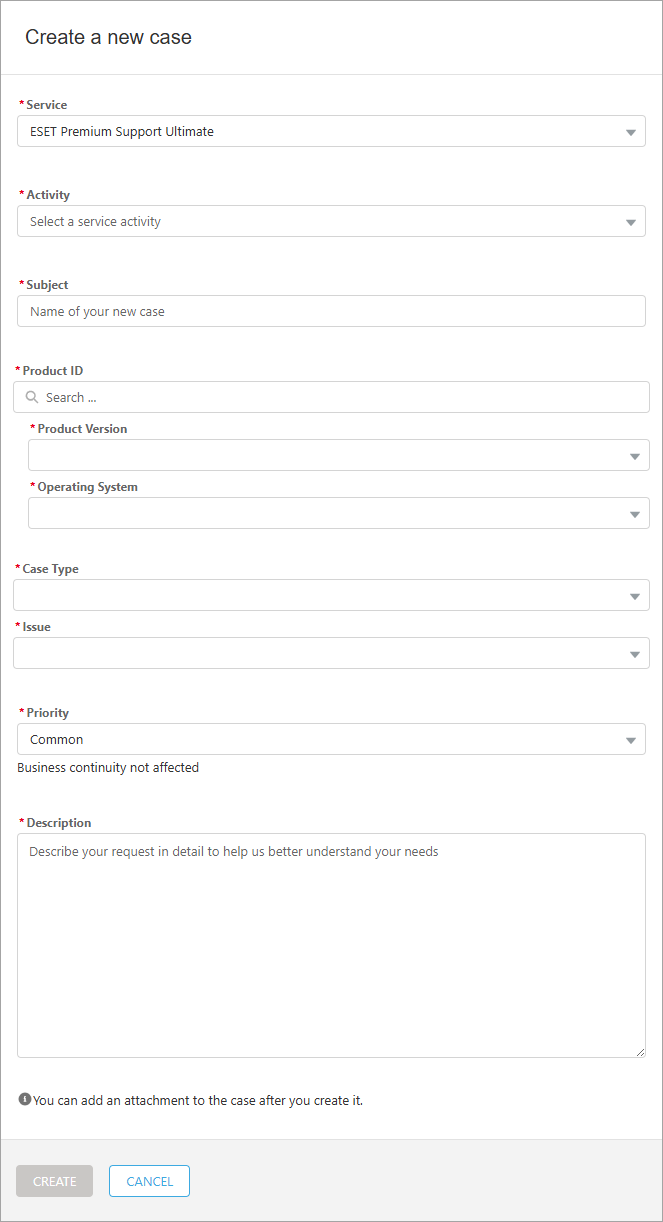
1.Select the ESET Premium Support Ultimate from the Service drop-down menu.
2.Select the Activity from the drop-down menu. 3.Type a Subject for the new case. 4.Type the Product ID or click the Search text field, and select the product from the drop-down menu. 5.Select the Product version from the drop-down menu. 6.Select the Operating system from the drop-down menu. 7.Select the Case type from the drop-down menu. 8.Select the Issue type from the drop-down menu. 9.Select the Priority from the drop-down menu. 10. Type a detailed Description of your request.
11. Click Create to finish and submit the new case for resolution. A green confirmation message Case was created successfully will appear.
|
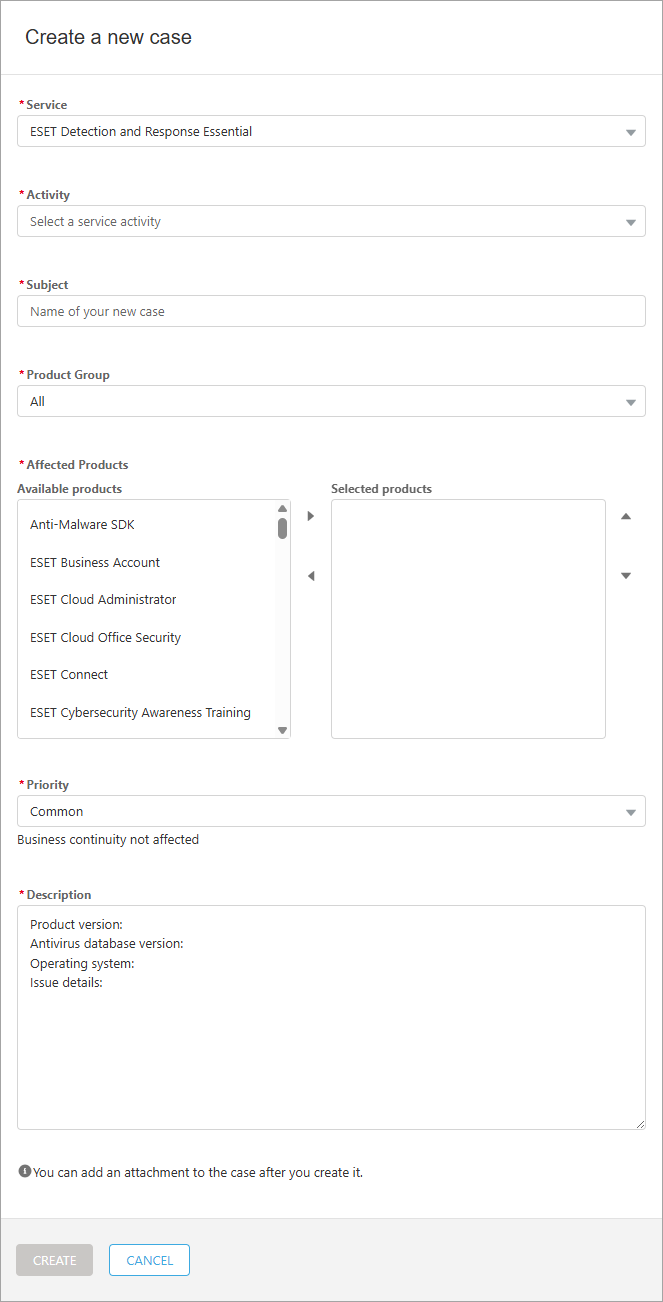
1.Select the ESET Detection and Response Essential from the Service drop-down menu.
2.Select the Activity from the drop-down menu. 3.Type a Subject for the new case. 4.Select the Product group from the drop-down menu. 5.Select the Affected products from the list of Available products and move them to the list of the Selected products. Use right 6.Select the Priority from the drop-down menu. 7.Type a detailed Description of your request.
8.Click Create to finish and submit the new case for resolution. A green confirmation message Case was created successfully will appear.
|
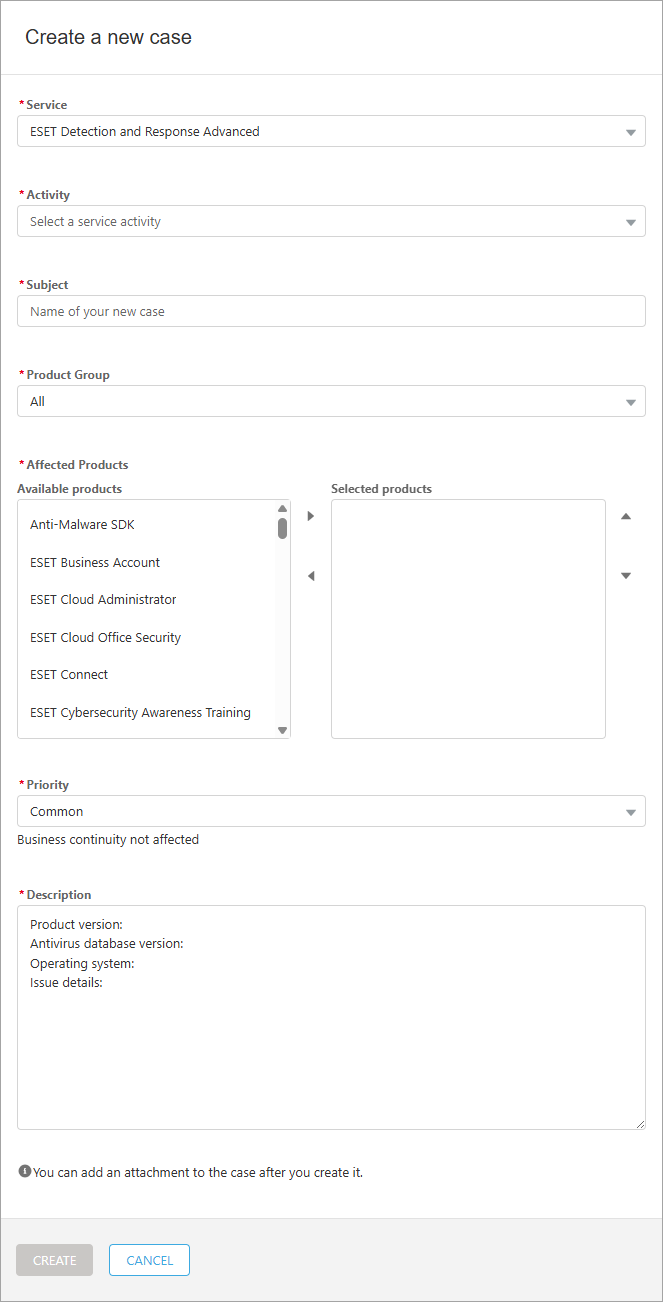
1.Select the ESET Detection and Response Advanced from the Service drop-down menu.
2.Select the Activity from the drop-down menu. 3.Type a Subject for the new case. 4.Select the Product group from the drop-down menu. 5.Select the Affected products from the list of Available products and move them to the list of the Selected products. Use right 6.Select the Priority from the drop-down menu. 7.Type a detailed Description of your request.
8.Click Create to finish and submit the new case for resolution. A green confirmation message Case was created successfully will appear.
|
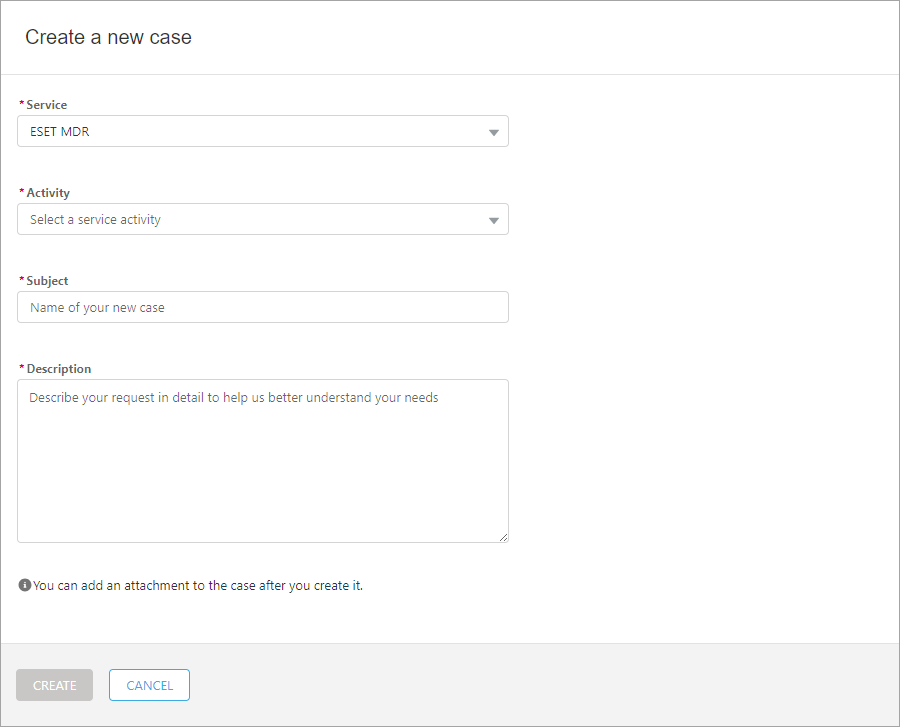
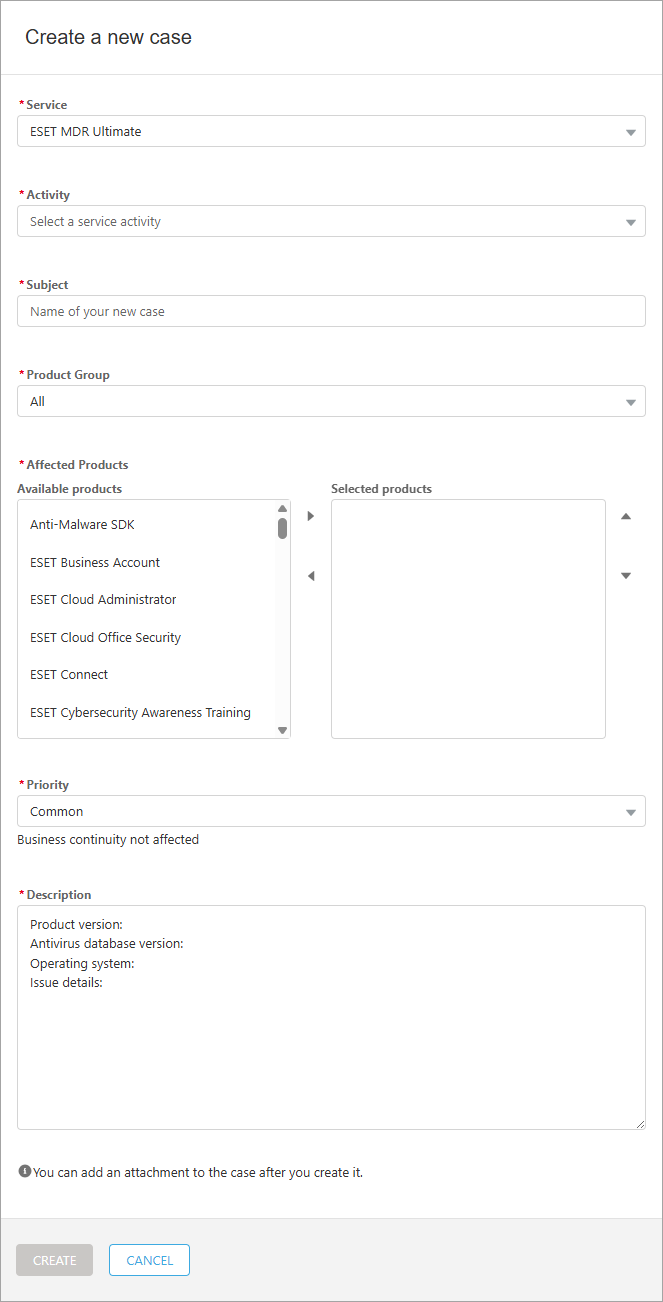
1.Select the ESET MDR from the Service drop-down menu.
2.Select the Activity from the drop-down menu. 3.Type a Subject for the new case. 4.Select the Product group from the drop-down menu. 5.Select the Affected products from the list of Available products and move them to the list of the Selected products. Use right 6.Select the Priority from the drop-down menu. 7.Type a detailed Description of your request.
8.Click Create to finish and submit the new case for resolution. A green confirmation message Case was created successfully will appear.
|
1.Select the ESET MDR Ultimate from the Service drop-down menu.
2.Select the Activity from the drop-down menu. 3.Type a Subject for the new case. 4.Select the Product group from the drop-down menu. 5.Select the Affected products from the list of Available products and move them to the list of the Selected products. Use right 6.Select the Priority from the drop-down menu. 7.Type a detailed Description of your request.
8.Click Create to finish and submit the new case for resolution. A green confirmation message Case was created successfully will appear.
|
1.Select the Healthcheck from the Service drop-down menu.
2.Type a Subject for the new case. 3.Select the Product group from the drop-down menu. 4.Select the Affected products from the list of Available products and move them to the list of the Selected products. Use right 5.Type a detailed Description of your request.
6.(Optional) Click the calendar
7.Click Create to finish and submit the new case for resolution. A green confirmation message Case was created successfully will appear.
|
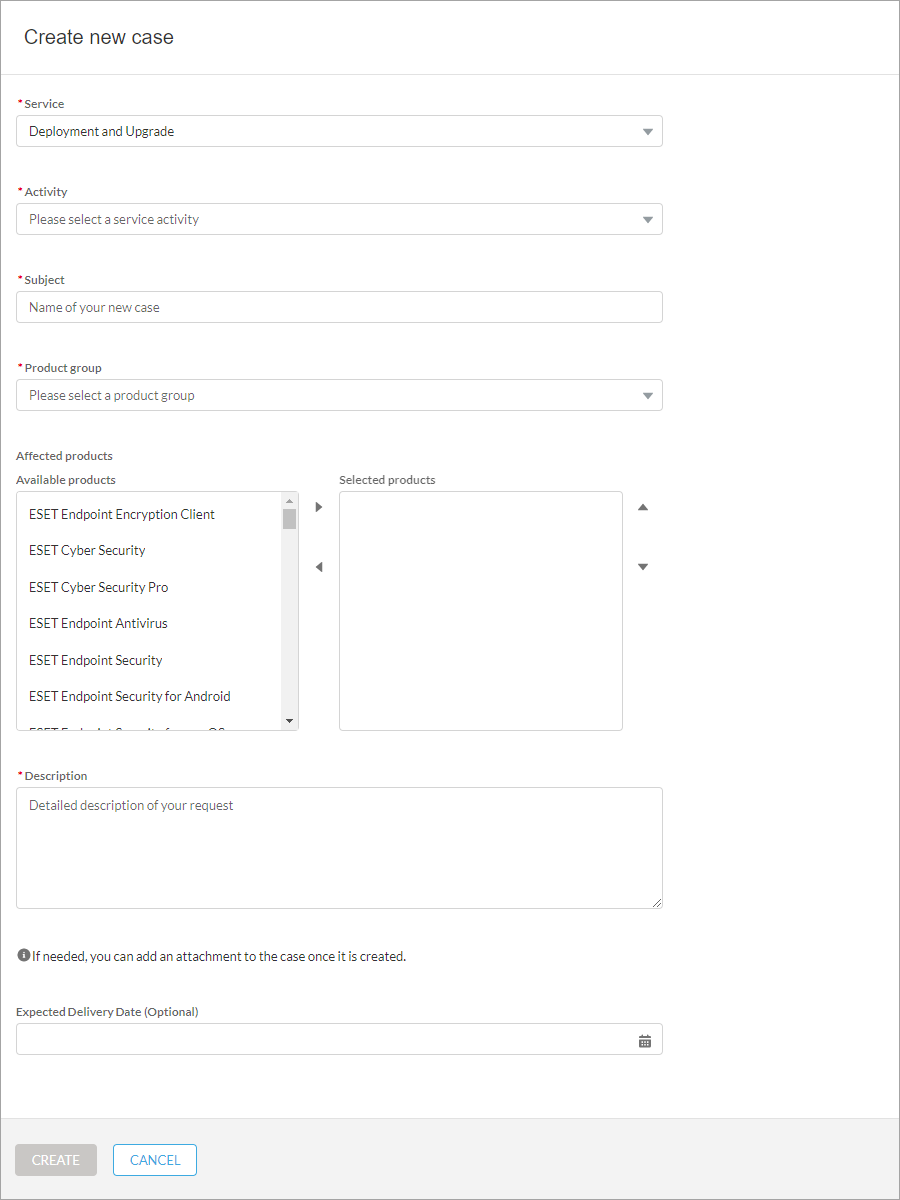
1.Select the Deployment and Upgrade from the Service drop-down menu.
2.Select the Activity from the drop-down menu. 3.Type a Subject for the new case. 4.Select the Product group from the drop-down menu. 5.Select the Affected products from the list of Available products and move them to the list of the Selected products. Use right 6.Type a detailed Description of your request.
7.(Optional) Click the calendar
8.Click Create to finish and submit the new case for resolution. A green confirmation message Case was created successfully will appear.
|


