Set static IP address
•Set static IP address before the initial VA configuration
•Change the static IP address of the configured VA
Set static IP address before the initial VA configuration
Manual configuration is required if your ESET PROTECT VA is not assigned an IP address by a DHCP server. Follow the instructions below to set a static IP address manually:
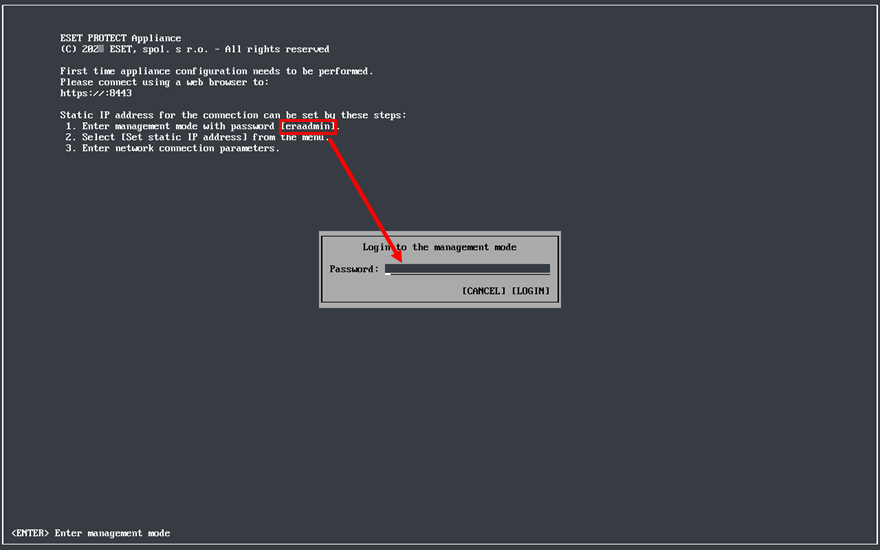
1.While in the VM console main screen, press Enter on your keyboard to log in to the management mode. Type eraadmin and press Enter twice to login.

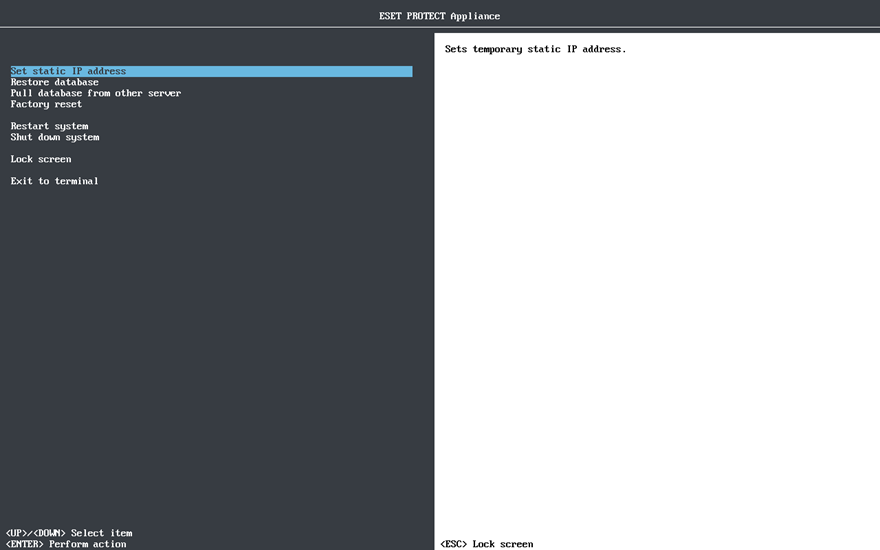
2.Choose Set static IP address using the arrow keys and press Enter.

3.A network configuration interactive wizard will start, asking you to set:
•Static IP address
•Network mask
•Gateway address
•DNS server address
Network parameters must be typed in IPv4 dot-decimal notation, for example 192.168.1.10 (IP address) or 255.255.255.0 (network mask). See also Enable/disable ping on the ESET PROTECT Virtual Appliance. |
4.Press Enter to continue or Ctrl+C to stay in terminal.
ESET PROTECT VA has one network adapter by default which is sufficient, but if you add multiple network adapters for other reasons, Set static IP address will apply to the lan0 adapter only.
Change the static IP address of the configured VA
Follow the steps below to change the IP address of the configured VA:
If your ESET PROTECT certificates contain the IP address, generate new certificates with the new IP address before changing the IP address. |
1.Log in to the management mode by typing your password (specified during ESET PROTECT VA configuration) and pressing Enter twice.
2.Select Exit to terminal using the arrow keys and then press Enter.
3.Run sudo nmtui.
4.Select Edit a connection > select lan0.
5.Change the IPv4 Configuration to Manual.
6.Type your desired IP address, netmask, gateway and DNS servers.
7.Select OK to save the changes and Back and Quit to exit nmtui.
Alternatively, you can edit the configuration file using a text editor: sudo nano /etc/NetworkManager/system-connections/lan0.nmconnection
Add/edit the following lines under [ipv4] (replace placeholder values with your network settings): BOOTPROTO=none ONBOOT=yes IPADDR=your_static_ip NETMASK=your_netmask GATEWAY=your_gateway DNS=primary_dns DNS2=secondary_dns |
8.Restart the NetworkManager service: sudo systemctl restart NetworkManager
9.Verify your new IP address: nmcli d show lan0