Install the Authentication Server
Windows Server 2008 and Windows Server 2008R2 Before installing the Authentication Server on Windows Server 2008 or Windows Server 2008 R2, change the default TLS version to use. |
1.Run the supplied .EXE file to install the Authentication Server on the machine that will host the ESA Authentication Service. NET Framework version 4.5 will be automatically installed if it is not detected.
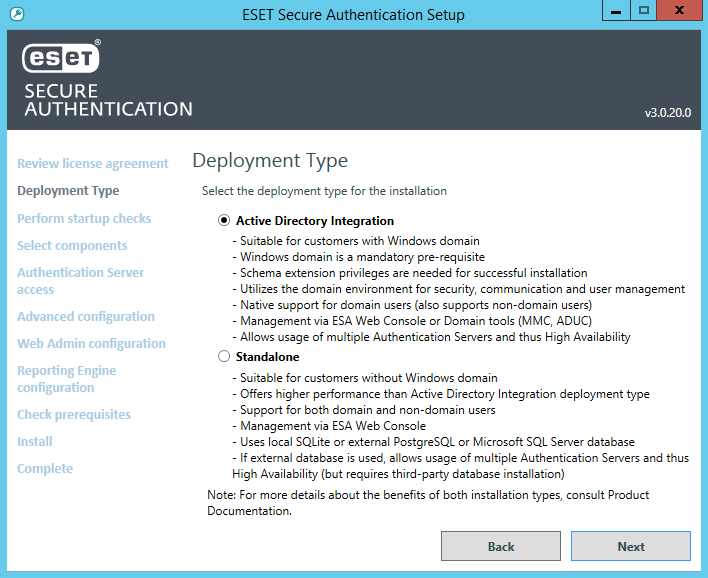
2.Select a deployment type:
•Active Directory Integration - This type of deployment is suitable for customers running a Windows domain network. They are not limited to protect with 2FA computers belonging to their Windows domain only. They can also invite computers from outside their network, as long as the Authentication Server is available online.
•Standalone - This type of deployment is also suitable for customers not using a Windows domain. They can invite computers from their local network and other networks also. ESA-related services run under SYSTEM user.
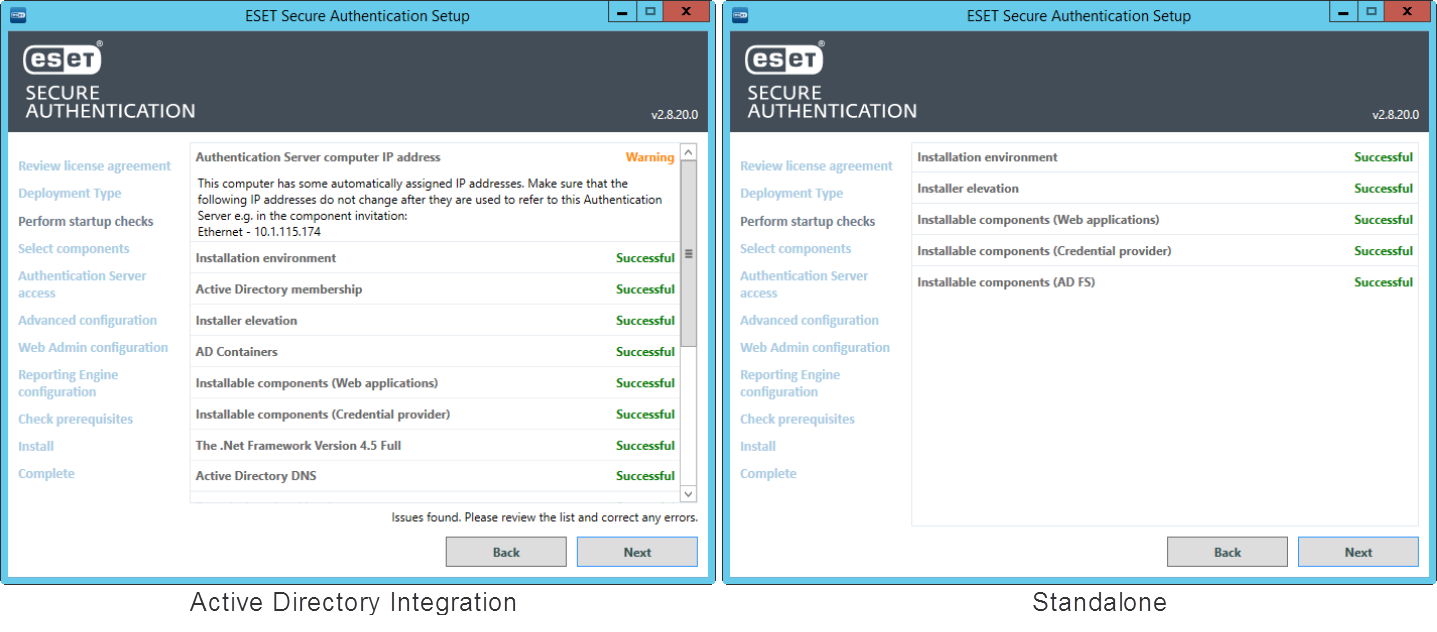
3.A number of prerequisite checks will be performed to ensure that the domain or installation environment is healthy and that ESA can be installed. Any failures must be corrected before installation can proceed. The installation will continue when all prerequisites are completed.
If the Next button is not available for more than 5 seconds, wait or scroll down to see which requirements are still being checked.
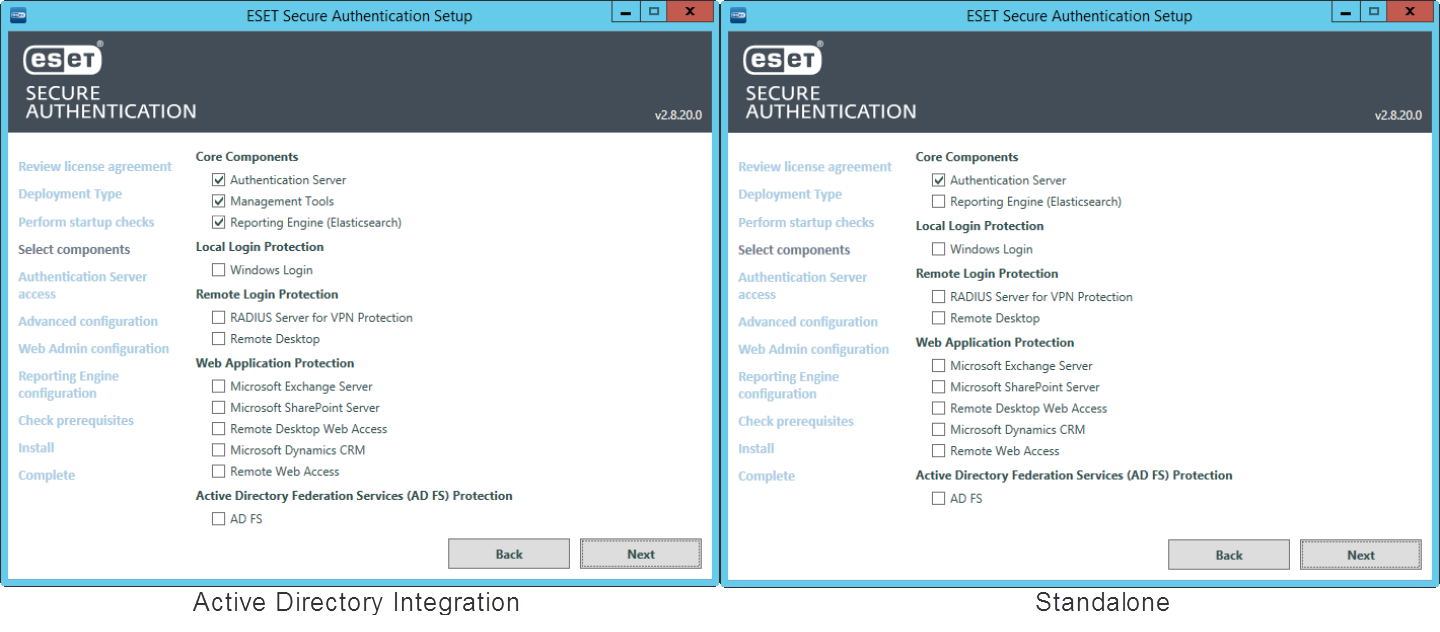
4.When prompted, verify the Authentication Server component is selected, as per the figure below. If the Active Directory Integration type of deployment was selected initially, then Authentication Server, Management Tools (Microsoft Management Console for ESA), and Reporting Engine (Elasticsearch) would be selected automatically.
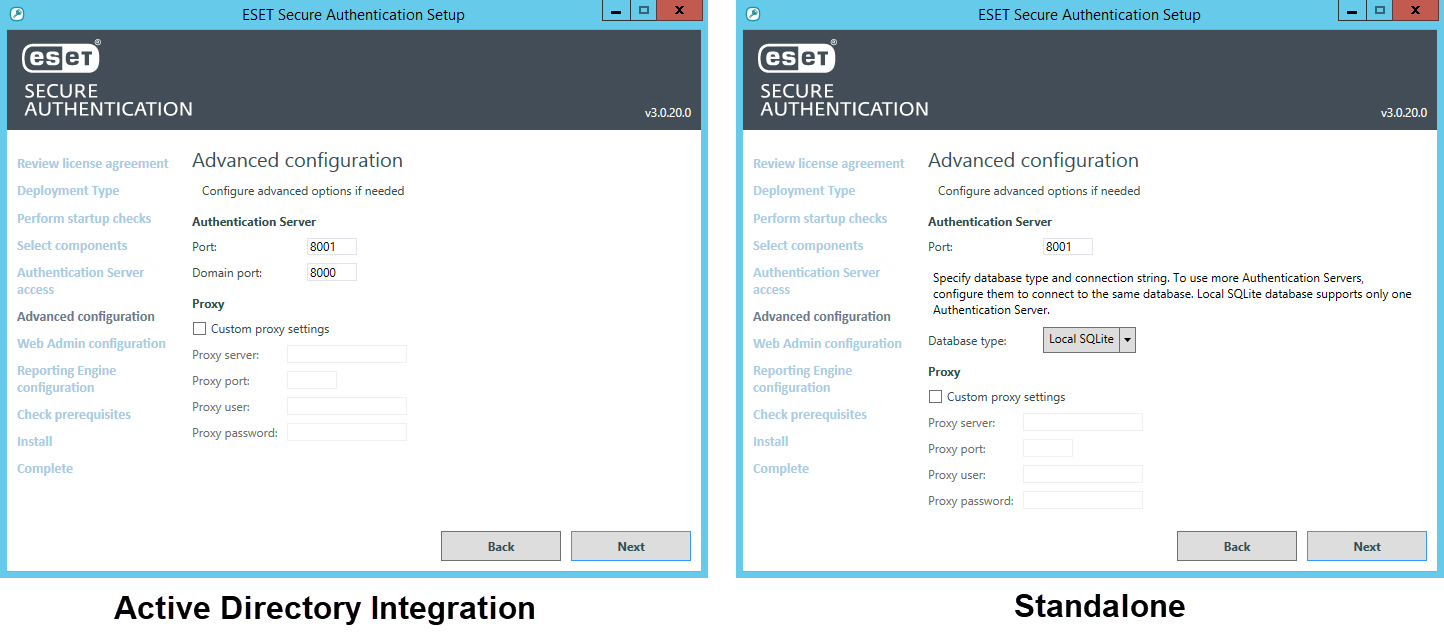
5.If port number 8000 (Active Directory Integration only) or 8001 is already in use on your network, select a different Domain port or different Port for the ESA Web Console. If you prefer to use a transparent proxy, select Custom proxy settings and type in the corresponding values. Port number 8001 is also used for API.
If installing the Authentication Server in Standalone mode and prefer to use an external database, select a supported external database from Database Type and type the existing database's connection details. Click Next.
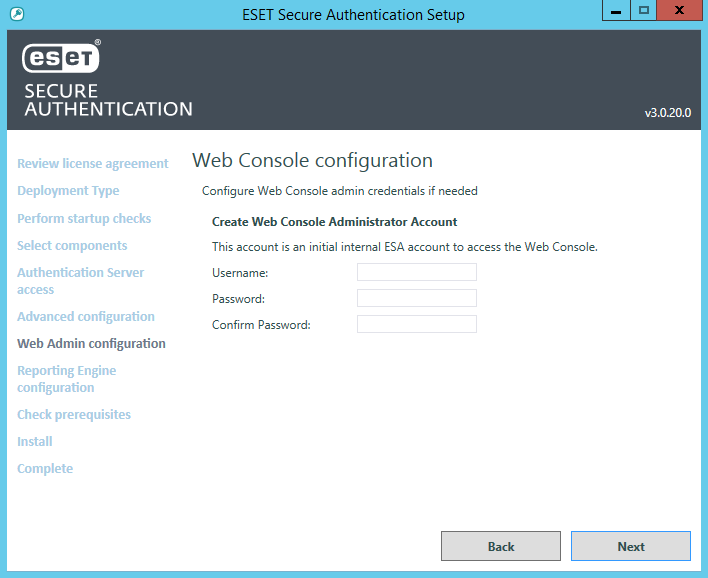
6.Set the Username and Password. Click Next.
7.The subsequent Check prerequisites screen will reveal if the selected ports are available.
8.Go through the remainder of the steps as prompted by the installer and close the installer when complete.
9.Use the ESA Web Console to configure your installation of ESET Secure Authentication On-Prem and related components, users.
