RADIUS Configuration
To configure 2FA for your VPN, add your VPN appliance as a RADIUS client:
1.In the ESA Web Console, navigate to Components > RADIUS, select a RADIUS server, and click Create new RADIUS client.
2.In the Basic Settings section:
a.Give the RADIUS client a memorable name for easy reference.
b.Configure the IP Address and Shared Secret for the Client so that they correspond to the configuration of your VPN appliance. The IP address is the internal IP address of your appliance. If your appliance communicates via IPv6, use that IP address along with the related scope ID (interface ID).
c.The shared secret is the RADIUS shared secret for the external authenticator you will configure on your appliance.
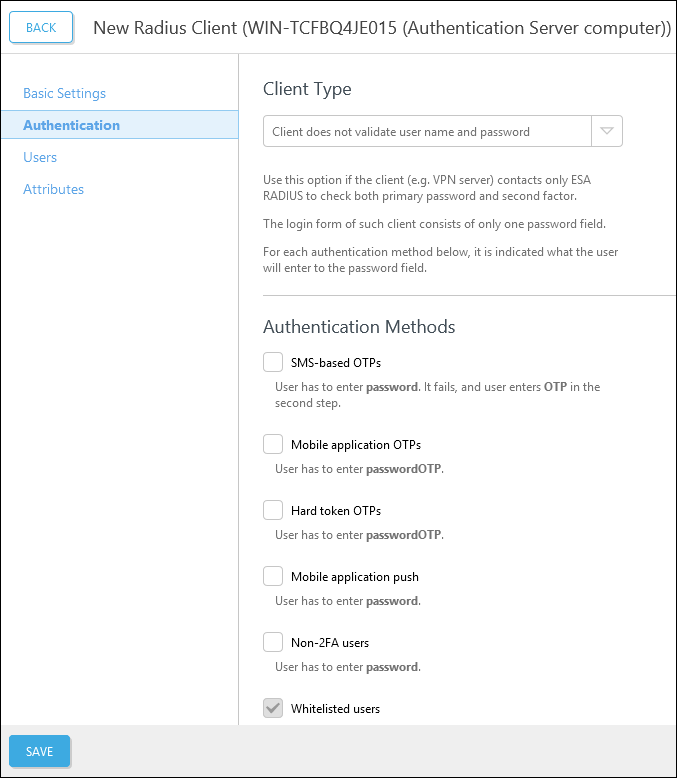
3.In the Authentication section:
a.Select the Client Type.
b.Select the desired authentication method. The optimal authentication method depends on your VPN appliance make and model. See ESA VPN integration guidelines for more details in the ESET Knowledgebase.
c.Optionally, you can allow any non-2FA users to use the VPN.
|
Non-2FA users Allowing non-2FA users to log in to the VPN without restricting access to a security group will allow all users in the domain to log in using the VPN. Using this configuration is not recommended. Suppose an ESA RADIUS client is configured to allow Non-2FA users to log in using their generic credentials. If self-enrollment with any default authentication type is enabled, all users will be requested to provide 2FA or MRK to authenticate. |

4.In the Users section, from the Realm selection box, select Current AD domain or Current AD domain and domains in trust to have the realm (domain) of the user be automatically registered when the user authenticates for the first time using VPN and 2FA. Alternatively, select a specific realm from the selection box to have all users be registered to the same realm.
5.If your RADIUS client supports the Message-Authenticator attribute, select Require Message-Authenticator attribute to mitigate potential security risks and vulnerabilities (CVE-2024-3596)
6.If your VPN client requires additional RADIUS attributes to be sent by ESA RADIUS, in the Attributes section, click Add to configure them. Remember to select the correct Value Type for your attribute so the RADIUS component can parse it.
7.When you are finished making changes, click Save.
8.Restart the RADIUS server.
a.Locate the ESA RADIUS Service in the Windows Services (under Control Panel > Administrative Tools > View Local Services).
b.Right-click the ESA Radius Service and select Restart from the context menu.
|
Push Authentication If the Mobile Application Push authentication method is enabled, set the authentication expiration time of your VPN server to more than 2.5 minutes. |
Client Type options
•Client does not validate user name and password
•Client validates user name and password
•Use Access-Challenge feature of RADIUS
•Client does not validate user name and password - avoid compound
More information on Client Type options
The following RADIUS clients support the RADIUS Access-Challenge feature:
▪Pulse Connect Secure (formerly Junos Pulse (VPN))
▪Linux PAM module
The Microsoft RRAS RADIUS client should not be used with the Access-Challenge feature.