|

|
Connecting an Encrypted Disk
If the machine you are decrypting does not boot due to a hardware failure, connect the encrypted disk to another machine as the only connected disk. Ensure the disk is connected as a bootable device. Do not use a caddy or similar connection method, as it will not work.
When the disk is connected correctly, proceed with the following steps.
|
The encryption recovery process is needed if the Wipe FDE Login password task was executed, or if there is an issue with the encryption or EFDE pre-boot login screen, and password recovery fails. This process will decrypt the drive on the workstation and disable the EFDE pre-boot login.
You need a Workstation ID for the recovery process. Workstation ID is case-sensitive. You can find the Workstation ID at the bottom of the pre-boot login screen:
|

|
•All users with Read access to the All static group (access to all devices) also have access to recovery data of removed devices.
•For security reasons, recovery data is available only to users with access to the All static group (access to all devices), such as global administrators. |
The administrator can perform this task in two ways:
If the administrator can identify the affected workstation in the management console:
1.Click Computer Details of the workstation in the management console.
2.In ESET PROTECT On-Prem, click Overview > Encryption tile select Manage > Restore Access > Recovery data.
•In ESET PROTECT, click Overview > in Platform Modules > ESET Full Disk Encryption > click  > Restore access > Recovery data.
If the administrator cannot identify the affected workstation in the management console:
1.In the top bar of the management console, click Help > Encryption recovery.
2.Select the Recovery data option.
3.The user must provide the Workstation ID to the administrator. Workstation ID is displayed at the bottom of the EFDE pre-boot login screen.
From this point, the recovery process is the same for both options.
Download the Recovery Data File:
1.On the screen, create a one-time recovery Password (this password is valid only for this one specific encryption recovery).
2.Click Continue to proceed to the next step.
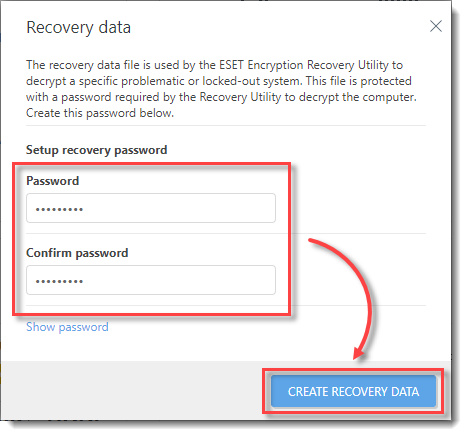
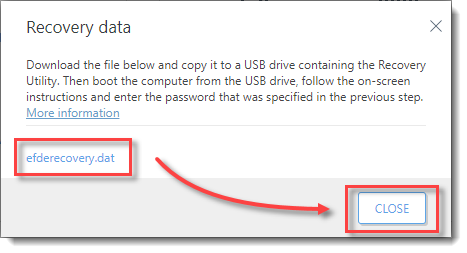
3.In the next window, click efderecovery.dat and Download&Save the file. After this step is finished, click Close.
|

|
The efderecovery.dat file is unique for every workstation and every encryption of the workstation. For example, the decryption file will not be the same if the workstation is encrypted, decrypted, and then encrypted again.
|
ESET Recovery Media Creator
1.Insert an empty USB drive into your computer.
|

|
Ensure that the USB device has a FAT32 formatted partition. The partition is required to set up the ESET Recovery Media Creator.
When using EFI mode, 32GB is the maximum limit. When you exceed the limit, ESET Recovery Media Creator displays Destination partition is too large (32GB maximum).
|
2.Download the ESET Recovery Media Creator.
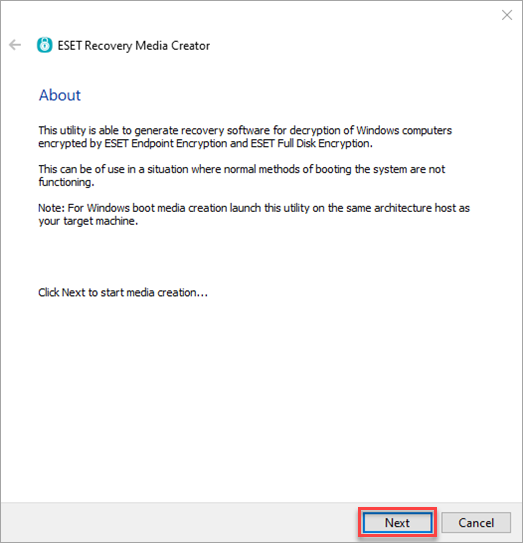
3.Run the utility on your computer and click Next to proceed.
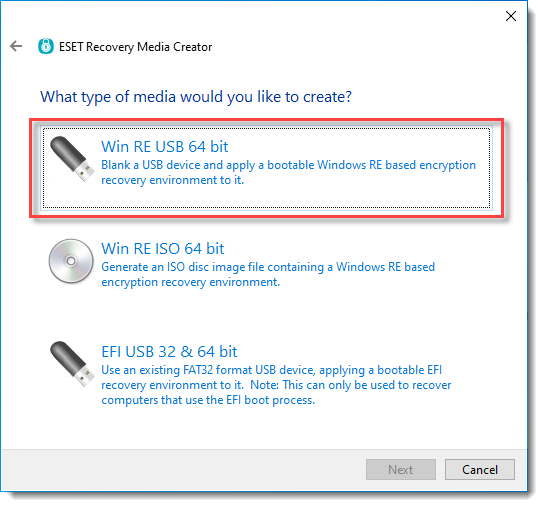
4.Select Win RE USB 64 bit (or alternatively 32–bit).
|

|
When creating the Win RE USB, the architecture (x86 / x64) of the host system running the utility must match the architecture of the target system of the recovery.
|
5.As the Destination disk for the recovery, select your empty USB drive inserted in Step 1.
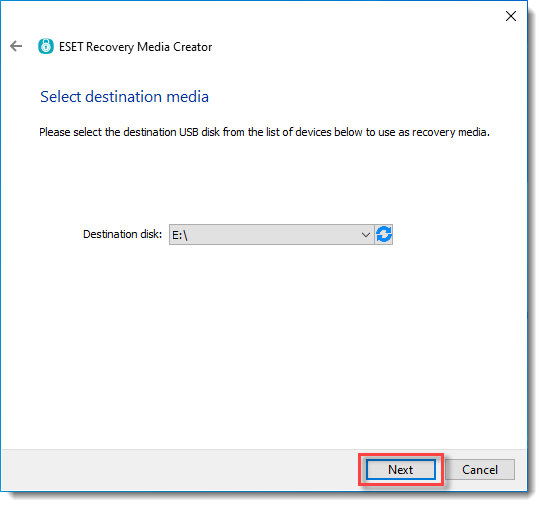
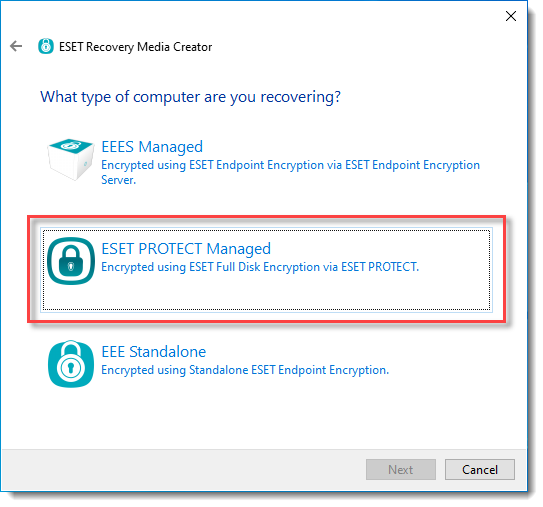
6.For What type of computer are you recovering, select ESET PROTECT Managed.
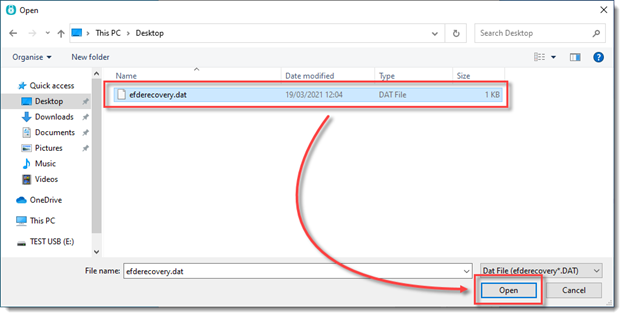
7.In the next step click Browse, and locate your efderecovery.dat file generated earlier.
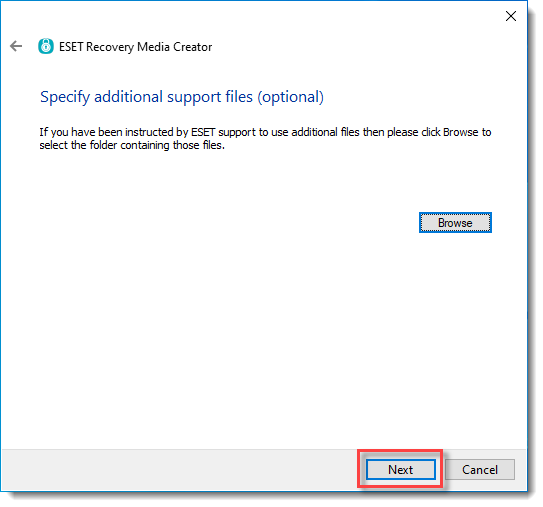
8.Optional: Select additional support files only if instructed to by ESET technical support.
9.Click Next.
10. Review your settings and click Start to create the recovery disk.
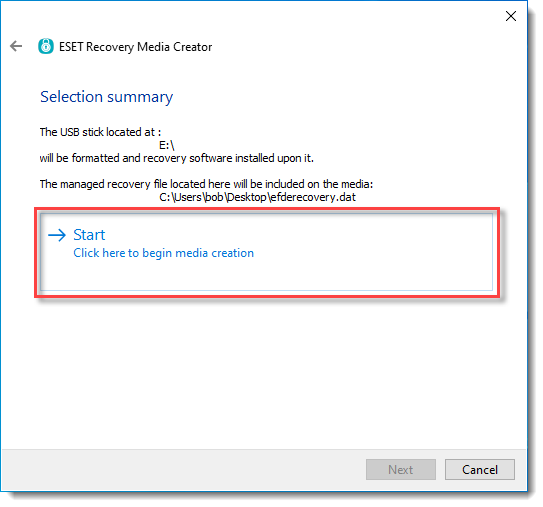
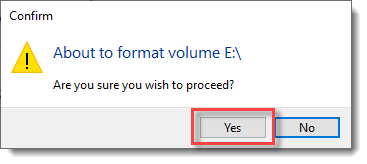
11. Your operating system will prompt you with a Format confirmation dialog. Select Yes to continue.
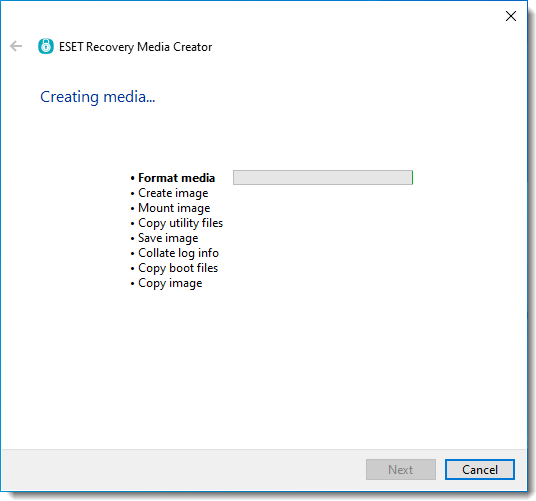
12. Wait for the utility to complete the creation process.
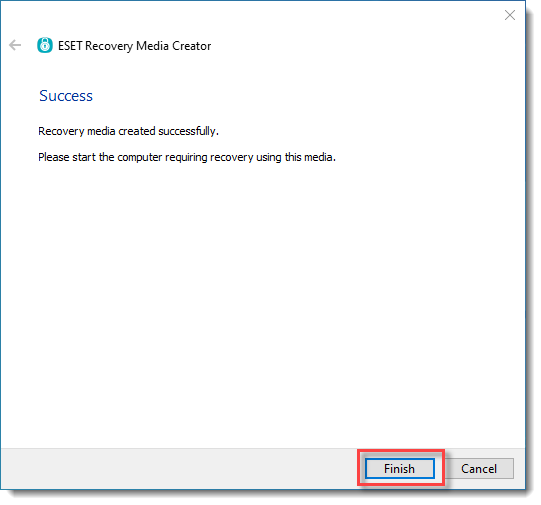
13. After the recovery drive creation process is completed, click Finish.
14. Safely remove the newly created recovery USB drive.
Decrypting of the encrypted workstation.
1.Insert the Recovery USB drive into the target workstation.
2.Open the Boot manager on the target workstation and select USB as the first boot option.
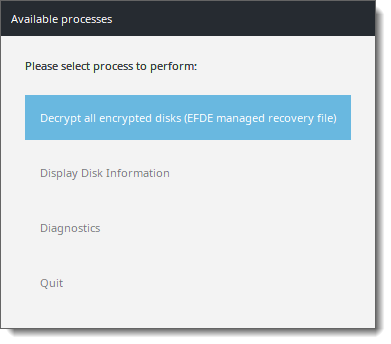
3.Select Decrypt all encrypted disks (EFDE managed recovery file).
4.Fill in the recovery password specified earlier in the management console.

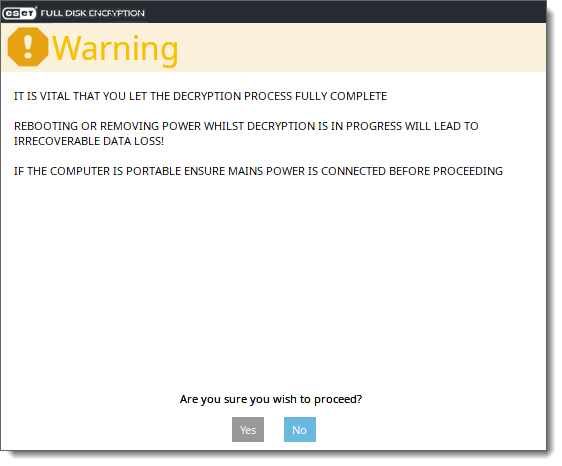
5.A warning screen will be displayed. Review the information on the warning screen and click Yes to continue.
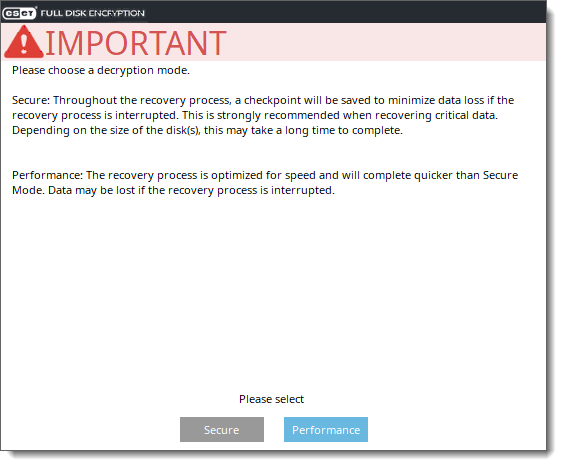
6.Choose the Decryption mode based on your preferences to initiate the decryption process.
|

|
Ensure that you let the process complete and DO NOT shut down or power the machine off.
|
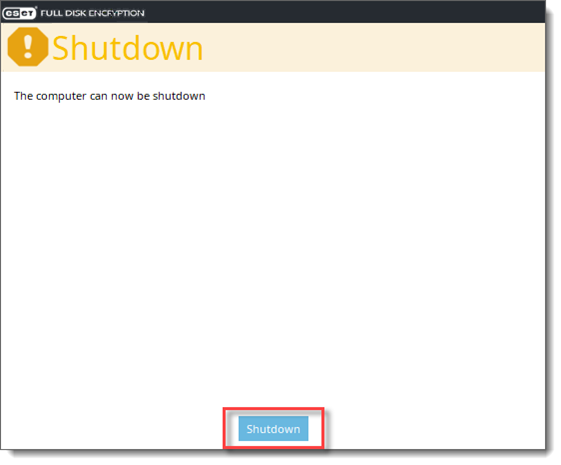
7.When the workstation has been decrypted, press Ok and then Shutdown.
8. The next time the workstation is booted, the EFDE pre-boot login screen will not be displayed, and Windows should boot normally. |
|
1.Insert an empty USB drive into your computer.
2.Download the Encryption recovery tool for macOS.
3.Unzip the content of the file downloaded in the previous step on the USB drive.
4.Copy the efderecovery.dat file onto the USB drive.
|

|
You need the user password of the targeted macOS computer to complete the process successfully. The process cannot finish without the password.
|
5.Insert the USB drive to the macOS computer undergoing the recovery and initialize the macOS Recovery mode (press CMD+R).
6.You will need to type the user password to access the macOS Utilities, click Utilities > Terminal.
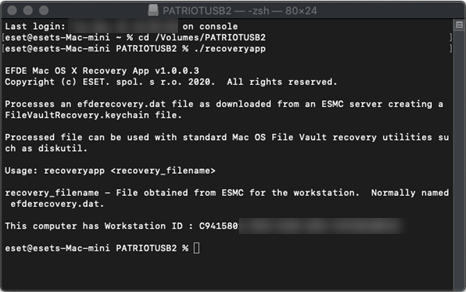
7.In the console, navigate to the USB drive and generate the FileVaultRecovery.keychain file by running the following command ./recoveryapp efderecovery.dat .
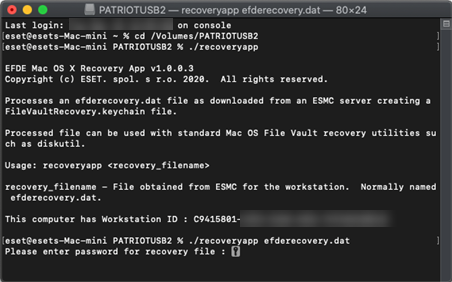
8.Type the password that was set during the creation of the efderecovery.dat file in your management console.
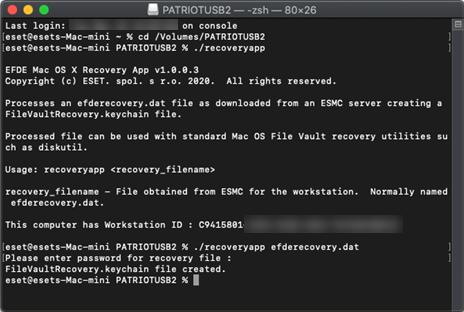
9.After successfully creating the FileVaultRecovery.keychain, you can continue to the disk decryption.
10. Next you need to identify the encrypted disk. To do this, navigate to the root directory and execute the command diskutil apfs list in the terminal to see the list of the APFS volume disks.
11. In the displayed list, look for the volume with "Macintosh HD" and verify that under Filevault: Yes (Locked).
APFS Volume Disk (Role):
|
disk2s1 (Data)
|
Name:
|
macintosh HD - Data (Case-insensitive)
|
Mount point:
|
Not Mounted
|
Capacity Consumed:
|
5490372608 B (5.5 GB)
|
FileVault:
|
Yes (Locked)
|
12. Note of the volume ID name (for example: disk2s1).
13. You need to unlock the FileVaultRecovery.keychain with the following command:
security unlock-keychain /path/to/FileVaultRecovery.keychain
for example: security unlock-keychain /Volumes/PatriotUSB/FileVaultRecovery.keychain
14. Next you need to unlock the volume before you continue with the decryption process. To do so, execute the following command:
diskutil apfs unlockVolume /dev/disk2s1 where you replace the "disk2s1" with the volume ID name from the previous step. User passphrase is required to continue with the process.
15. At this point, the drive has been unlocked, and you can continue with the decryption of the disk using the recovery key you generated with the recoveryapp.
APFS Volume Disk (Role):
|
disk2s1 (Data)
|
Name:
|
macintosh HD - Data (Case-insensitive)
|
Mount point:
|
/Volumes/macintosh HD - Data
|
Capacity Consumed:
|
9967968256 B (10.0 GB)
|
FileVault:
|
Yes (Unlocked)
|
16. To continue the disk decryption, execute the following command:
diskutil apfs decryptVolume /dev/volume id –recoverykeychain /path/to/filename.keychain
for example: diskutil apfs decryptVolume /dev/disk2s1 –recoverykeychain /Volumes/PatriotUSB/FileVaultRecovery.keychain
17. You can check the status of the decryption process with the following command: diskutil apfs list
APFS Volume Disk (Role):
|
disk2s1 (Data)
|
Name:
|
macintosh HD - Data (Case-insensitive)
|
Mount point:
|
/Volumes/macintosh HD - Data
|
Capacity Consumed:
|
9983823872 B (10.0 GB)
|
FileVault:
|
36.0% (Unlocked)
|
18. After the process is successfully finished, exit the terminal and restart the computer. |
![]() > Restore access > Recovery data.
> Restore access > Recovery data.


