Migration process for Microsoft SQL Server
This migration process is the same for Microsof SQL Server and Microsoft SQL Server Express.
For additional information, see the following Microsoft Knowledge Base article: https://msdn.microsoft.com/en-us/library/ms189624.aspx.
Prerequisites
•Source and target SQL Server instances must be installed. They may be hosted on different machines.
•The target SQL Server instance must have at least the same version as the source instance. Downgrade is not supported!
•SQL Server Management Studio must be installed. If the SQL Server instances are on different machines, it must be present on both.
Migration using SQL Server Management Studio
1.Stop the ESET PROTECT Server Service.
Do not start ESET PROTECT Server before you complete all the steps below. |
2.Log into the source SQL Server instance via SQL Server Management Studio.
3.Create a full database backup of the database to be migrated. We recommend that you specify a new backup set name. Otherwise if the backup set has already been used, the new backup will be appended to it, which will result in an unnecessarily large backup file.
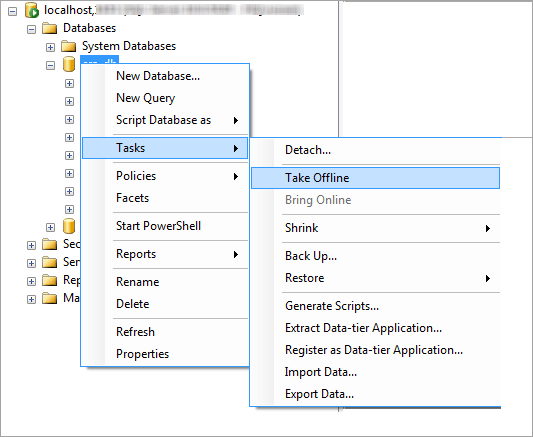
4.Take the source database offline, select Tasks > Take Offline.
5.Copy the backup (.bak) file that you created in step 3 to a location that is accessible from the target SQL Server instance. You may need to edit access rights for the database backup file.
6.Log into the target SQL Server instance with SQL Server Management Studio.
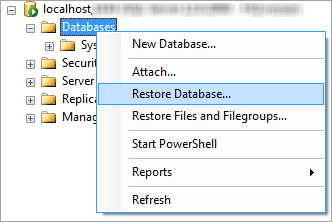
7.Restore your database on the target SQL Server instance.
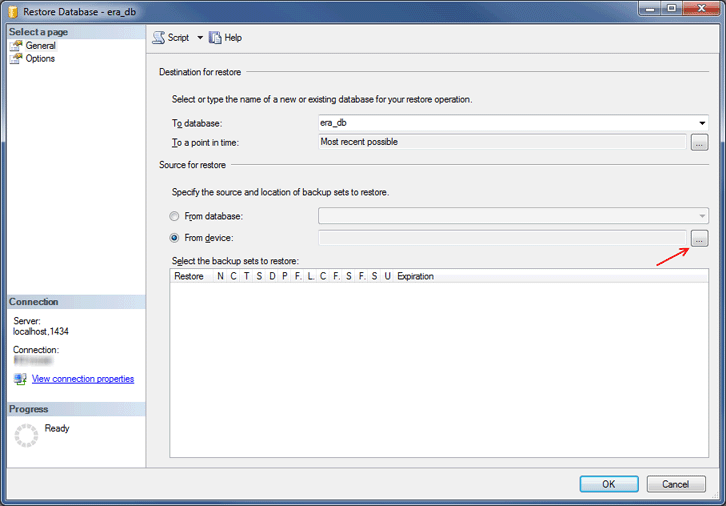
8.Type a name for your new database into the To database field. You can use the same name as your old database if your prefer.
9.Select From device under Specify the source and location of backup sets to restore and then click … .
10. Click Add, navigate to your backup file and then open it.
11. Select the most recent possible backup to restore (the backup set may contain multiple backups).
12. Click the Options page of the restore wizard. Optionally, select Overwrite existing database and ensure that the restore locations for the database (.mdf) and for the log (.ldf) are correct. Leaving the default values unchanged will use the paths from your source SQL server, so please check these values.
If you are unsure where the DB files are stored on the target SQL Server instance, right-click an existing database, select properties and click the Files tab. The directory where the database is stored is displayed in the Path column of the table shown below.
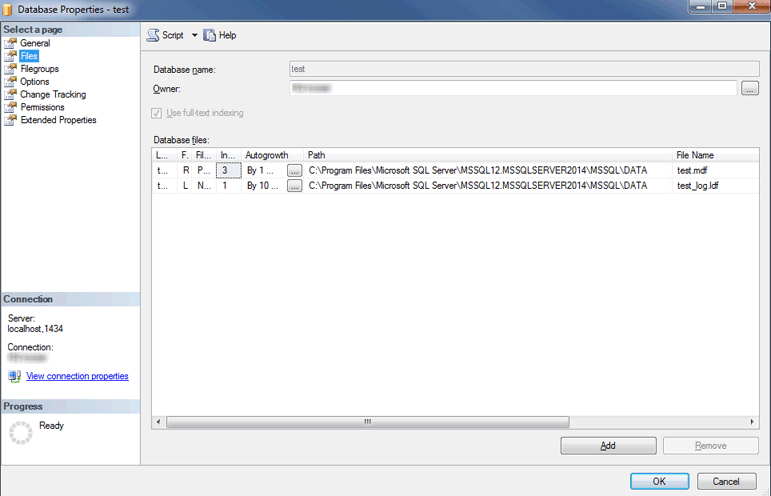
13. Click OK in the restore wizard window.
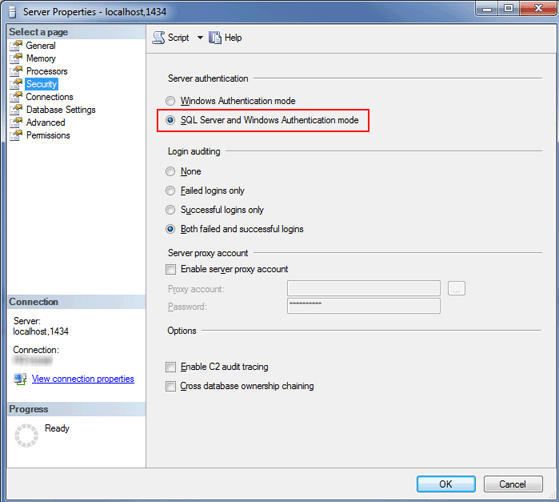
14. Ensure that the new database server has SQL Server Authentication enabled. Right-click the server and click Properties. Navigate to Security and verify that SQL Server and Windows Authentication mode is selected.
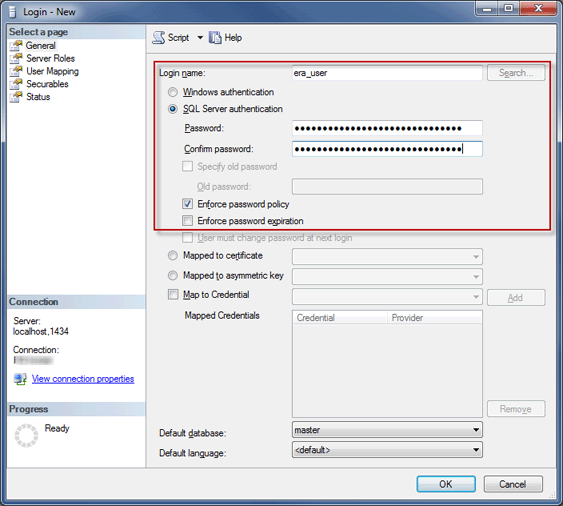
15. Create a new SQL Server login (for ESET PROTECT Server) in the target SQL Server with SQL Server authentication and map the login to a user in the restored database.
•Do not enforce password expiration!
•Recommended characters for usernames: Lower case ASCII letters, numbers and character underscore "_"
•Recommended characters for passwords: ASCII characters ONLY, including upper case and lower case ASCII letters, numbers, spaces, special characters
•Do not use non-ASCII characters, curly braces {} or @
•Please note that if you do not follow the character recommendations above, you may have database connectivity problems or you will need to escape the special characters in the later steps during database connection string modification. Character escaping rules are not included in this document.
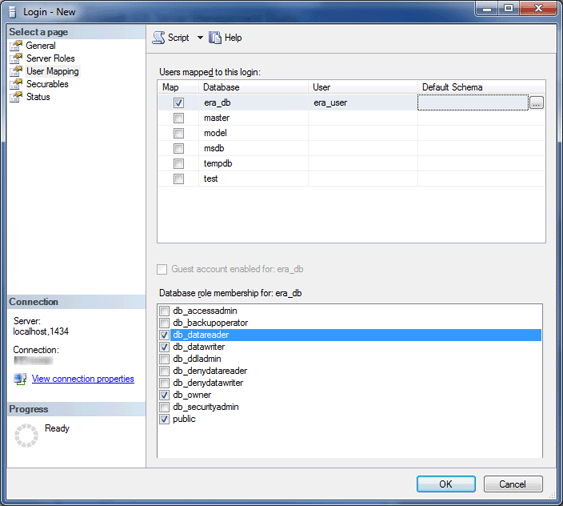
16. Map the login to a user in the target database. In the user mappings tab, ensure that the database user has the roles: db_datareader, db_datawriter, db_owner.
17. To enable the latest database server features, change the restored database Compatibility level to the latest one. Right-click the new database and open the database Properties.
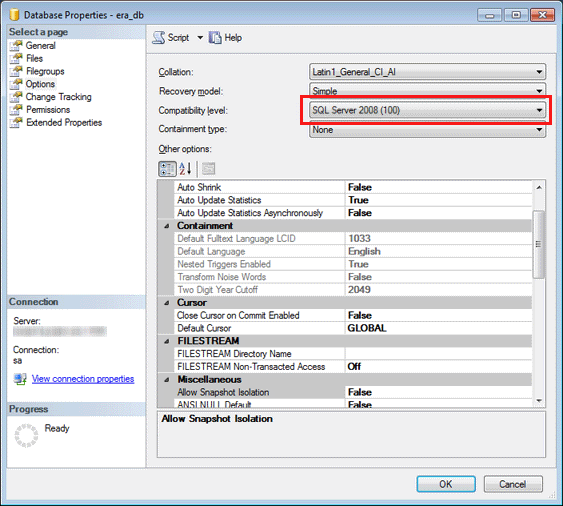
SQL Server Management Studio is unable to define compatibility levels later than that of the version in use. For example SQL Server Management Studio 2014 is unable to set compatibility level for SQL Server 2019. |
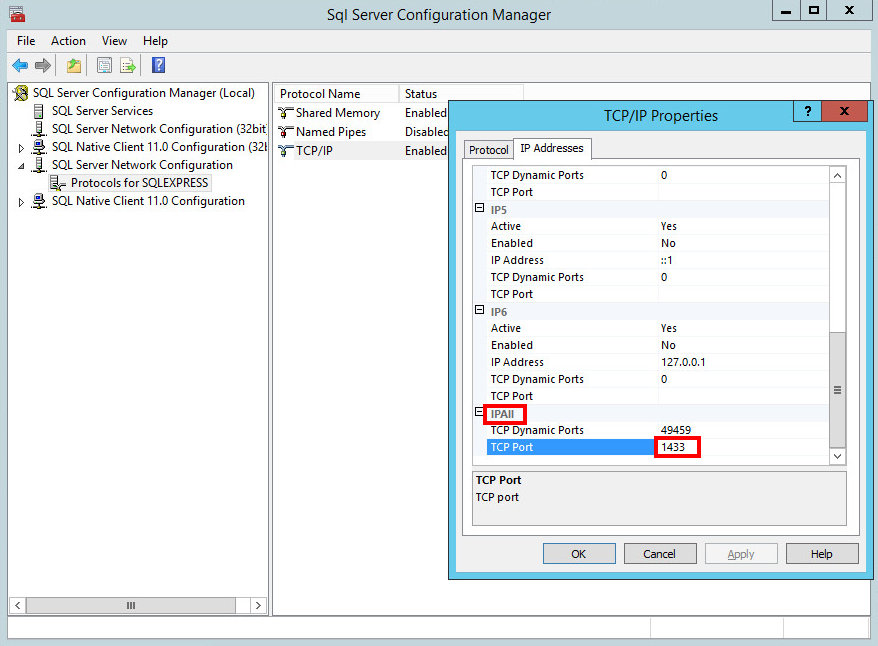
18. Ensure the TCP/IP connection protocol is enabled for "db_instance_name"(e.g SQLEXPRESS or MSSQLSERVER) and the TCP/IP port is set to 1433. To do so, open Sql Server Configuration Manager, navigate to SQL Server Network Configuration > Protocols for db_instance_name, right-click TCP/IP and select Enabled. Double-click TCP/IP, switch to the Protocols tab, scroll down to IPAll and in the TCP Port field, type 1433. Click OK and restart the SQL Server service.
