ESET Server Security installation steps
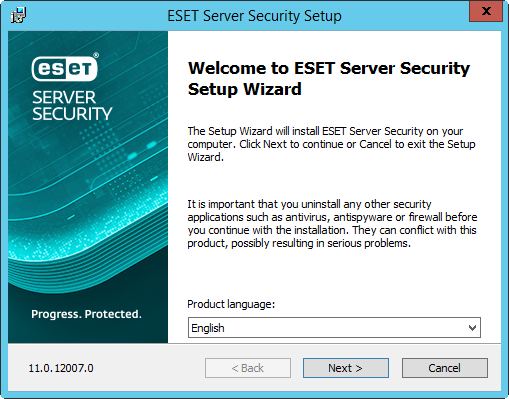
This is a typical main program window Installation Wizard. Double-click the .msi package and follow the steps to install ESET Server Security:
1.Click Next to continue or Cancel if you want to quit the installation.
2.The Installation Wizard runs in a language specified as the Home location of a Region > Location setting of your operating system (or the Current location of a Region and Language > Location setting in earlier systems). Use the drop-down menu to select your preferred Product language. The selected language for ESET Server Security is independent of the language you see in the Installation Wizard.

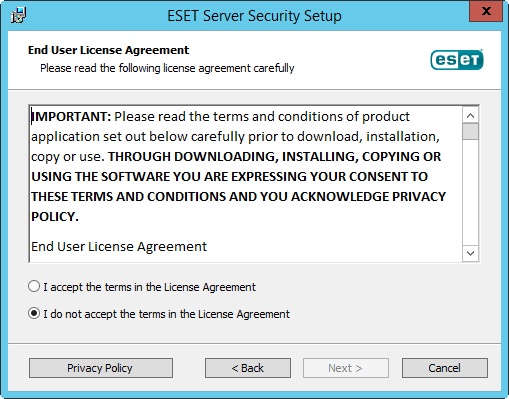
3.Click Next, and the End User License Agreement is displayed. After acknowledging your acceptance of the End User License Agreement and Privacy Policy, click Next.

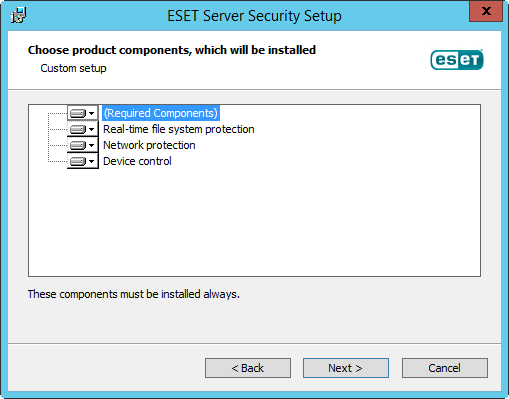
4.Choose one of the available installation types (availability depends on your operating system):
Complete
This installs all ESET Server Security features.
Installer contains only essential modules; all other modules are downloaded during the initial module update after the product activation. |
Core
This installation type is intended for Windows Server Core editions. Installation steps are the same as a complete installation, but only core features and the command line user interface are installed.
Although core installation is mainly for use on Windows Server Core, you can still install it on regular Windows Servers if you prefer. ESET security products installed using core installation do not have a main program window. This means that you can only use the command line user interface when working with ESET Server Security. See the Command line installation section for more detailed information and other special parameters.
To execute Core installation via command line, use the following sample command: msiexec /qn /i efsw_nt64.msi ADDLOCAL=_Base |
Custom
Custom installation lets you choose which features of ESET Server Security will be installed on your system. A list of product modules and features displays before the installation starts. It is useful when you want to customize ESET Server Security with only the necessary components.

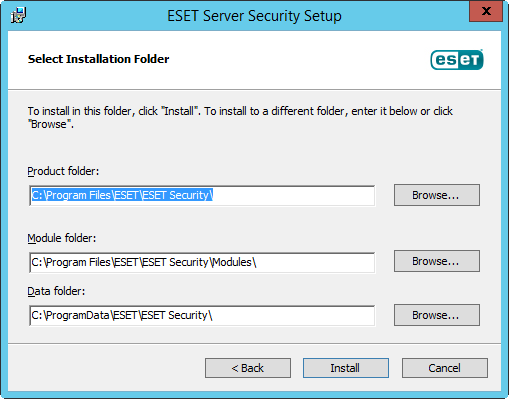
5.You are prompted to select the location where you will install ESET Server Security. By default, the program installs in C:\Program Files\ESET\ESET Server Security. Click Browse to change this location (not recommended).

6.Click Install to begin the installation. After the installation, you are prompted to activate ESET Server Security.
7.If your ESET Server Security does not have the firewall component (limited by the license or custom installation), ensure you configure the Trusted zone to be used by the RDP access restriction feature:
If you performed an attended fresh installation locally on the server, the Limit incoming RDP connections to is set to Trusted zone by default. If you performed an installation remotely over RDP, the Limit incoming RDP connections to is set to All networks by default. This setting is meant to be temporary and to prevent your RDP connection from being cut off until you configure the Trusted zone. In both cases, we recommend configuring the Trusted zone to include networks, IP addresses, or IP address ranges from which you specifically allow RDP connections to the server. Go to Network access protection > IP sets and edit Trusted zone IP set. After configuring the Trusted zone IP set to your needs, change the Limit incoming RDP connections to use the Trusted zone from the previous All networks setting to secure your server and take advantage of the RDP access restriction feature while having the RDP fully functioning within your company networks. If you are using the firewall component, Limit incoming RDP connections to setting is not present. Configure the firewall to secure RDP according to your requirements. |