Enable ESET LiveGuard Advanced together with the ESET security product installation
The ESET PROTECT On-Prem or ESET PROTECT installation task can install the ESET security product and activate and enable ESET LiveGuard Advanced in one action.
The activation process ensures that selected devices are assigned to the correct license from your account. When activating computers where the ESET security product is already activated and running, use the simplified activation process.
Prerequisites
ESET PROTECT On-Prem users
•ESET LiveGuard Advanced license imported in ESET PROTECT On-Prem
•Client machines with ESET Management Agent version not earlier than the version of the Server component
ESET PROTECT users
• The ESET LiveGuard Advanced license (or a protection tier containing ESET LiveGuard Advanced) must be imported in your ESET business cloud account (ESET PROTECT Hub / ESET Business Account / ESET MSP Administrator).
•The latest ESET Management Agent version is installed on all client computers.
Activation task
1.Log in to the ESET PROTECT Web Console.
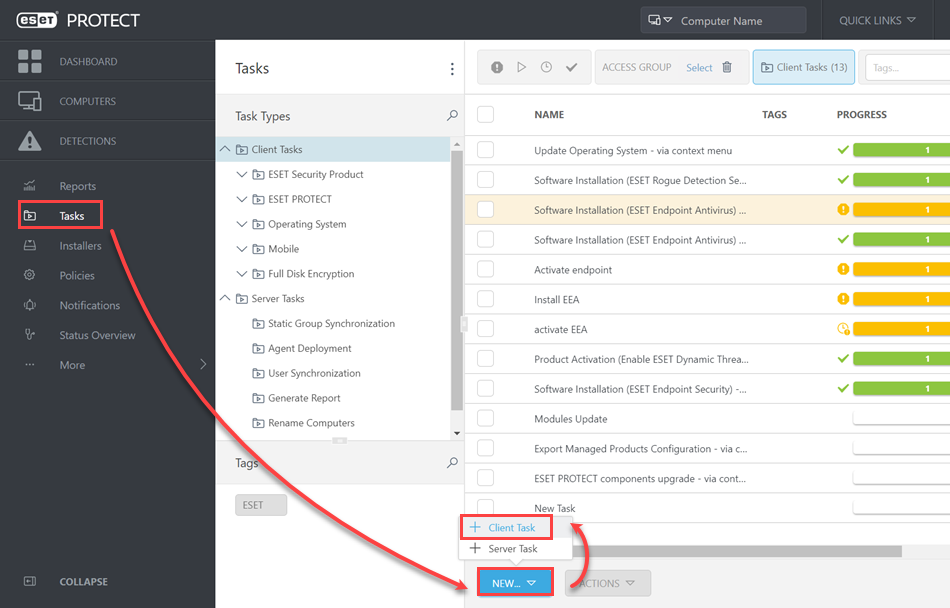
2.Click Tasks > New or Add > Client Task.

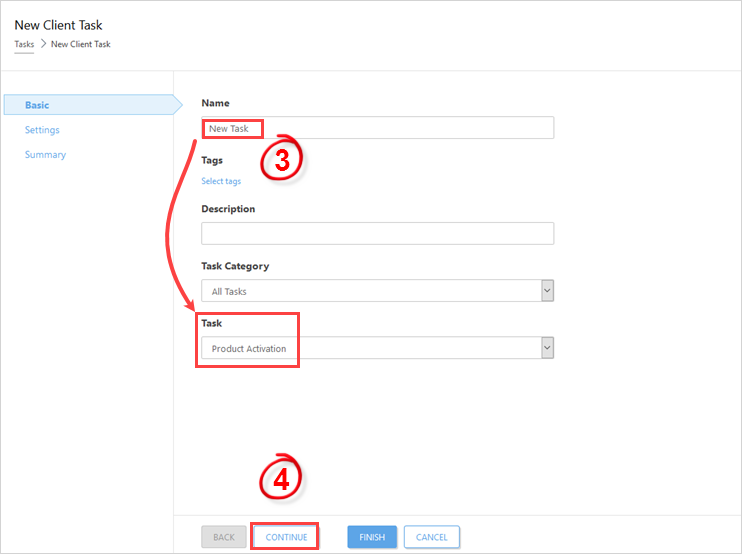
3.Type a name for your activation task and select Product Activation as the Task type.
4.Click Continue.

5.Select the operating system and click Select under Choose package from repository to select the ESET security product where you want to activate ESET LiveGuard Advanced.
6.Select the Activate ESET LiveGuard check box.

7.Click Summary for an overview of the task settings.
8.If the task is created correctly, click Finish.
9.After you create the task, you need to schedule it. Click Create Trigger in the alert window.
10. Type a Trigger Description and click Continue.
11. Click Add Computers or Add Groups to add machines to be activated. Ensure that the clients you select have products that are compatible with the license you selected in step 6. Click OK and then click Continue.
12. You can select a Trigger type. We recommend using the default option: As Soon as Possible, which runs the task immediately after the trigger. If you select another setting, Advanced Settings—Throttling becomes available.
13. Click Finish to schedule the activation task.
After you complete the activation, the license becomes visible in the machine details. In the Web Console, click Computers, select a machine and then click ![]() Details or View details > Details > Products and Licenses (ESET PROTECT On-Prem) or Platform Modules (ESET PROTECT).
Details or View details > Details > Products and Licenses (ESET PROTECT On-Prem) or Platform Modules (ESET PROTECT).