ESET Inspect and ESET MDR activation
Using ESET DEM plugin for N-able N-sight RMM you can install and activate ESET Inspect with the ESET MDR on your managed devices.
Prerequisites ESET MSP Administrator 2 account with the purchased ESET MDR License. ESET PROTECT with ESET Inspect installed and activated. 1.Using the ESET PROTECT, create the ESET PROTECT All-in-one installer file with the ESET Inspect Connector. 2.Follow the steps below to on-board the ESET Inspect and activate the ESET MDR your managed devices |
On-Board ESET Inspect with ESET MDR
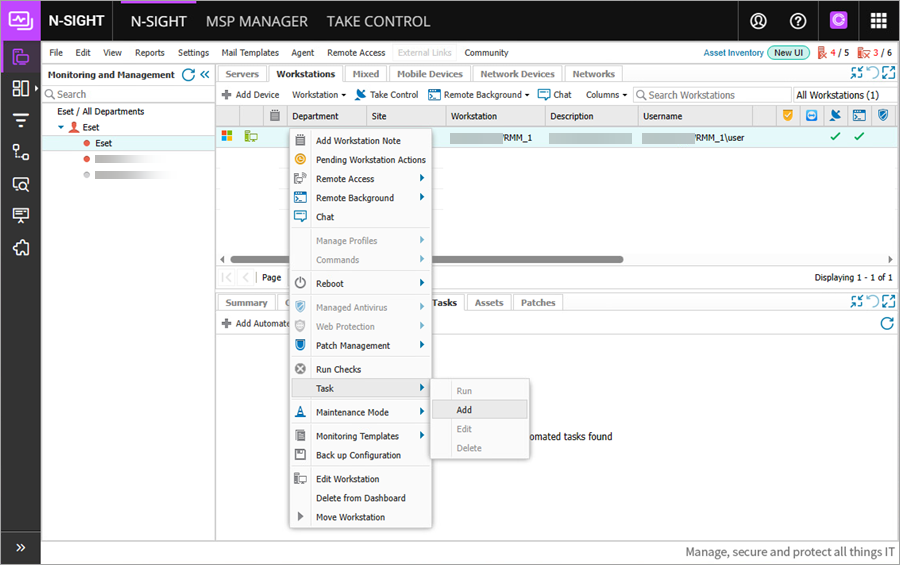
1.Select the applicable Windows, Mac or Linux computers in the Workstations tab.
Operating system-specific task You can apply a task only on computers running the specific operating system (Windows, Mac or Linux). |
2.Right-click the computer, and from the drop-down menu, select Task > Add.

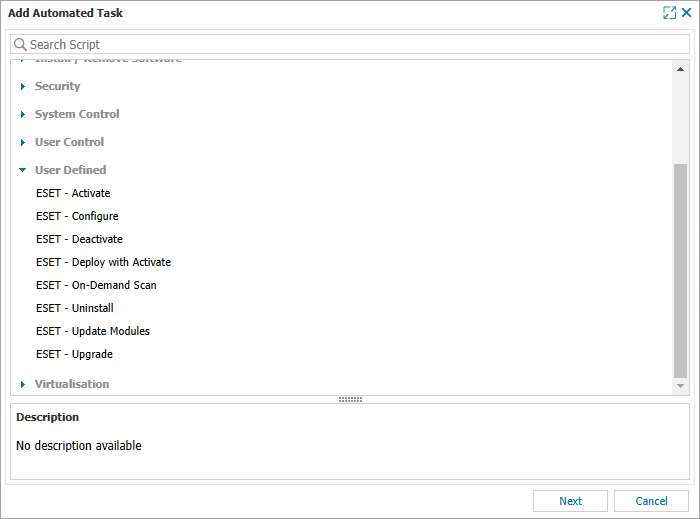
3.In the Add Automated Task window, scroll down to the User Defined section, select the ESET - Onboard Task. Click Next.

4.In the selected task, type the task Descriptive Name.
5.In the Script Parameters section, Setup Installer text field, type the download link, unc or local file path to your ESET PROTECT All-in-one installer file. Click Next.
6.Select the frequency method (for example, Manual). Click Next.
7.In the next window, Set maximum permitted execution time limit.
8.Click Finish.
Activate ESET MDR
Follow the instructions in the ESET MSP Administrator 2 Online Help guide to activate ESET MDR.