Schedule a job to scan an endpoint
To schedule a scan job:
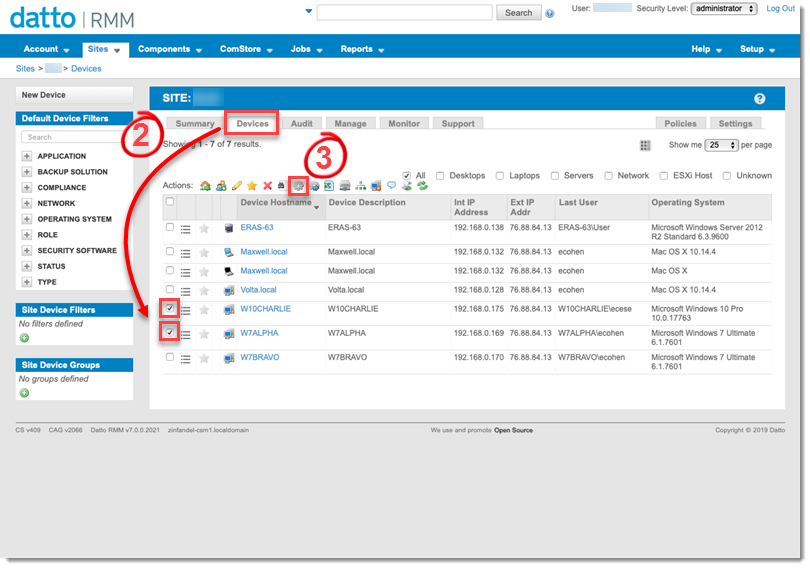
1.Click Sites and then select the applicable site.
2.Click Devices and select the appropriate device(s).
3.In the Actions menu, click the Schedule a job gear icon.
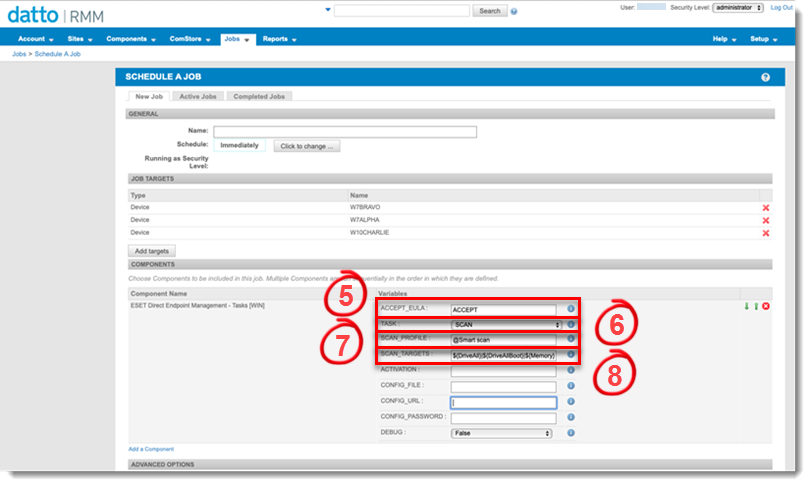
4.In the Components section, click Add a Component. Select the appropriate ESET Direct Endpoint Management - Tasks component and click Save.
|
Select an operating system component: Windows [WIN], macOS [MAC] or Linux [LINUX]. |
5.To accept the End-User License Agreement, in the ACCEPT_EULA field, type ACCEPT.
6.In the TASK field, type SCAN.
7.Select a SCAN_PROFILE.
|
If left blank, this field will default to @Smart Scan. |
8.Select SCAN_TARGETS. Windows users, can specify multiple targets using a pipe | delimiter, for example, ${DriveAll}|${Boot}|${Memory}. Mac and Linux users must provide applicable file paths separated by colons. The following variables are supported:
•${DriveRemovable}—All removable drives and devices
•${DriveRemovableBoot}—Boot sectors of all removable drives
•${DriveFixed}—Hard drives (HDD, SSD)
•${DriveFixedBoot}—Boot sectors of hard drives
•${DriveRemote}—Network drives
•${DriveAll}—All available drives
•${DriveAllBoot}—Boot sectors of all drives
•${DriveSystem}—System drives
•${Share}—Shared drives (only for server products)
•${Boot}—Main boot sector
•${Memory}—Operating memory
|
If left blank, this field will default to C: for Windows and / for Mac and Linux. |
9.Click Save.
The scan job has been scheduled.