Enroll students in ESET Cybersecurity Awareness Training
There are two options for a comprehensive primary training course:
Both options cover all the basic info that most people need to protect themselves and their organizations better and provide a certificate after passing the quiz, which satisfies insurance and compliance requirements:
Internet Safety
•Public Wi-Fi
•Staying safe while working remotely
•Artificial Intelligence (AI)
•Web-content filtering
•Safer browsing
•VPNs
Passwords
•Use strong passwords or passphrases
•Password hygiene
•Password management
•Two-Factor Authentication
Malware
•Types of malware
•Malware targets
•Mobile security
•How malware gets to you
Personalized threats
•Social engineering
•Insider threats
•Phishing
•Email attachments
•Spam
You can subscribe to additional courses for free by clicking School > Content Library/Store. Once you have subscribed, you can also assign students to these courses.
Change the school settings
1.Log in to ESET Cybersecurity Awareness Training Admin portal.
2.Click Administration > Settings > School Settings.
3.Select the applicable School Portal Login Type and then click Save.
•Username/Password: Users receive an email asking them to create a username and password for the training course.
•Token: Users receive an email with a direct link to the training course and a unique access token.
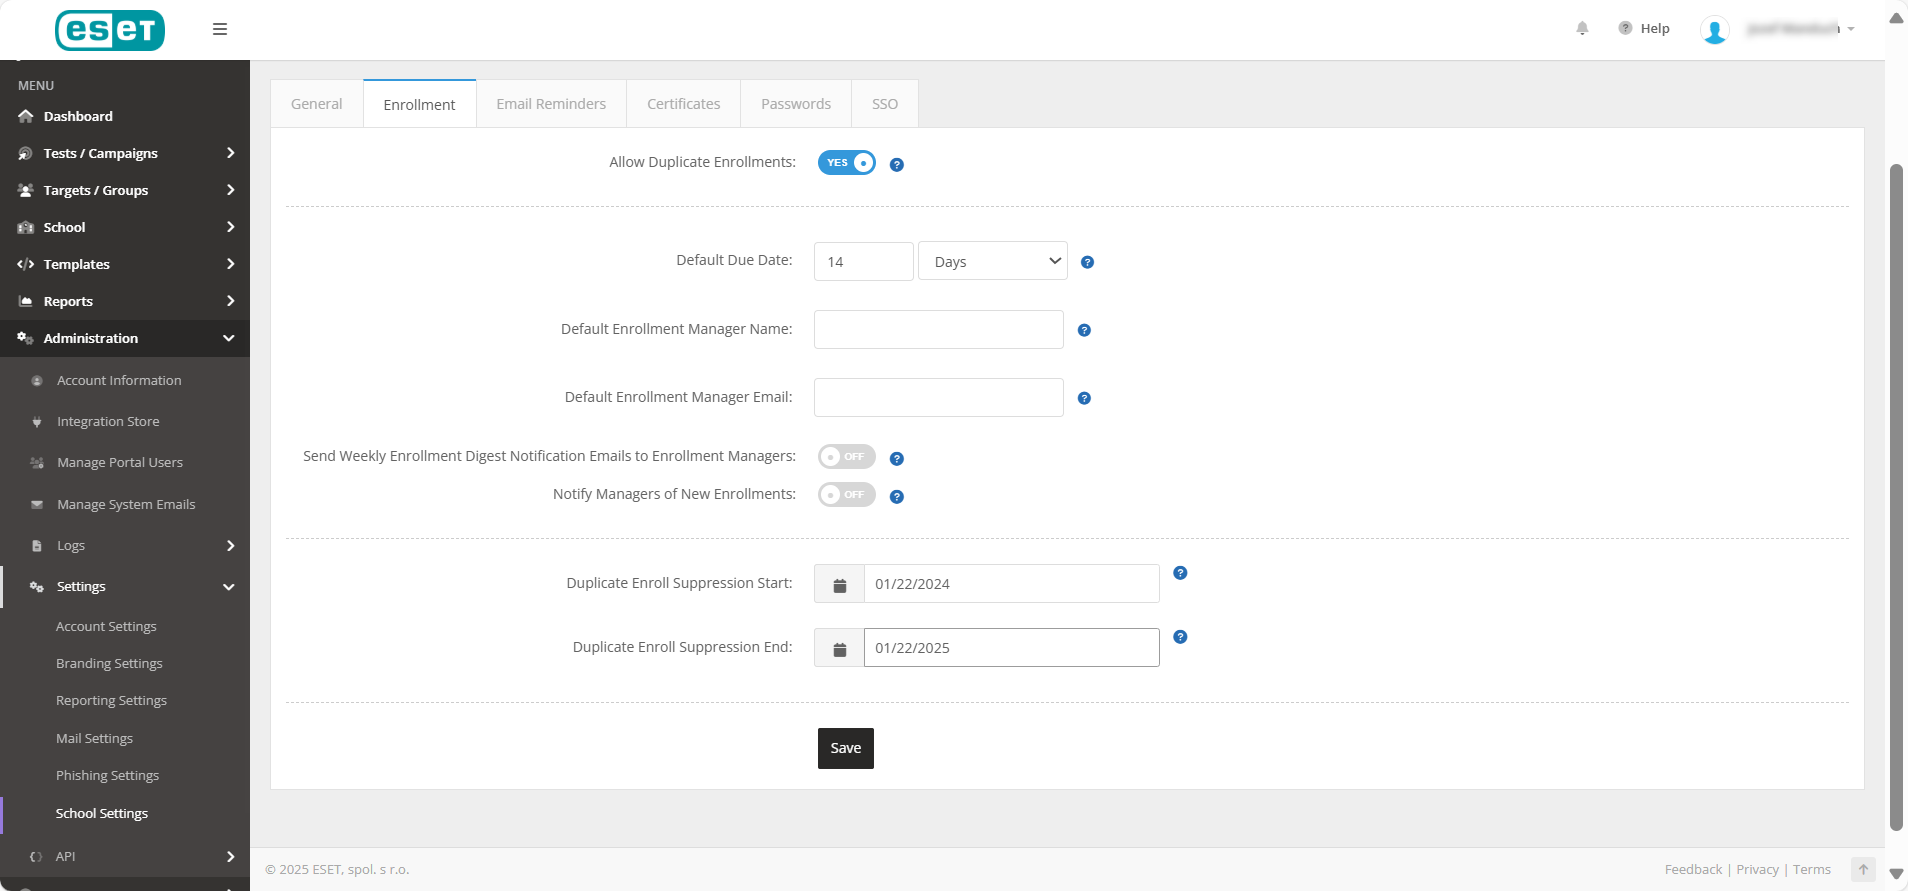
4.Click Enrollment.

5.Click the Allow Duplicate Enrollments toggle to enroll students multiple times into the same course. If disabled, duplicate enrollments will not be allowed on your account.
Auto-Enroll on failing a campaign overrides your account's Allow Duplicate Enrollments setting. If you have disabled the Allow Duplicate Enrollments setting, and then create a campaign that has auto-enroll, then targets that fail the campaign will still be enrolled in the course. |
6.If applicable, enter a Default Due Date.
7.To copy a manager on all enrollment emails, enter a Default Enrollment Manager Name and Default Enrollment Manager Email.
8.For now, ignore the Duplicate Enroll Suppression fields and click Save.
9.To send course reminder emails, click Email Reminder.
10.The setting When Should Enrollment Emails Send? allows you to specify the time that the new enrollment emails go out. There are three options to choose from:
•Immediately
•Hourly
•Daily
11.Click the Send Course Reminder Emails toggle to allow students to receive reminder emails about unfinished coursework.
12.Click the Send Reminder for Failed Enrollments toggle to cause reminder emails to be sent to students who have completed but failed an enrollment.
13.In the Reminder emails should send, specify when to send reminder emails (daily, weekly, monthly, yearly, or quarterly) and on what days of the week.
14.Clicking the pen icon beside the course_reminder_auto/course_past_due_auto emails will take you to the Manage System Emails page, where you can edit the content of these emails.
15.Click Save.
16.The Certificates screen lets you specify the new certificates' locale and page size.
17.The Passwords screen lets you specify users' requirements when creating/setting a new password.
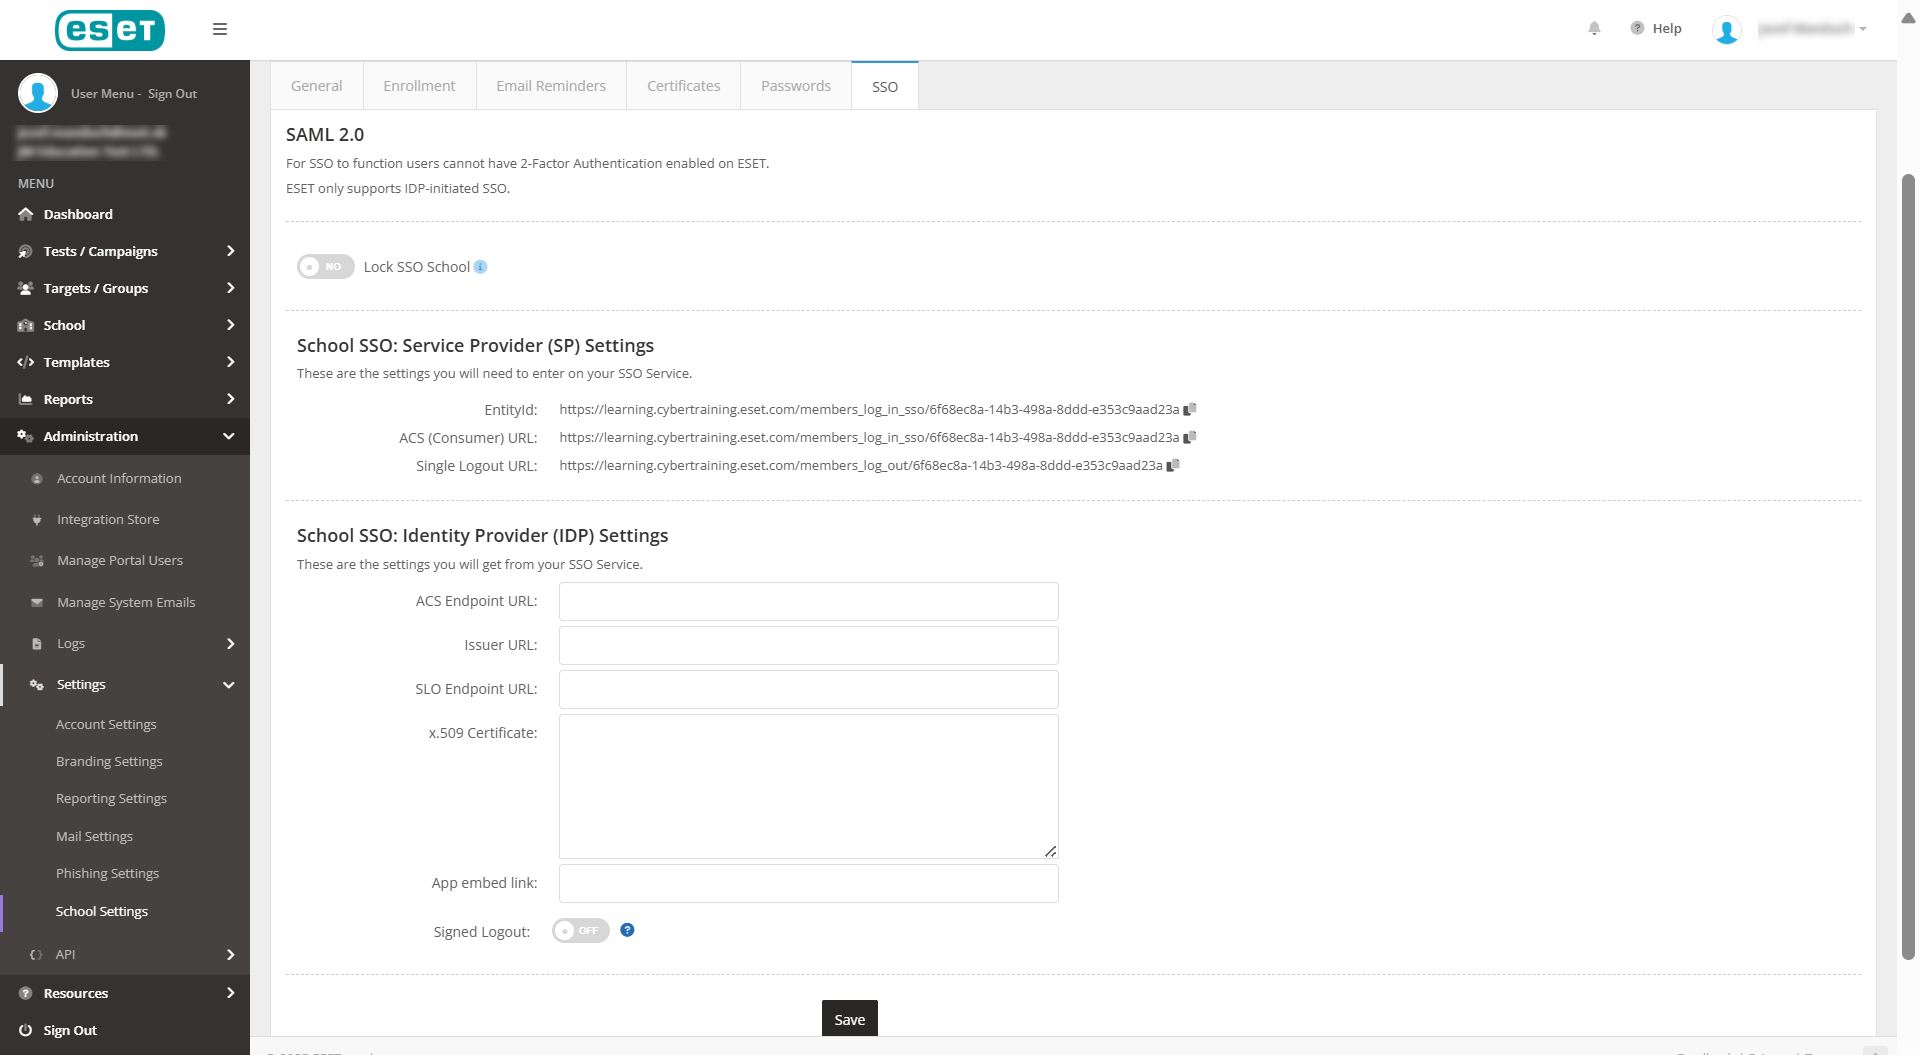
18.The SSO settings screen lets you configure single sign-on for your ESET account. You can choose from the available SSO solutions (OneLogin, Okta, PingOne, Azure, and others).
19.If Lock SSO School toggle enabled, it will remove students' ability to log in with a username and password. To log in, students must click on the app embed link in enrollment/reminder emails or log in through their SSO provider. If a custom school URL is set, the login page will not show, and instead, instructions will be given to log in through the SSO provider.

20.Click the Signed Logout toggle if your IDP requires signed logout requests.
Create Enrollment
1.Log in to ESET Cybersecurity Awareness Training Admin portal.
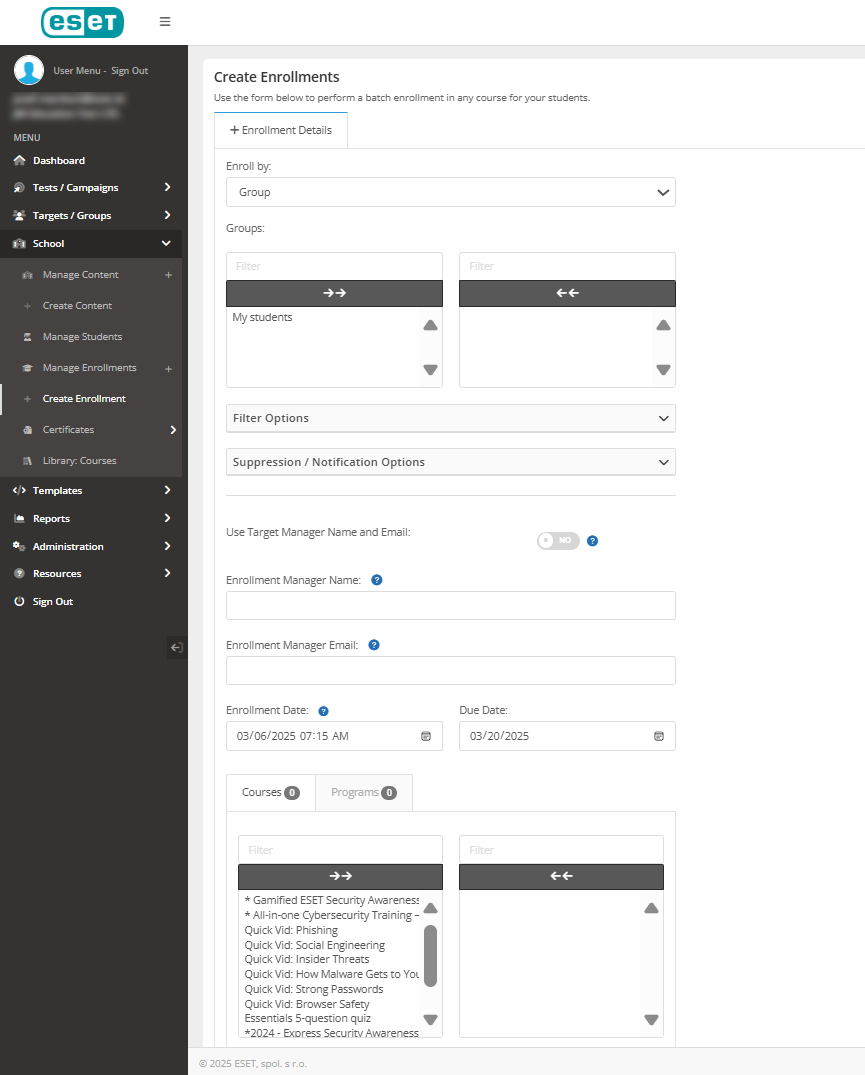
2.In the menu, click School > + Create Enrollment.

3.In the Enroll by drop-down menu, select Group.
4.In the Groups, select the applicable group name.
5.In the Suppression/Notification Options section, click the applicable toggle to communicate account creation (for first-time users) or send an enrollment notification.
6.In the Skip Duplicate Enrollments, select one of the three options:
•None—Students who have already been enrolled in a course will be enrolled again.
•All—This option will prevent enrollments for students from being duplicated.
•Date Range—If the student was enrolled in the course within the date range, they won't be enrolled again in that course.
7.Click the Use Target Manager Name/Email toggle and the target's manager will be used as the enrollment manager. If disabled, you can set a custom manager name/email for the enrollment(s) that will be created.
8.Select an Enrollment Date.
9.Select a training Due Date.
10.In the Courses/ Programs section, choose the applicable item to enroll.
11.To copy a manager on enrollment emails, enter an Enrollment Manager Name and Enrollment Manager Email, and then click Enroll.