Upgrade Apache Tomcat using the All-in-one installer (Windows)
Apache Tomcat is a mandatory component required to run the ESET PROTECT Web Console. Use this method to upgrade Apache Tomcat using the latest ESET PROTECT On-Prem 11.1 All-in-one installer. This is the recommended upgrade option if the existing Apache Tomcat installation was performed via the All-in-one installer. Alternatively, you can upgrade Apache Tomcat manually.
Before upgrading
Back up the following files:
C:\Program Files\Apache Software Foundation\[ Tomcat folder ]\.keystore
C:\Program Files\Apache Software Foundation\[ Tomcat folder ]\conf\server.xml
C:\Program Files\Apache Software Foundation\[ Tomcat folder ]\webapps\era\WEB-INF\classes\sk\eset\era\g2webconsole\server\modules\config\EraWebServerConfig.properties
If you are using a custom SSL certificate store in the Tomcat folder, also back up that certificate.
Apache Tomcat and Web Console upgrade limitations •If a custom version of Apache Tomcat is installed (manual installation of the Tomcat service), the future ESET PROTECT Web Console upgrade via the All-in-one installer or Components Upgrade Task is not supported. •Apache Tomcat upgrade will delete the era folder located in C:\Program Files\Apache Software Foundation\[ Tomcat folder ]\webapps\. If you use the era folder to store additional data, ensure to back up the data before upgrading. •If C:\Program Files\Apache Software Foundation\[ Tomcat folder ]\webapps\ contains additional data (other than the era and ROOT folders), the Apache Tomcat upgrade will not take place and only the Web Console will be upgraded. •The Web Console and Apache Tomcat upgrade clears the Offline help files. If you used Offline help with an earlier ESET PROTECT On-Prem version, re-create it for ESET PROTECT On-Prem 11.1 after upgrading to ensure that you have the latest Offline help matching your ESET PROTECT On-Prem version. |
Upgrade procedure
1.Download the ESET PROTECT All-in-one installer from the ESET website and unzip the downloaded file.
2.If you want to install the latest version of Apache Tomcat and the All-in-one installer contains an earlier version of Apache Tomcat (this step is optional - skip to step 4 if you do not need the latest version of Apache Tomcat):
a.Open the x64 folder and navigate to the installers folder.
b.Remove the apache-tomcat-9.0.x-windows-x64.zip file located in the installers folder.
c.Download the Apache Tomcat 9 64-bit Windows zip package.
d.Move the downloaded zip package to the installers folder.
3.To launch the All-in-one installer, double-click the Setup.exe file and click Next on the Welcome screen.
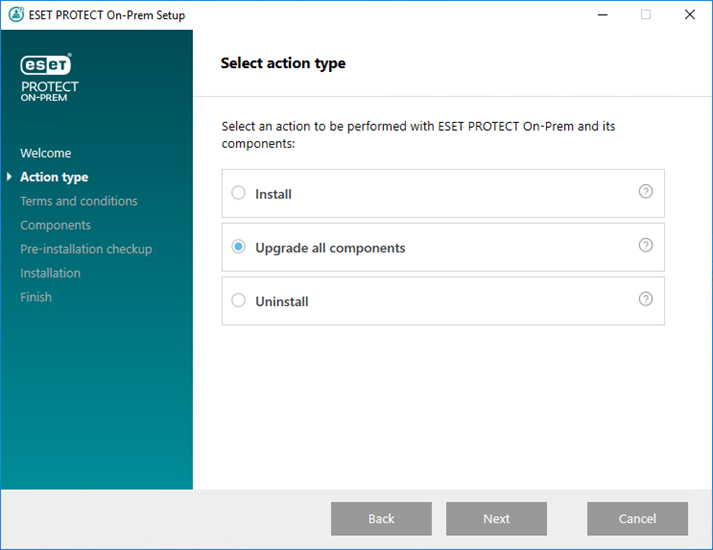
4.Select Upgrade all components and click Next.

5.After accepting the EULA, click Next.
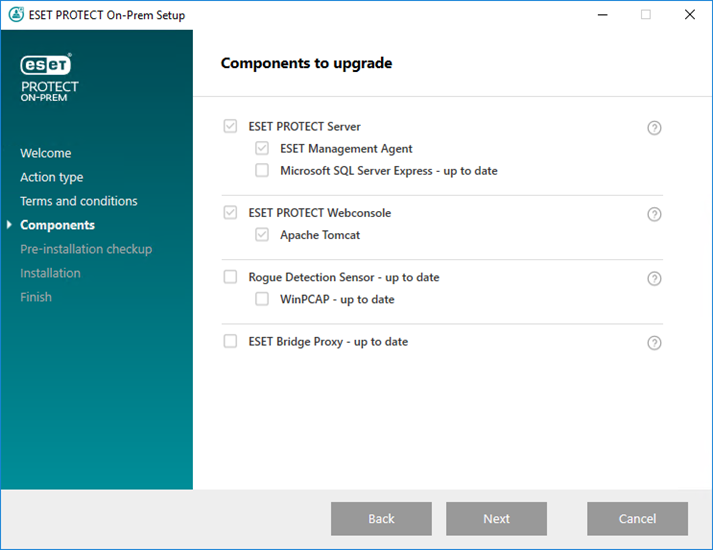
6.The All-in-one installer automatically detects if the upgrade is available: there are check boxes next to the upgradable ESET PROTECT components. Click Next.

7.Select a Java installation on the computer. Apache Tomcat requires 64-bit Java/OpenJDK. If your system has multiple Java versions installed, uninstall earlier Java versions and keep only the latest supported Java version.
Starting January 2019, Oracle JAVA SE 8 public updates for business, commercial or production use require a commercial license. If you do not purchase a JAVA SE subscription, you can transition to a no-cost alternative. See the supported versions of JDK. |
8.Click Upgrade to complete the upgrade and then click Finish.
9. If you installed the Web Console on a different computer than the ESET PROTECT Server:
a. Stop the Apache Tomcat service: Navigate to Start > Services > right-click the Apache Tomcat service and select Stop.
b.Restore the EraWebServerConfig.properties file from step 1 to its original location.
c. Start the Apache Tomcat service: Navigate to Start > Services > right-click the Apache Tomcat service and select Start.
10. Connect to the ESET PROTECT Web Console and verify that the Web console loads correctly.
See the additional Web Console configuration for enterprise solutions or low-performance systems. |
Troubleshooting
If the Apache Tomcat upgrade fails, uninstall Apache Tomcat and then install it again and apply the configuration from step 1.