Custom certificates with ESET PROTECT On-Prem
If you have your own PKI (public key infrastructure) and want ESET PROTECT On-Prem to use your custom certificates for communication between components, see the example below. This example is performed on Windows Server 2025. Screen shots may vary on other versions of Windows, however the general procedure is unchanged.
Do not use certificates with a short validity (for example, Let's Encrypt that are valid for 90 days) to avoid the complex procedure of their frequent replacement. |
You can use OpenSSL to create new self-signed certificates. For more information, see our Knowledgebase article. |
Required server roles:
•Active Directory Domain Services.
•Active Directory Certificate Services with the Standalone Root CA installed.
1.Open Management Console and add Certificates Snap-ins:
a)Log on to the server as a member of the local Administrator group.
b)Run mmc.exe to open Management Console.
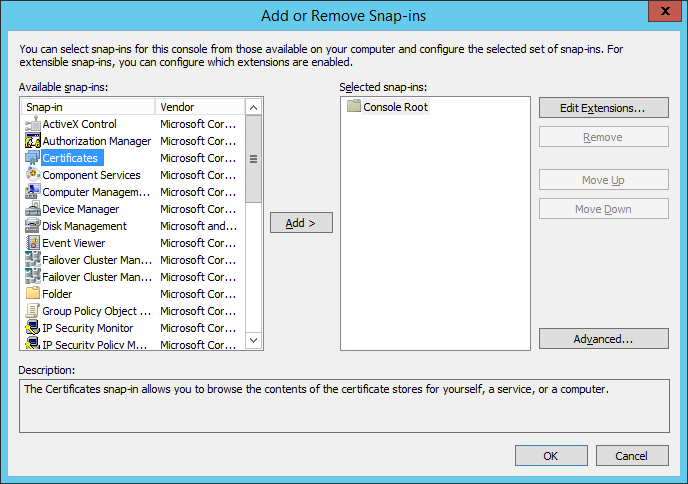
c)Click File and select Add/Remove Snap-in (or press CTRL+M).
d)Select Certificates in the left pane and click Add.
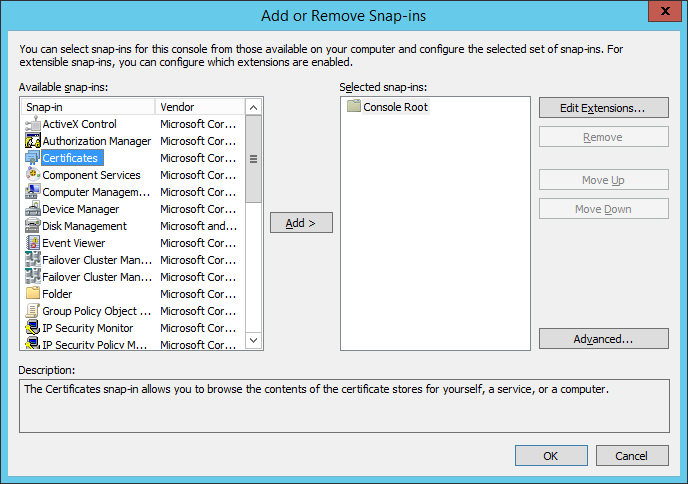
e)Select Computer Account and click Next.
f)Ensure Local Computer is selected (default) and click Finish.
g)Click OK.
2.Create a Custom Certificate Request:
a)Double-click Certificates (Local Computer) to expand it.
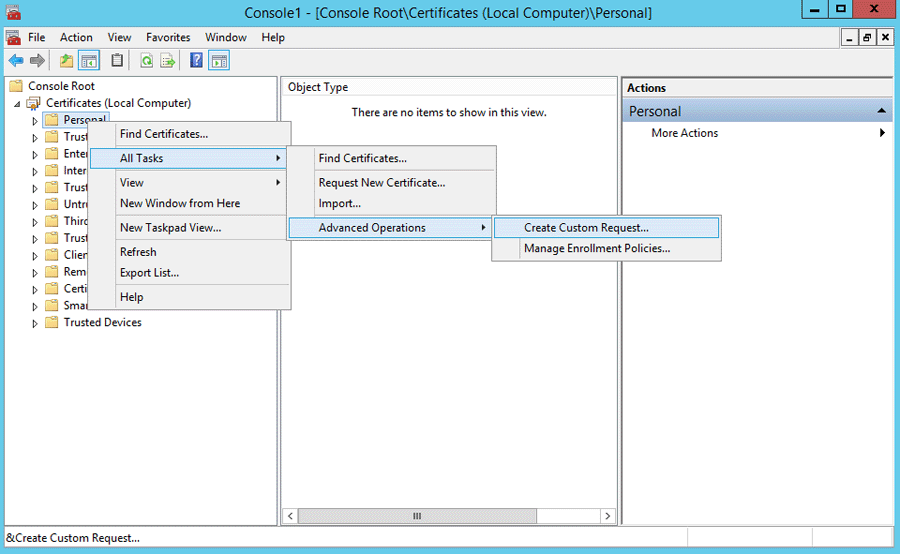
b)Right-click Personal and select All Tasks > Advanced Operations and choose Create Custom Request.
c)The Certificate Enrollment wizard window will open, click Next.
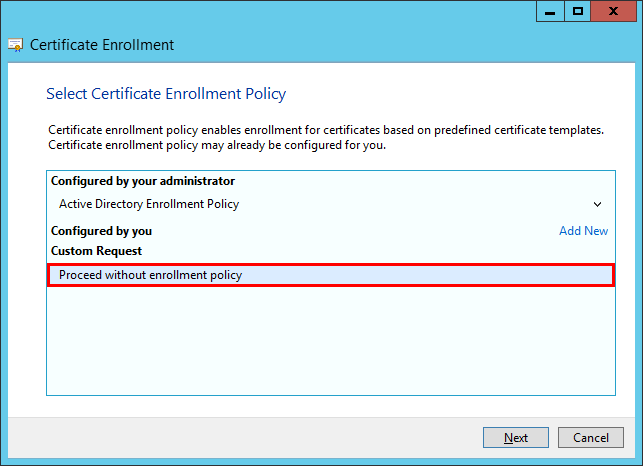
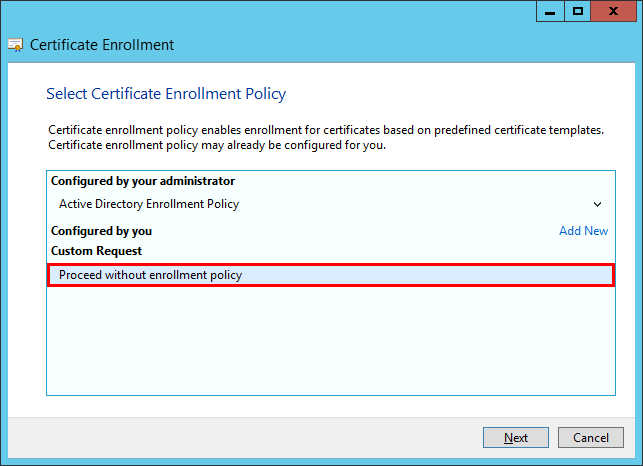
d)Select Proceed without enrollment policy and click Next to continue.
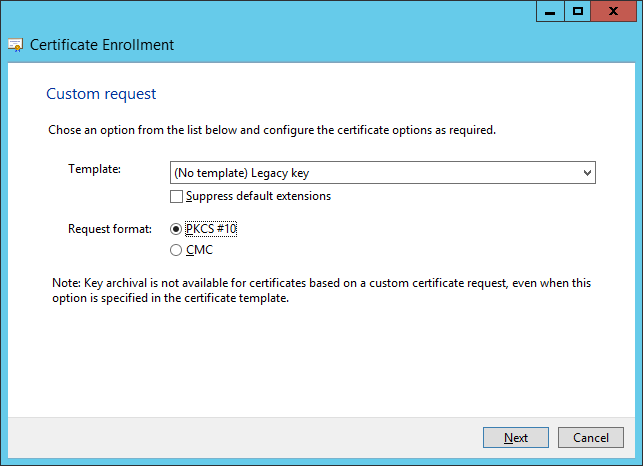
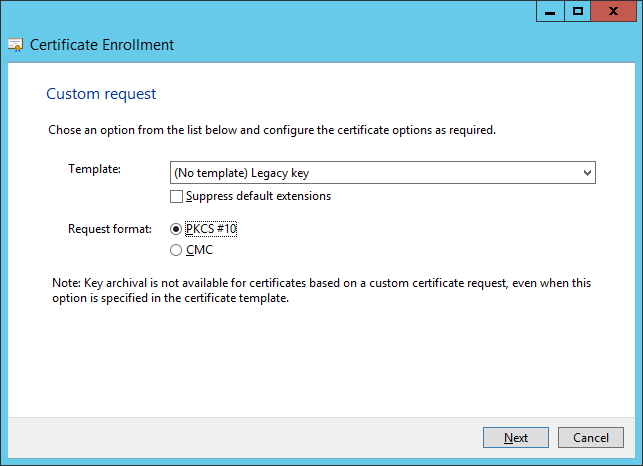
e)Choose (No template) CNG key from the drop-down list and ensure that the PKCS #10 Request format is selected. Click Next.
f)Click the arrow to expand the Details section and then click Properties.
g)In the General tab, type in a Friendly name for your certificate, you can also type a Description (optional).
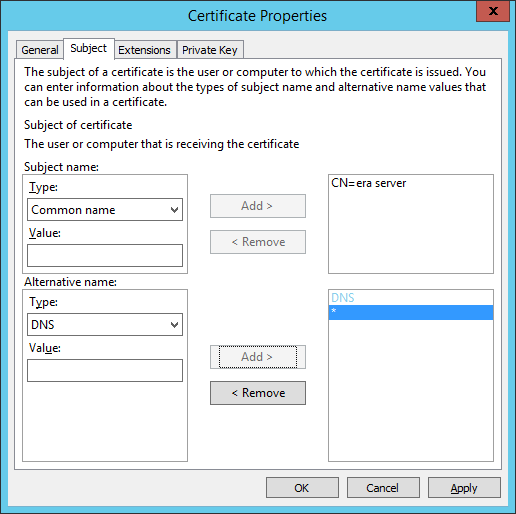
h)In the Subject tab, do the following:
In Subject name section, select Common Name from the drop-down list under Type, type server in the Value field and then click Add. CN=server will appear in the information box on the side. If you are creating a certificate request for ESET Management Agent type agent in the Common name value field.
The Common Name must contain one of these strings: server or agent, depending on which Certificate Request you want to create. |
i)In the Alternative name section, choose DNS from the drop-down list under Type and type * (asterisk) into the Value field, then click the Add button.
Subject Alternative Name (SAN) should be defined as "DNS:*" for ESET PROTECT Server and for all the Agents. |
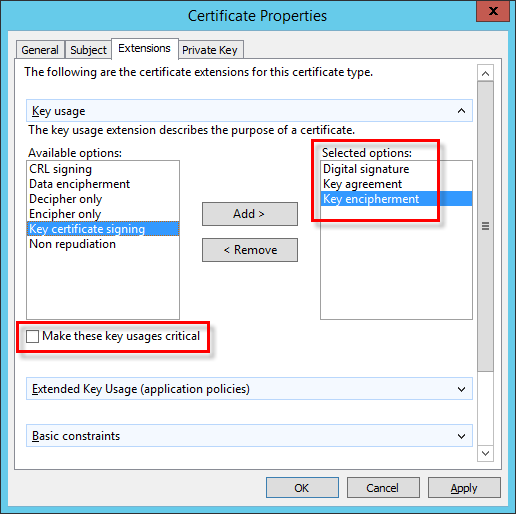
j)In the Extensions tab, do the following:
i.Expand the Key usage section by clicking the arrow.
Ensure to select and add these 3 options from the Available options: •Digital signature •Key agreement •Key encipherment Deselect Make these key usages critical. |
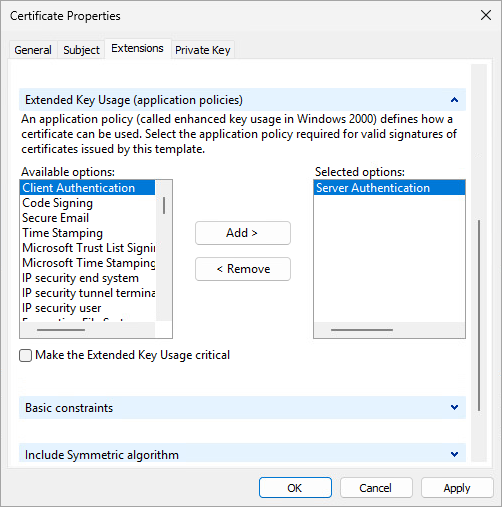
ii.Expand the Extended Key usage (application policies) section by clicking the arrow. Select and add Server Authentication for Server certificate or Client Authentication for Agent certificate.
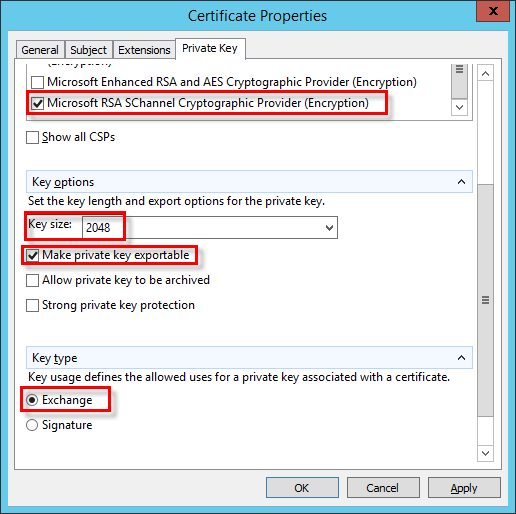
k)In the Private Key tab, do the following:
i.Expand the Cryptographic Service Provider section by clicking the arrow. A list of all cryptographic service providers (CSPs) will be displayed.
Ensure that only RSA, Microsoft Software Key Storage Provider is selected. Deselect all other CSPs. |
ii.Expand the Key Options section. In the Key size menu, set a value of at least 2048. Select Make private key exportable.
iii.Click Apply and check your settings.
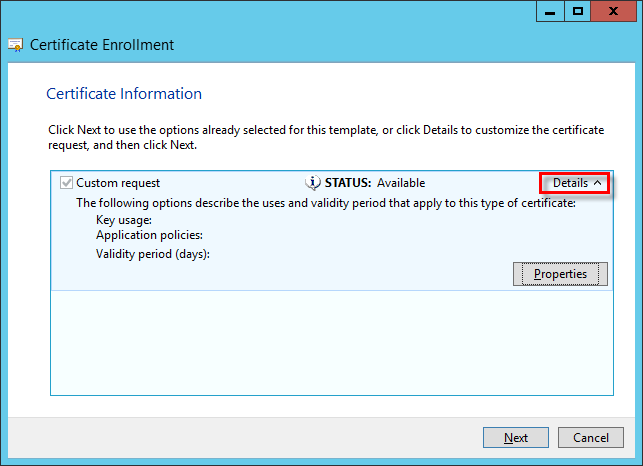
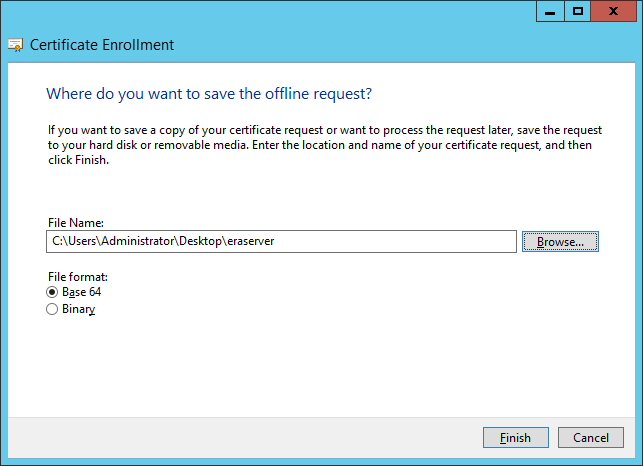
l)Click OK. Certificate information will be displayed. Click the Next button to continue. Click Browse to select the location where the certificate signing request (CSR) will be saved. Type the filename and ensure that Base 64 is selected.
m) Click Finish to generate the CSR.
3.To import your custom certificate request, follow the steps below:
a)Open Server Manager and click Tools > Certification Authority.
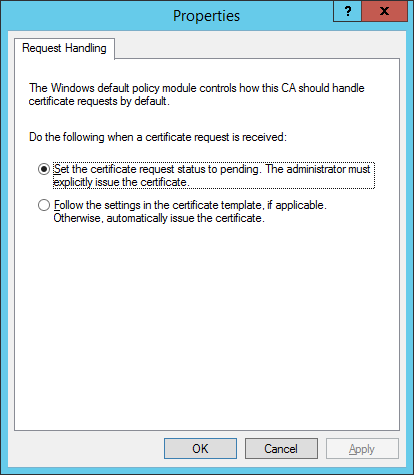
b)In the Certification Authority (Local) tree, select Your Server (usually FQDN) > Properties and then select the Policy Module tab. Click Properties and select Set the certificate request status to pending. The administrator must explicitly issue the certificate. Otherwise, it will not work properly. Click OK. You must restart Active Directory certificate services if you need to change this setting.
c)In the Certification Authority (Local) tree, right-click Your Server (usually FQDN) > All Tasks > Submit new request and navigate to your previously generated CSR file from step 2.
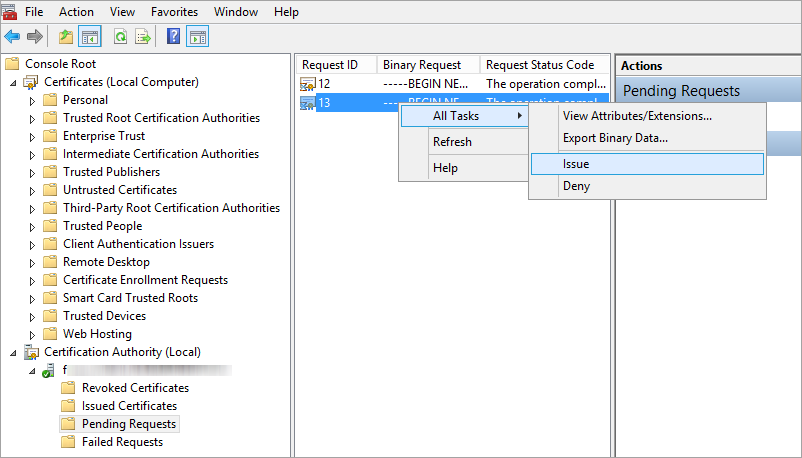
d)The certificate will be added under Pending Requests. Right-click the CSR in the navigation pane and select All Tasks > Issue.
4.Export Issued Custom Certificate to a .tmp file:
a)Select Issued Certificates in the left pane. Right-click the certificate you want to export and click All Tasks > Export Binary Data.
b)In the Export Binary Data dialog, choose Binary Certificate from the drop-down list. In Export options, click Save binary data to a file and then click OK.
c)In the Save Binary Data dialog box, move to the file location where you want to save the certificate and then click Save.
5.Import the .tmp file.
a)Navigate to Certificate (Local Computer) > right-click Personal and select All Tasks > Import.
b)Click Next.
c)Locate your saved .tmp binary file using Browse and click Open. Select Place all certificates in the following store > Personal. Click Next.
d)Click Finish to import the certificate.
6.Export the Certificate including a private key to a .pfx file.
a)In Certificates (Local Computer) expand Personal and click Certificates, right-click the new certificate that you want to export and select All Tasks > Export.
b)In the Certificate Export Wizard, click Yes, export the private key. (This option will appear only if the private key is marked as exportable and you have access to the private key.)
c)Under Export File Format, select Personal Information Exchange -PKCS #12 (.PFX), select the check box next to Include all certificates in the certification path if possible and then click Next.
d)Select the Password check box, type a password to encrypt the private key you are exporting. In the Confirm password field, type the same password again and then click Next.
•The certificate passphrase must not contain the following characters: " \ These characters cause a critical error during Agent initialization. •The password must contain at least 14 characters in three categories: lowercase letters, uppercase letters, digits or special characters. We recommend using a password with no less than 17 characters. |
e)In File name, type a filename and path for the .pfx file that will store the exported certificate and private key. Click Next and then click Finish.
The above example shows you how to create an ESET Management Agent certificate. Repeat the same steps for ESET PROTECT Server certificates. You cannot use this certificate to sign another new certificate in the Web Console. |
7.Export Certification Authority:
a)Open Server Manager and click Tools > Certification Authority.
b)In the Certification Authority (Local) tree, select the Your Server (usually FQDN) > Properties > General tab and click View Certificate.
c)In the Details tab, click Copy to File. The Certificate Export Wizard will open.
d)In the Export File Format window, select DER encoded binary X.509 (.CER) and click Next.
e)Click Browse to select the location where the .cer file will be saved and then click Next.
f)Click Finish to export the Certification Authority.
For step-by-step instructions to use custom certificates in ESET PROTECT On-Prem, see the next chapter.