DKIM Signing
DomainKeys Identified Mail (DKIM) signing is a method to secure outbound email messages and make verification easier. This method gives receiving mail servers an accurate way to distinguish genuine messages from spam.
DKIM authentication works the following way:
•Outbound email message headers are signed with DKIM private key.
•Receiving mail server checks the DNS DKIM record that contains a public key.
•If the signature with the private key in the message headers matches the DNS DKIM record public key, the email is considered genuine and is delivered to the recipient(s).
•If the signature and public key do not match, what happens to the email message depends on the receiving mail server's configuration (it may have specific rules in place, for example ESET Mail Security uses the DKIM result rule condition for this purpose).
To use the ESET Mail Security DKIM Signing feature, ensure you have the DNS DKIM record configured for your domain. For details on creating a DKIM record, see the What is DKIM record and how to create it? article. The article also includes an example of a DKIM record.
When done, we suggest you use the DKIM Record Checker or MXToolBox to verify that the public DKIM key is present and the syntax is correctly implemented.
You can use the following example command to create a new self-signed certificate using the PowerShell (it will become available to choose from the certificate store): New-SelfSignedCertificate -CertStoreLocation "cert:\LocalMachine\My" -KeySpec Signature -DnsName <user domain> |
Configure DKIM Signing in ESET Mail Security by specifying DKIM domains and a list of email headers to be signed. DKIM signature is added to selected message headers. Each DKIM signature contains information that mail servers can use to verify an email message's authenticity as they pass it to the final destination. If you are using multiple domains for outbound messages, you can configure DKIM Signing for each domain separately.
Enable DKIM signing under Server > Integration in Advanced setup. For Agent priority setup, we recommend you keep the ESET DKIM Agent priority in last place, at the bottom, to ensure the headers are signed last after any modifications done by previous agents. |
DKIM domains
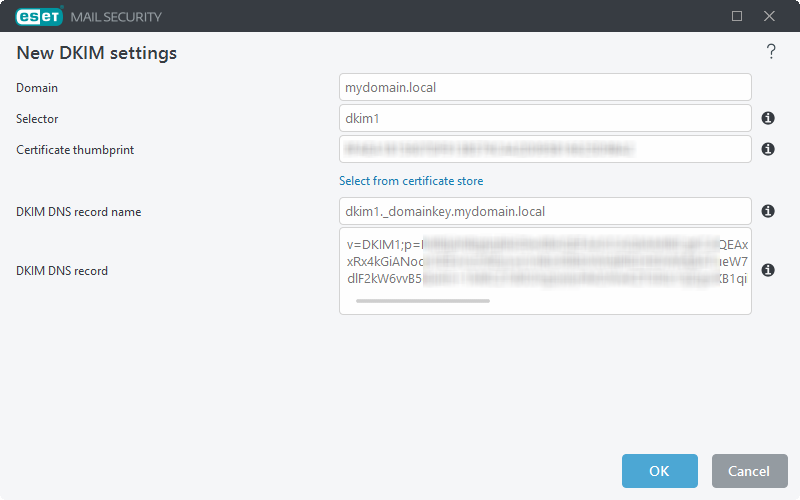
Define DKIM signing settings for each domain. Click Edit to open the DKIM domains window. Click Add to create New DKIM settings or Edit to modify existing ones.
•Domain—Type in the domain (for example, mydomain.local).
•Selector—Specify a selector for a DKIM signature attribute. This selector is then used in the DKIM-Signature header field.
•Certificate thumbprint—Click Select from certificate store and choose the certificate for DKIM signing.
•DKIM DNS record name—This is automatically generated. The name consists of the selector and the domain specified in the fields above.
•DKIM DNS record—The DNS text record (TXT) is automatically generated. It contains the public key of the DKIM certificate.

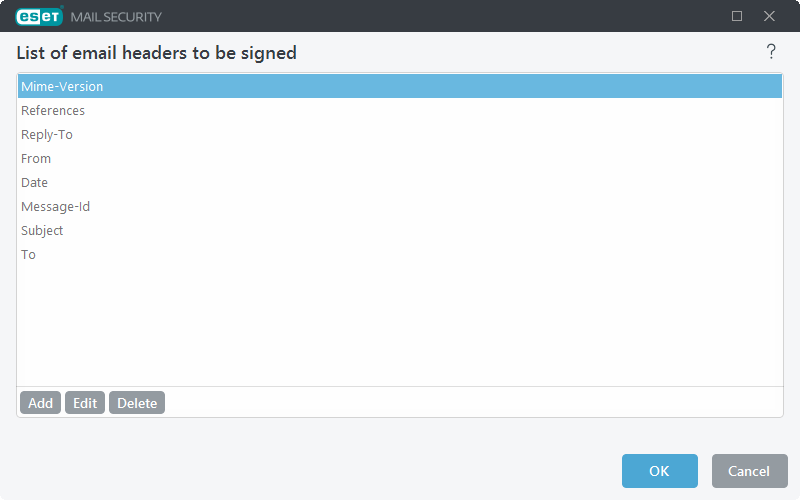
List of email headers to be signed
Click Edit to open the List of email headers to be signed window, click Add to add new headers or Edit to modify existing headers in the list.
